Category: Garden Bed Plans

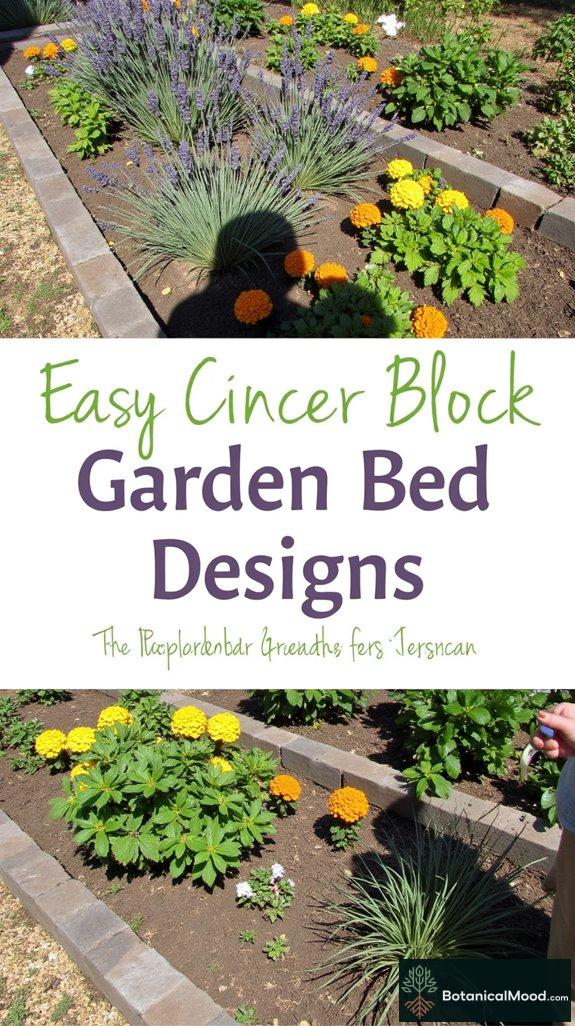
  • 5 Best Cinder Block Garden Designs For Vegetables

    5 Best Cinder Block Garden Designs For Vegetables

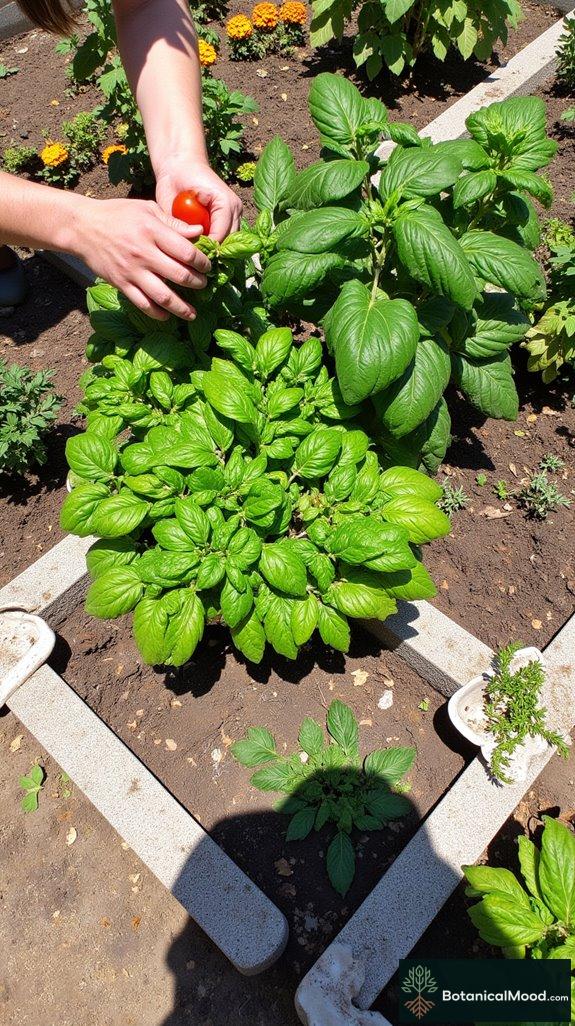
    I wish I’d discovered cinder block gardens sooner. Seriously, they’re a game changer for grow-happy veggies!

    Think classic rectangular raised beds for stability and draining woes. Trust me, I know; my first attempt in an old tire nearly drowned my tomatoes.

    Toss in integrated planting blocks for nutrient-deep goodies, or tiered walls for the ambitious sun chasers. You could even go big with multiple beds if you’re channeling your inner farmer.

    Just remember: pathways and compost features are essential for sanity in the garden!

    My Personal Cinder Block Garden Triumph: A Vegetable Wonderland

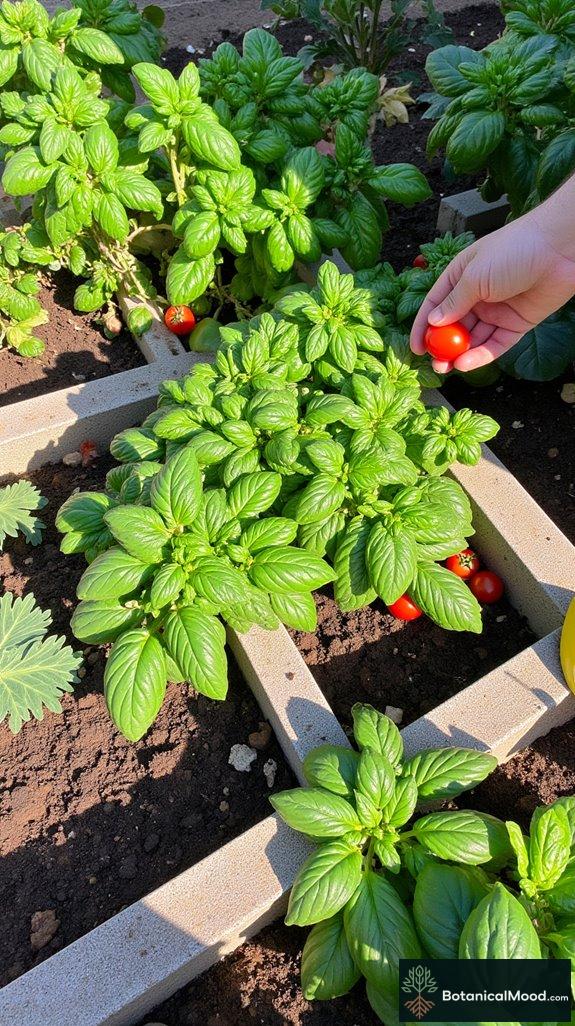
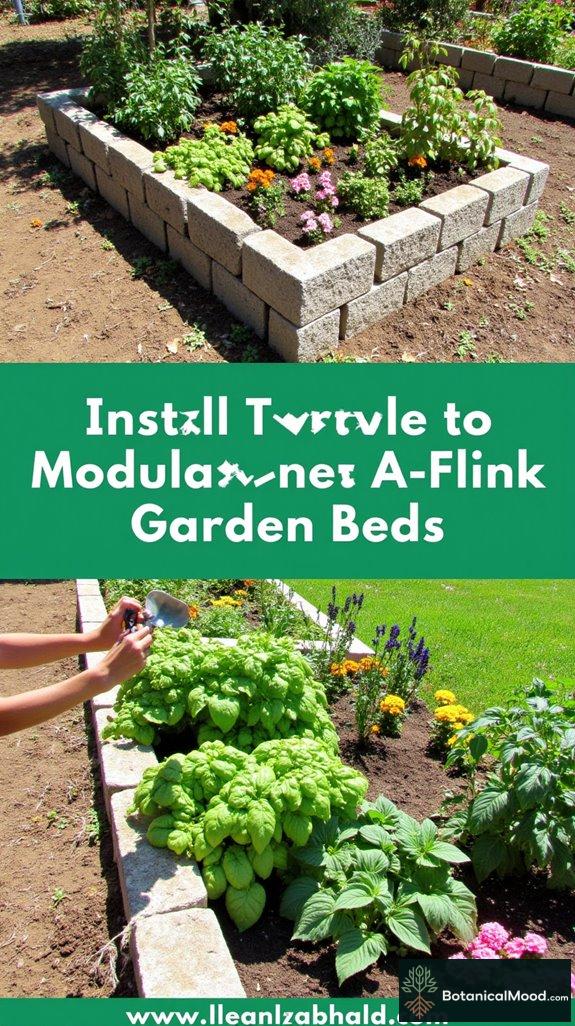
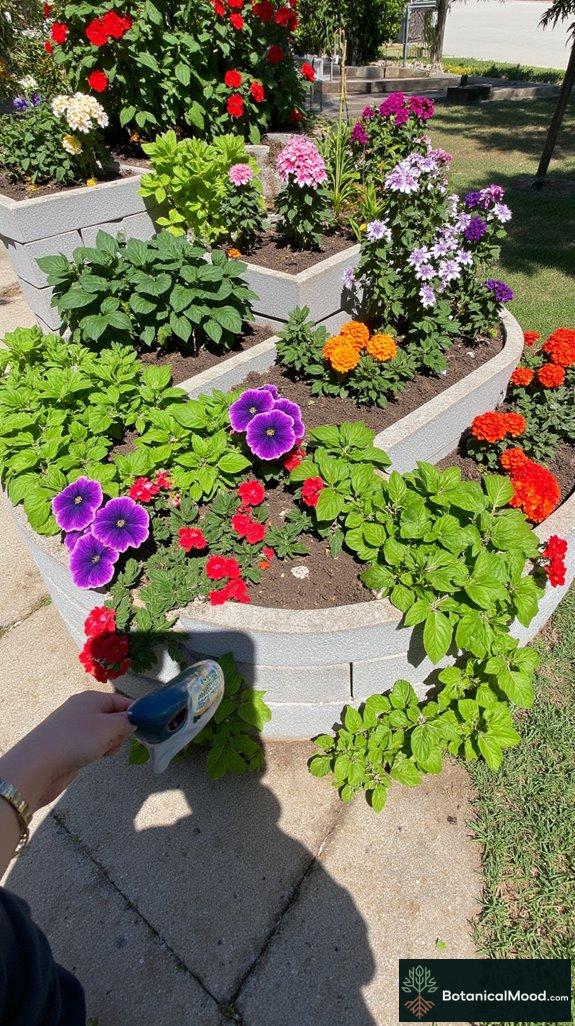
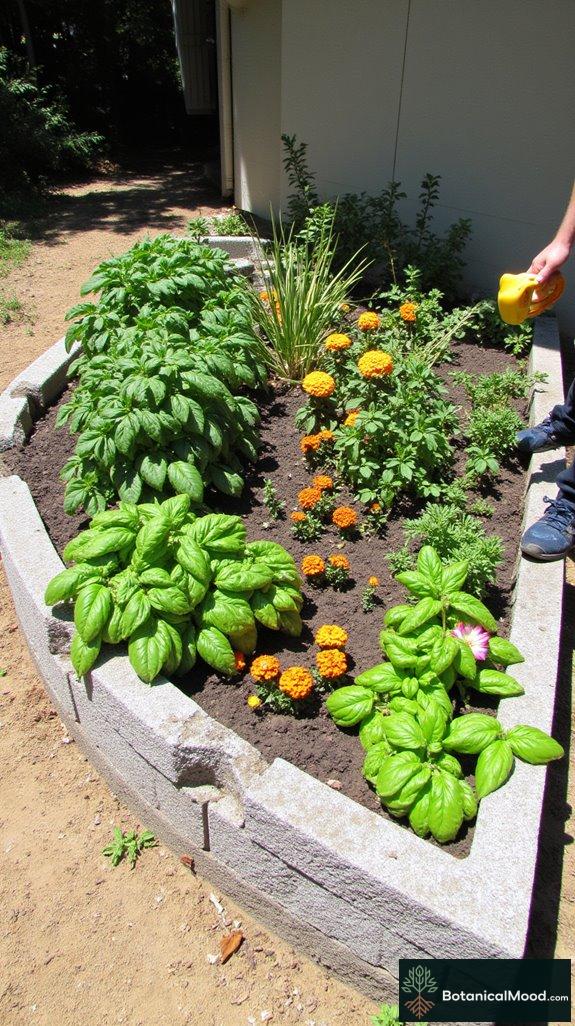
    Last summer, I decided to embrace the cinder block life. I arranged my blocks into a whimsical zigzag shape. Who needs fancy when you can have funky, right? I was amazed at how the tiered design let the sunlight sneak into every nook while the integrated planting compartments revealed the secret to juicy, bountiful veggies.

    It was trial and error, especially when I realized that my layout needed pathways for easy access (I learned that the hard way!). But the butterflies, the vibrant greens, and the luscious tomatoes made it all worth it. Who knew a little concrete could create such a paradise? It’s proof that gardening doesn’t have to be boring!

    Quick Takeaways

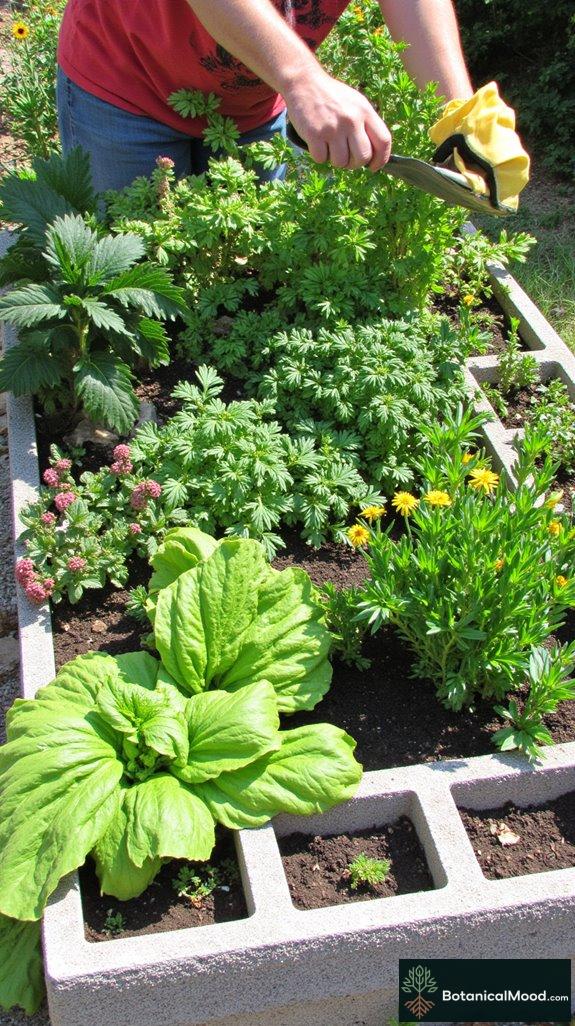
    • Rectangular Layout: Utilize a 2×4 or larger rectangular garden bed for versatile planting space and easy access to all areas of the bed.
    • Vertical Gardening: Incorporate trellises for climbing plants, maximizing space and sunlight exposure while keeping shorter plants shaded appropriately.
    • Tiered Design: Create a tiered garden bed using cinder blocks to maximize space, aesthetics, and sunlight for compact vegetables and herbs.
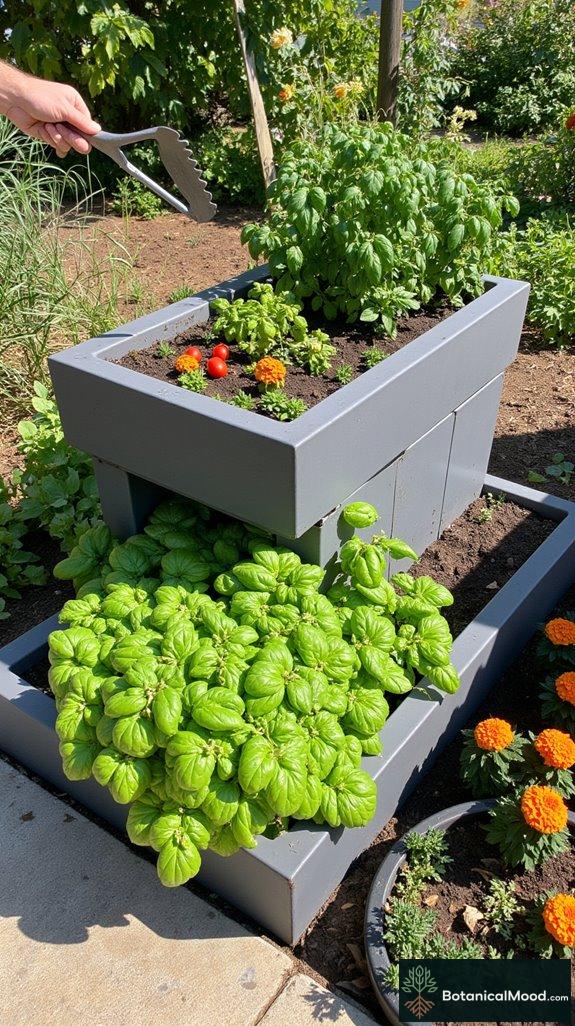
    • Compartmentalized Planting: Fill hollow cinder block sections with soil for herbs or smaller plants, enhancing drainage and nutrient accessibility.
    • Succession Planting: Optimize yields by regularly planting new crops in succession, ensuring continuous harvests throughout the growing season.

    Basic Rectangular Raised Bed

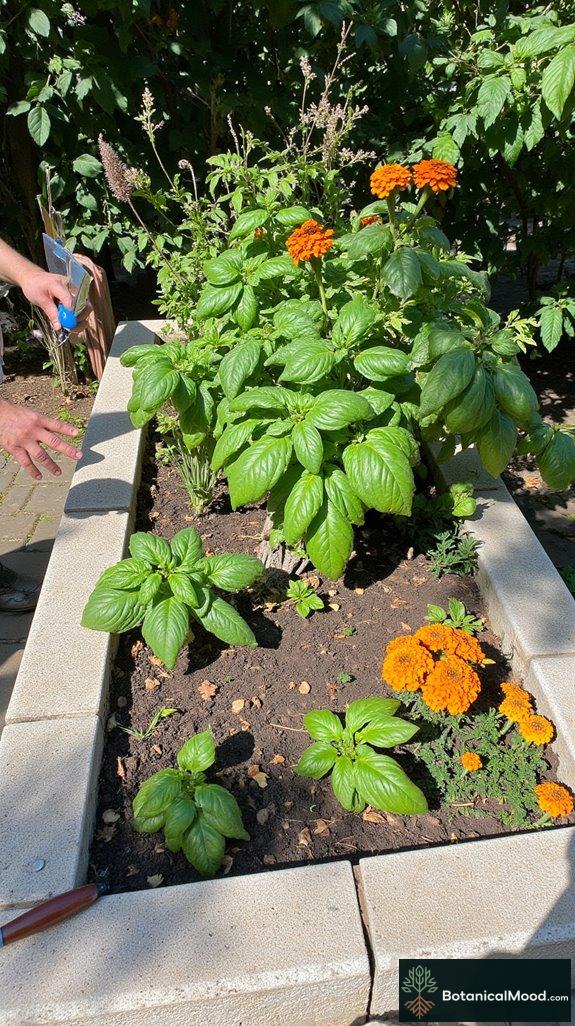
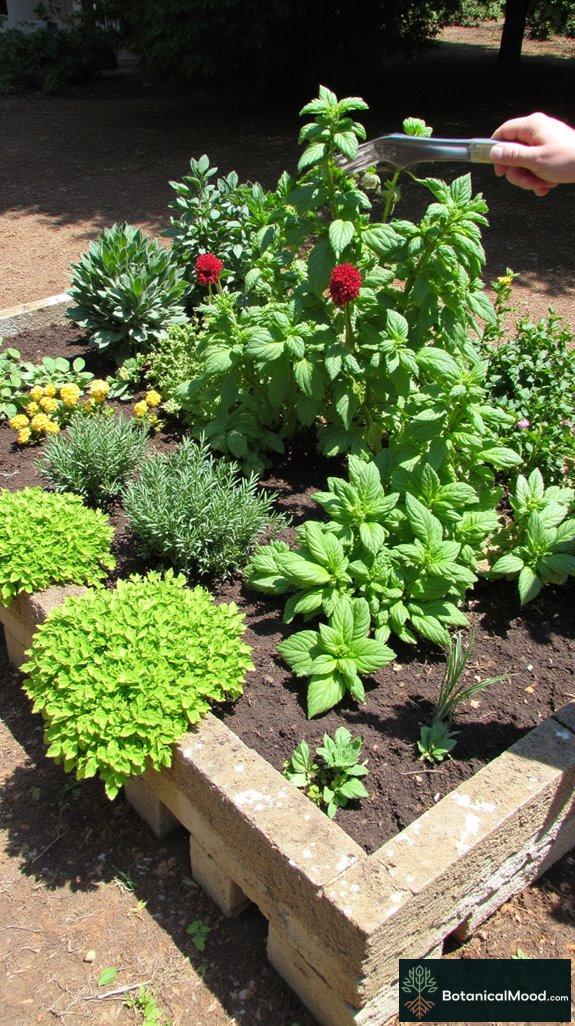
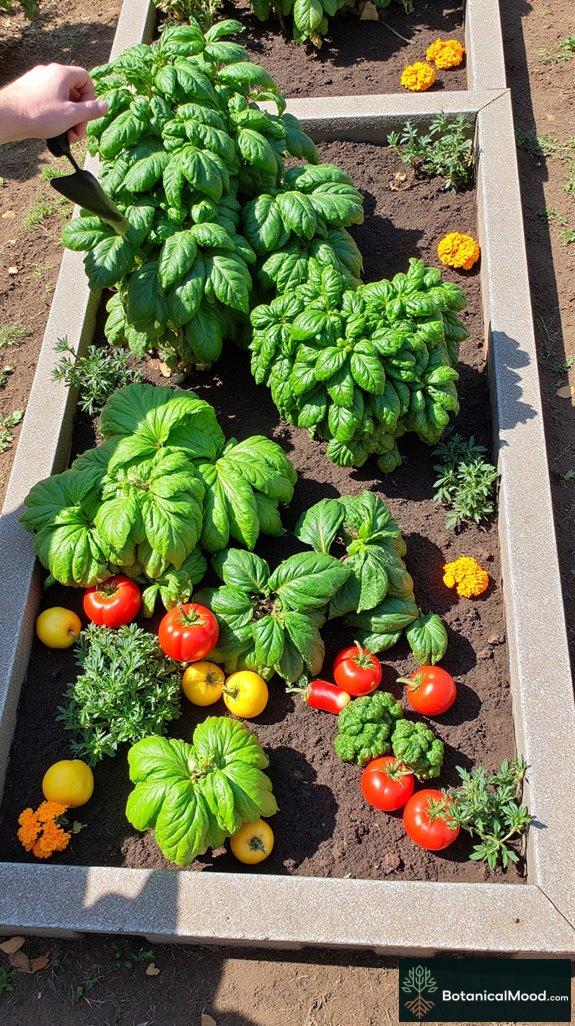
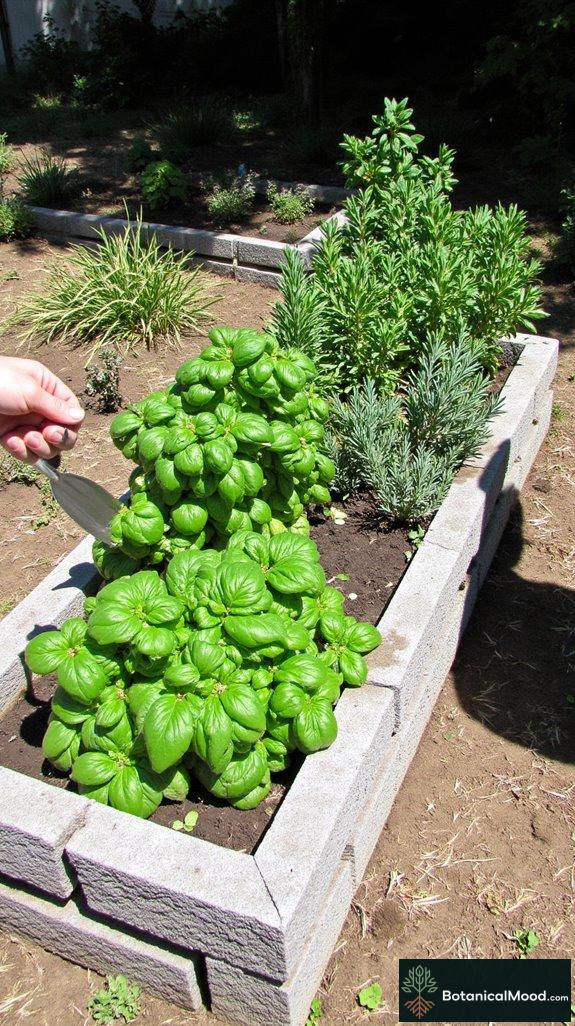
    durable rectangular raised bed

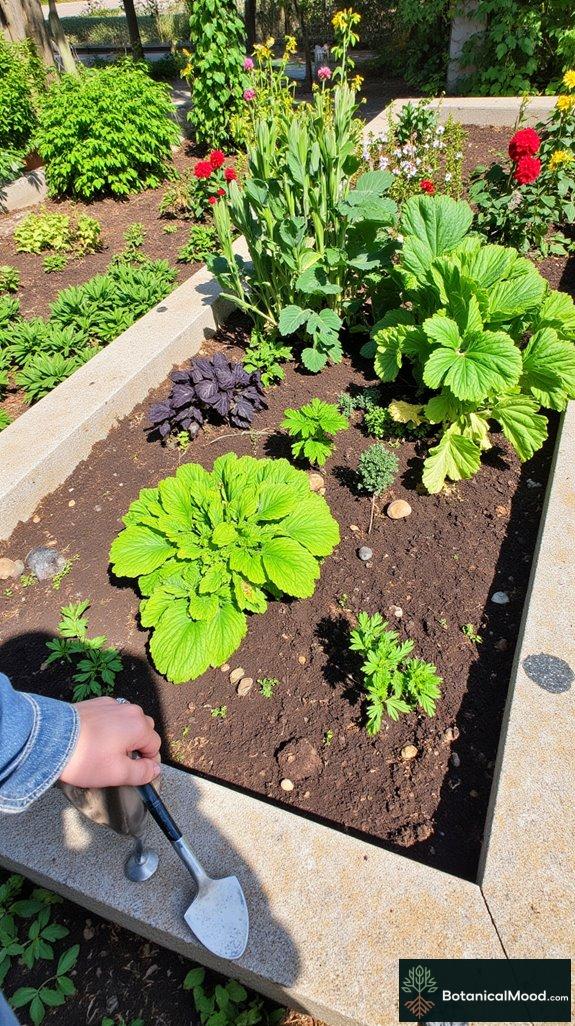
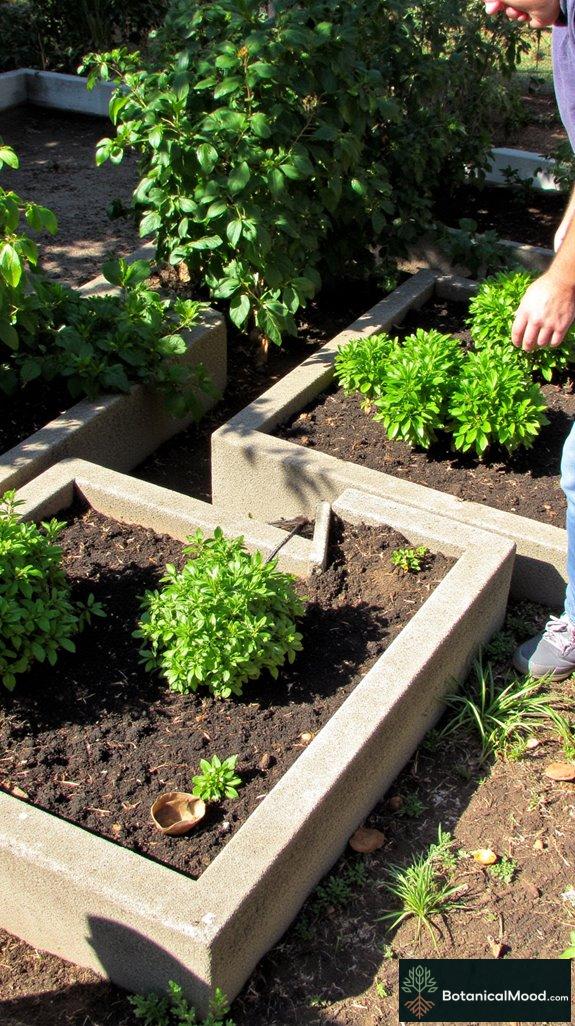
    The basic rectangular raised bed is a popular planting choice for both novice and experienced gardeners.

    The rectangular raised bed is an ideal choice for gardeners of all skill levels, combining simplicity with effective growing conditions.

    Constructed from durable cinder blocks, this garden bed typically measures around 4 feet by 8 feet, providing ample space for various vegetables.

    The cinder blocks, arranged in a rectangle, allow for excellent drainage and soil warmth.

    Filling the bed with a balanced soil mix of compost and topsoil encourages healthy plant growth.

    The clean lines of this design create an organized look, perfect for urban gardens or backyard spaces.

    Selecting Plants for Your Raised Bed

    When choosing plants for your rectangular raised bed, consider factors such as sunlight exposure and growth habits.

    Here are some excellent plant options:

    • Tomatoes
    • Lettuce
    • Carrots
    • Peppers
    • Radishes
    • Zucchini

    Designing Your Raised Bed Garden

    To design and plan your rectangular raised bed, consider the following steps:

    1. Layout: Decide on a single or double row planting method.
    2. Spacing: Make sure to space plants adequately; for example, tomatoes should be about 18-24 inches apart.
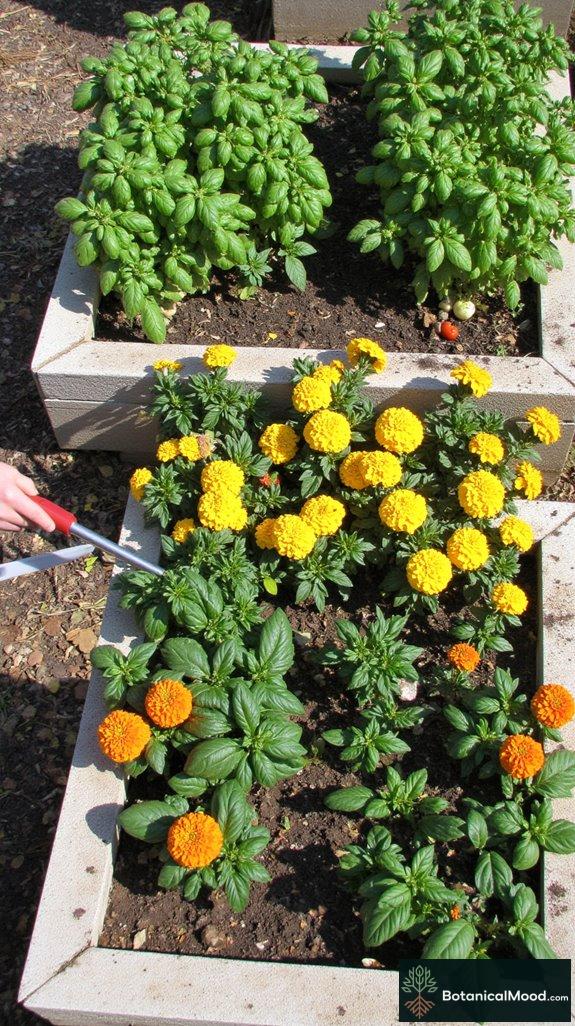
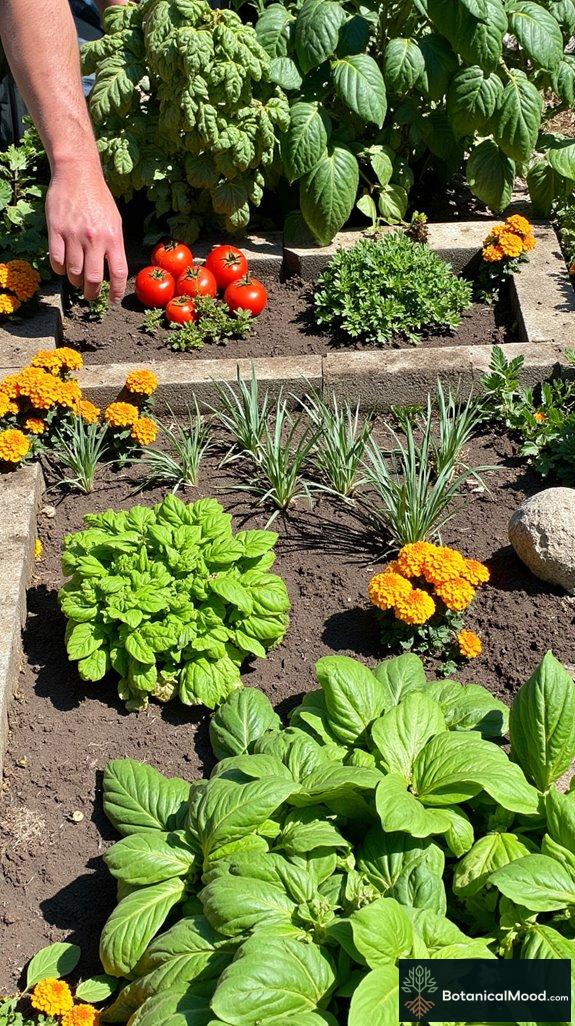
    3. Companion Planting: Incorporate companion plants for pest control, like marigolds with tomatoes.
    4. Succession Planting: Rotate crops seasonally to maximize yield.

    Pro Tip: Utilize vertical space by adding trellises for climbing vegetables like cucumbers and beans!

    Beyond the Basics: Companion Planting Benefits

    Companion planting optimizes plant health by enhancing growth and deterring pests.

    For example, planting basil near tomatoes can improve flavor and repel harmful insects, helping create a more diverse and sustainable garden ecosystem that benefits all plant types.

    Embrace this technique not only to boost vegetables but to foster a more diverse and sustainable garden ecosystem!

    Integrated Planting Blocks
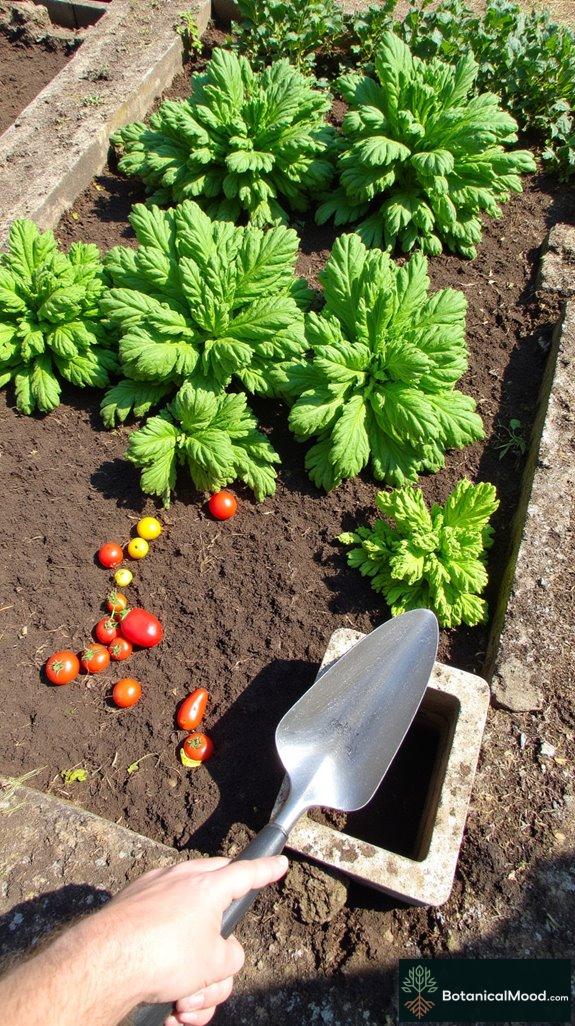
    sustainable agricultural practices integration

    Integrated Planting Blocks

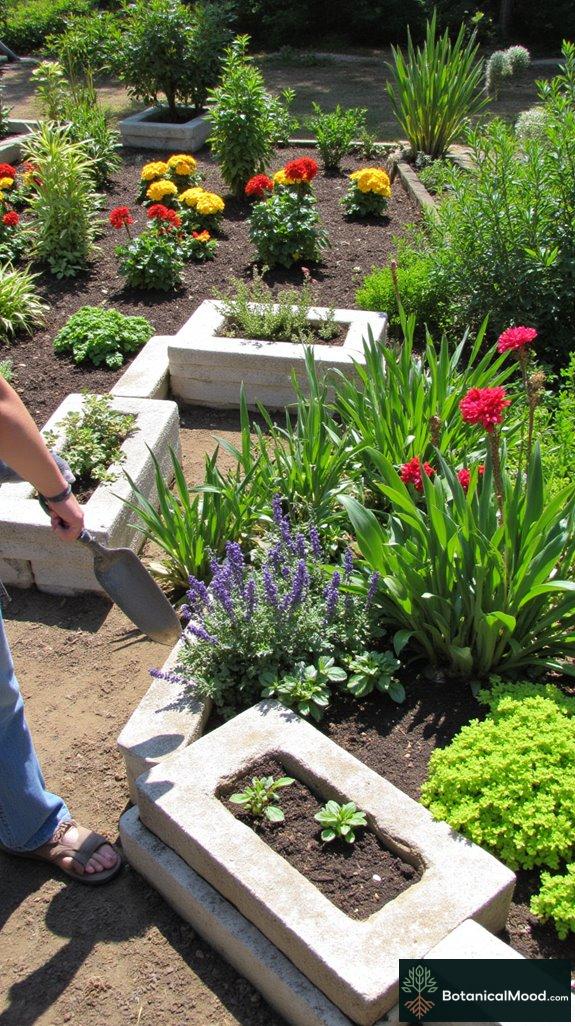
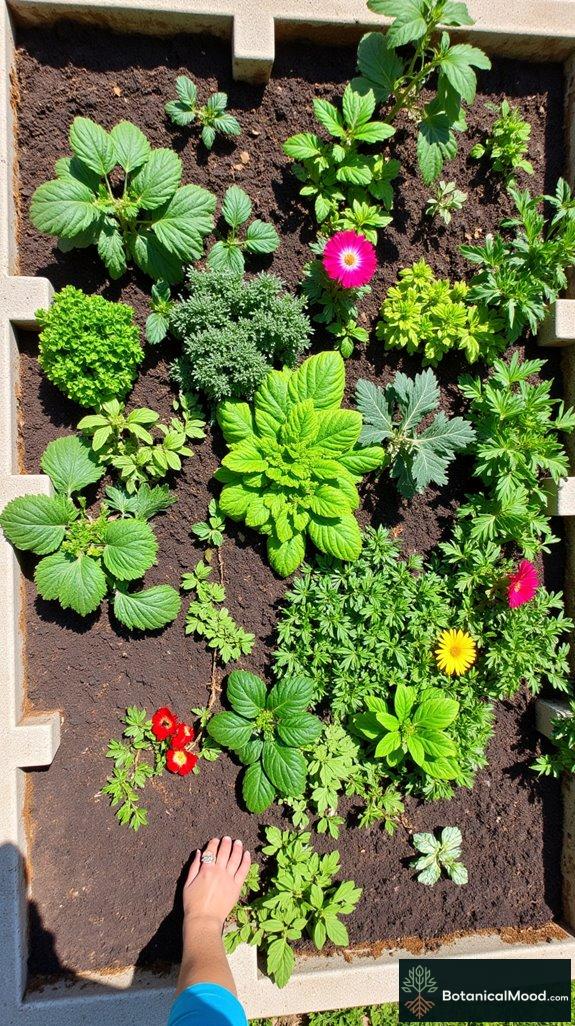
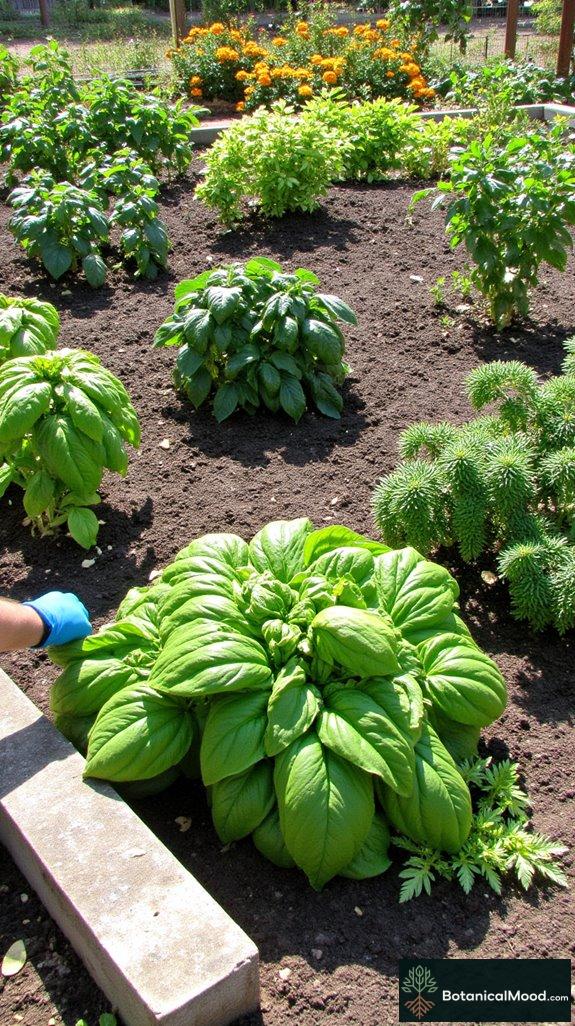
    Integrated planting blocks are unique garden beds designed using cinder blocks as both structure and container. These beds typically measure 4 feet by 8 feet, allowing for easy accessibility and light exposure.

    Arranged in a rectangular layout, the cinder blocks form hollow compartments filled with nutrient-rich soil, perfect for growing vegetables. This construction guarantees good drainage and provides a solid border to keep your garden organized. Materials used include concrete cinder blocks, soil, and mulch for moisture retention.

    Selecting Plants for Integrated Beds

    When selecting plants for integrated planting beds, consider companion planting and growth requirements. Here are some suggestions:

    • Basil
    • Tomatoes
    • Peppers
    • Lettuce
    • Radishes

    Designing Your Integrated Planting Bed

    To design an integrated bed, start by sketching a layout that incorporates ample sunlight and drainage areas. Here are some tips:

    • Use blocks to create a grid pattern for organization.
    • Space taller plants, like tomatoes, at the back and shorter ones, like lettuce, in front.
    • Leave at least 12-18 inches between each plant to guarantee air circulation.

    Pro tip: Consider creating a trellis with sturdy materials for climbing plants to maximize vertical space.

    Additionally, cinder block gardens provide an innovative solution for maximizing planting space while ensuring optimal growth conditions.

    Exploring Vertical Gardening Techniques

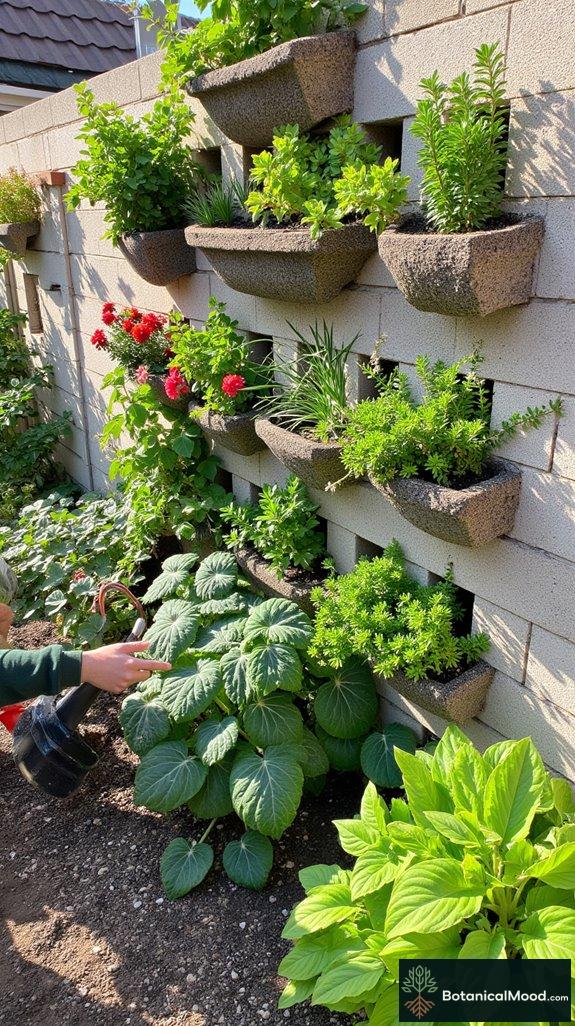
    Vertical gardening is an innovative way to enhance small garden spaces. Utilizing trellises, wall planters, or hanging containers, you can grow a variety of herbs, flowers, and vegetables upwards rather than outwards, maximizing your yield and conserving space.

    Embrace this technique to create a stunning green wall or vertical garden that adds both beauty and functionality to your gardening space.

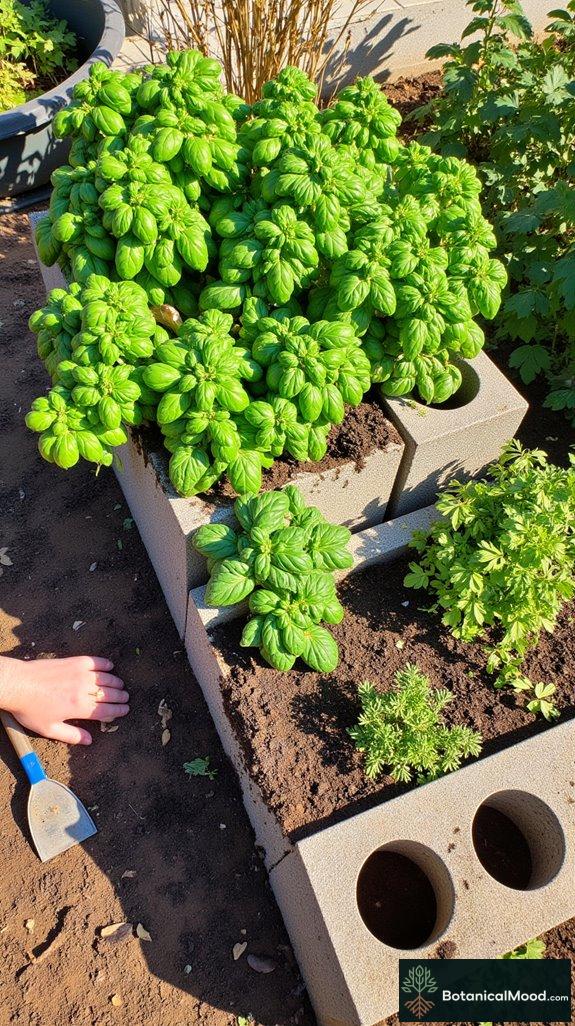
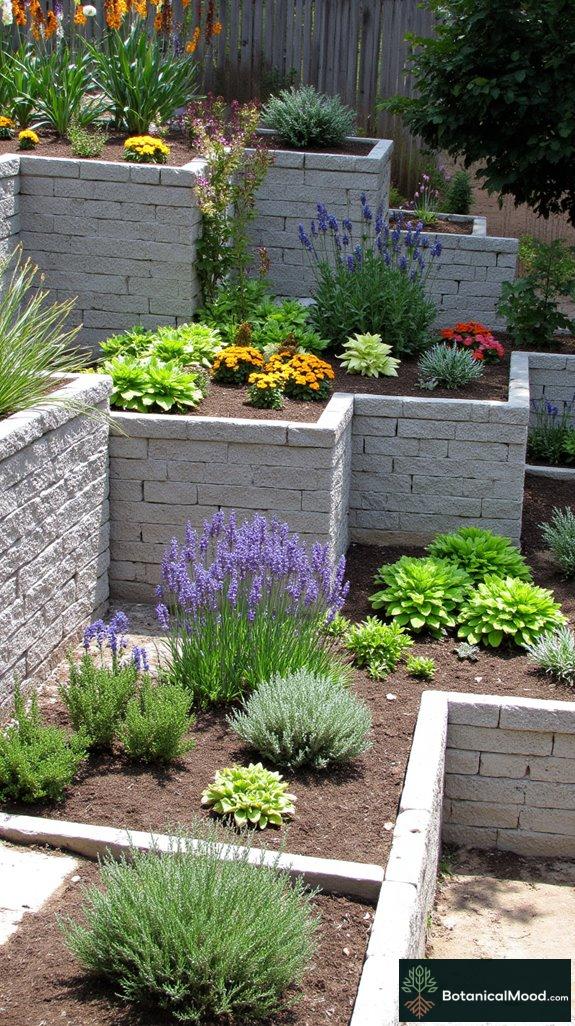
    Tiered Terraced Walls
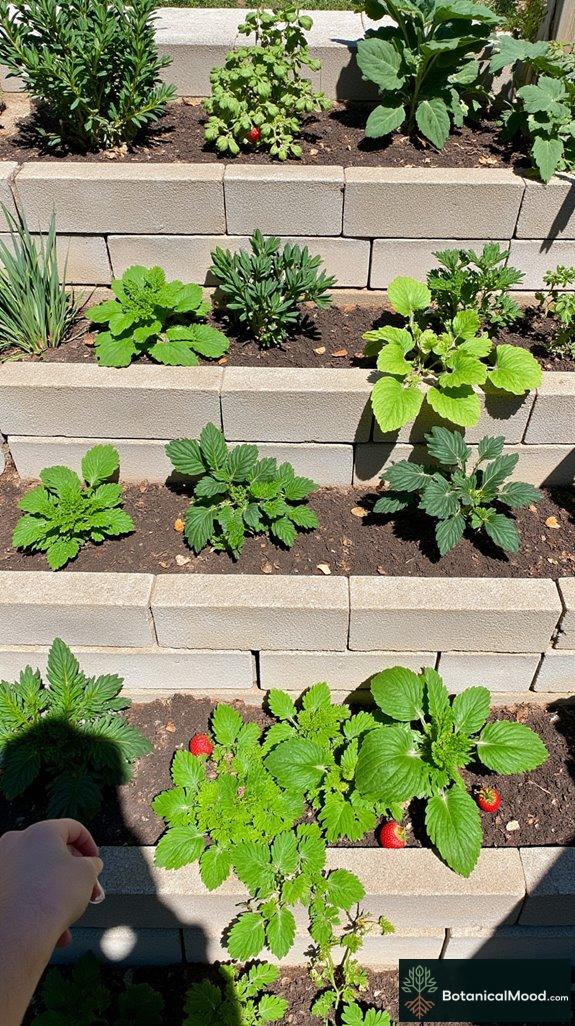
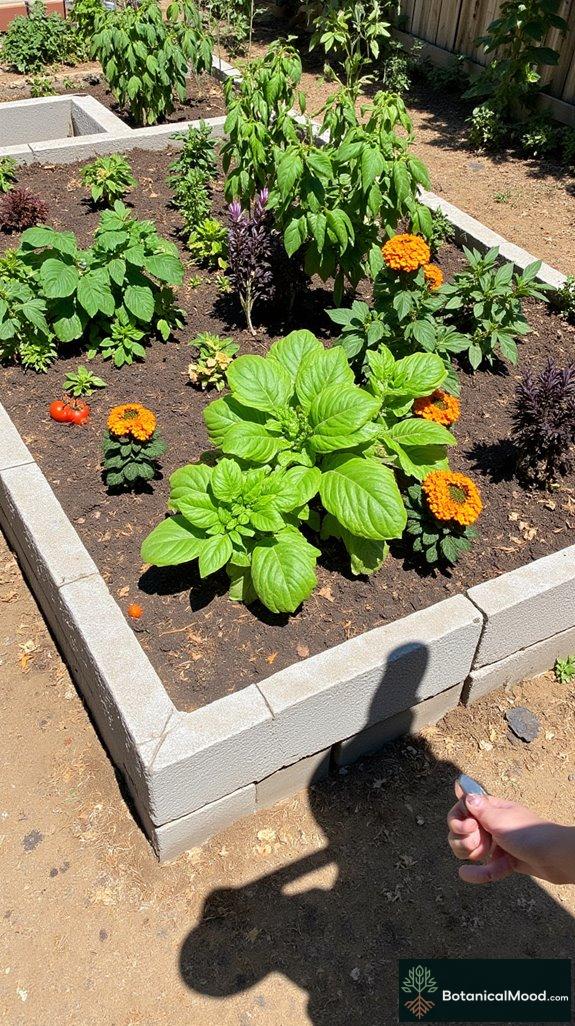
    innovative tiered planting beds

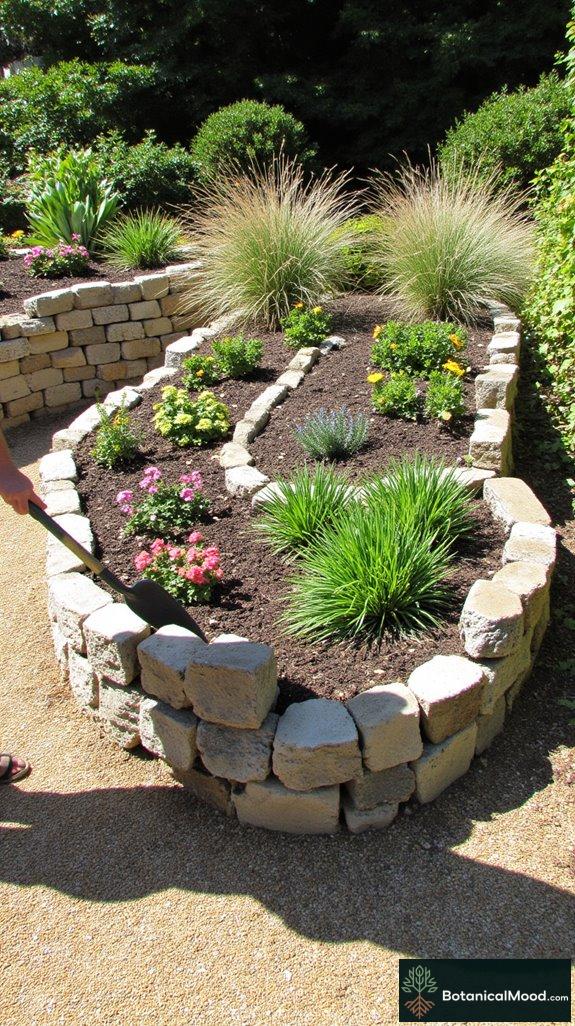
    Tiered terraced walls are an innovative planting bed design that maximizes space and enhances the garden’s aesthetics. Typically constructed with cinder blocks, these beds vary in size and shape, often resembling steps cascading down a slope. Each tier is filled with nutrient-rich soil, allowing for proper drainage and root growth.

    Common plants for these beds include compact vegetables like lettuce, herbs such as basil and oregano, and trailing plants like strawberries. Building a terraced wall involves stacking cinder blocks securely and filling them with a good quality potting mix. Additionally, cinder block modular beds allow for easy expansion and reconfiguration as your gardening needs change.

    Selecting Plants for Tiered Beds

    Choosing plants for tiered terraced walls requires considering sunlight, growth habits, and space. Here are some suggestions:

    • Lettuce
    • Spinach
    • Basil
    • Oregano
    • Strawberries
    • Radishes

    Designing a Tiered Planting Bed

    To design an effective tiered planting bed, follow these tips:

    1. Assess your garden’s sunlight and drainage.
    2. Choose plants with varying heights for visual appeal.
    3. Plan for companion planting to boost growth.
    4. Space plants 6-12 inches apart to allow for mature growth.
    5. Avoid overcrowding to promote airflow and reduce pests.

    Pro tip: Arrange taller plants at the back or top tier and shorter ones in front to guarantee all plants are visible and receive adequate sunlight.

    Effective Watering Techniques for Gardens

    Proper watering is crucial for healthy plant growth. Use soaker hoses or drip irrigation for efficient moisture delivery.

    Regularly check soil moisture levels to avoid over or under-watering. Incorporating mulch can help retain soil moisture while suppressing weeds, guaranteeing your garden thrives throughout the growing season.

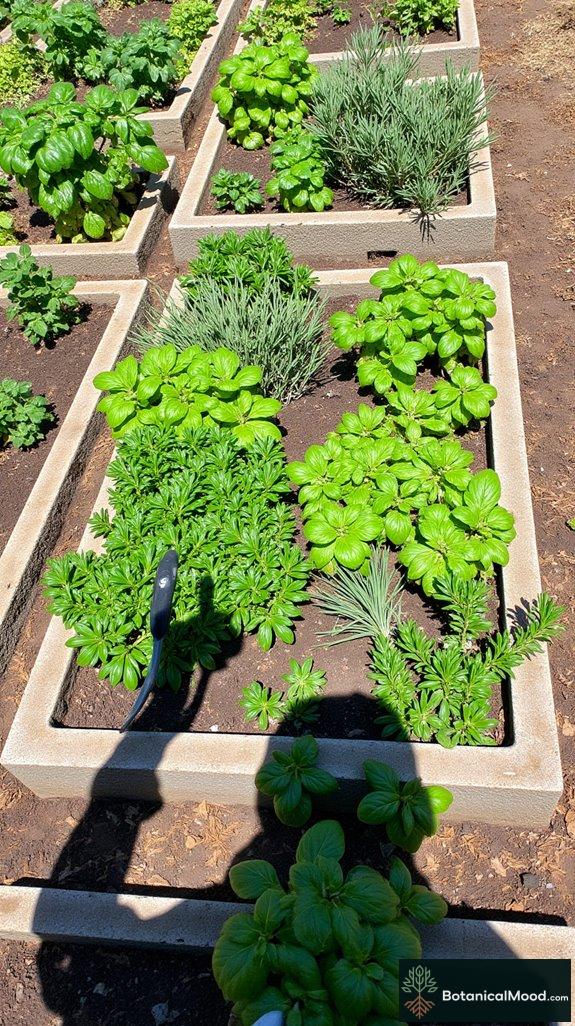
    Multiple Bed Farm-Scale Layout
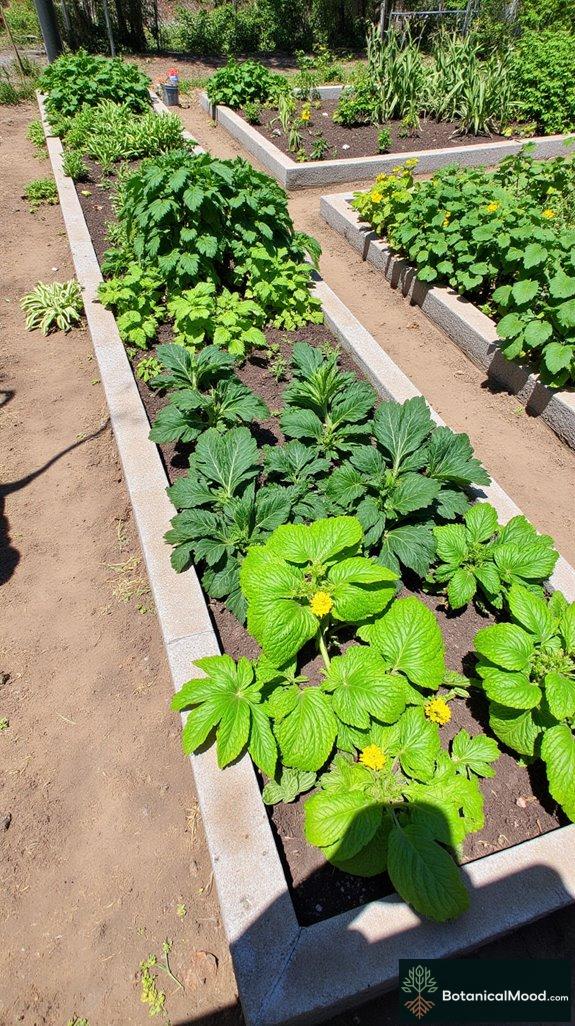
    farm layout with multiple beds

    Multiple Bed Farm-Scale Layout

    A multiple bed farm-scale layout is an efficient design for vegetable gardening, ideal for maximizing space and yielding a bountiful harvest.

    Each bed typically measures 4 feet wide and 8 to 12 feet long, arranged in a grid or staggered pattern. Constructed using durable cinder blocks, these raised beds improve drainage and soil temperature. Fill each bed with a nutrient-rich soil mix, fostering healthy plant growth. Common plants include tomatoes, peppers, cucumbers, and lettuces, which thrive in these contained spaces. Additionally, modular concrete block gardens provide flexibility in designing and expanding your vegetable garden as needed.

    Raised beds, measuring 4 feet by 8 to 12 feet, enhance drainage and soil health, ideal for growing vegetables like tomatoes and peppers.

    Selecting Plants for This Bed

    When choosing plants for your multiple bed layout, consider their growth habits and sunlight requirements. Here’s a suggested list:

    • Tomatoes
    • Bell Peppers
    • Zucchini
    • Carrots
    • Basil
    • Spinach

    Designing Your Multiple Bed Layout

    Designing your planting bed involves thoughtful arrangement and spacing. Here are some tips:

    1. Plan the layout with pathways for easy access.
    2. Space tall plants (like tomatoes) on the north side to avoid shading shorter plants.
    3. Ascertain adequate sunlight and airflow between beds.

    Pro Tips:

    • Use companion planting methods for pest control.
    • Include herbs among vegetables to enhance flavor and deter pests.
    • Consider succession planting to optimize space throughout the growing season.

    Exploring Vertical Gardening Techniques

    Vertical gardening is a creative and space-saving solution for small areas.

    By utilizing trellises, wall planters, and hanging systems, you can grow an array of vegetables, like pole beans and strawberries, while maximizing sunlight exposure.

    This method not only saves ground space but also adds visual interest to your garden.

    Multi-Functional Garden Features
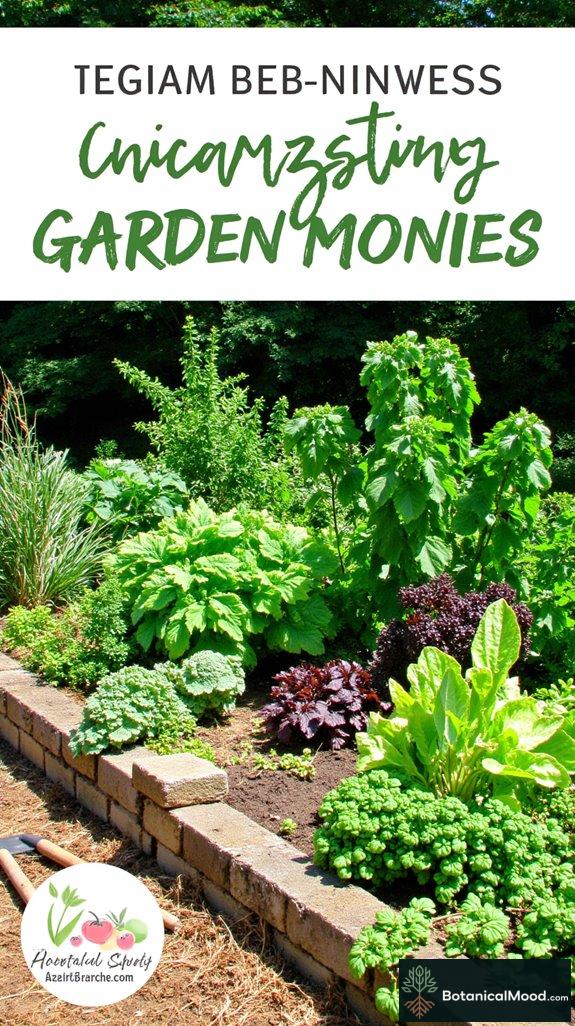
    versatile cinder block garden beds

    Cinder block garden beds are versatile, offering a sturdy structure for growing vegetables. These beds can be customized in size, typically ranging from 2×4 feet to larger configurations, depending on space. Cinder blocks, which are affordable, durable, and easy to assemble, create a rectangular layout on any level surface.

    The arrangement allows for excellent drainage while providing ample soil depth (12-18 inches) for vegetables. You can plant herbs like basil and parsley, leafy greens such as spinach and lettuce, or root vegetables like carrots and radishes.

    Selecting Plants for Cinder Block Beds

    When selecting plants for your cinder block bed, consider your climate, sunlight, and the season. Choose plants that thrive in your specific environment. Here are some suggestions:

    • Leafy greens: Spinach, Lettuce
    • Herbs: Basil, Cilantro
    • Onions: Green onions, Garlic
    • Root vegetables: Carrots, Radishes

    Designing Your Cinder Block Planting Bed

    To design your cinder block garden bed effectively, start by sketching a layout to maximize space. Here are tips for arrangements:

    • Place taller plants on the north side to avoid shading shorter ones.
    • Space plants according to their growth habits (e.g., 6-12 inches apart for leafy greens).
    • Use blocks as pathways to allow for easy access and maintenance.

    Pro tip: Incorporate vertical gardening techniques by placing trellises in the center for climbing vegetables like cucumbers and beans.

    Benefits of Compost in Gardening

    Incorporating compost into your garden not only improves soil structure but also enhances nutrient content, leading to healthier plants and higher yields. A well-designed garden helps in creating an ideal habitat for beneficial organisms that further enrich the soil health.

    Compost retains moisture and can suppress weeds, creating an overall thriving environment for your vegetable garden.

    Spring Weeding and Mulching

    spring garden maintenance tips

    As the vibrant colors of spring emerge, it’s time to address the essential tasks of weeding and mulching in the garden.

    These spring maintenance efforts not only enhance the beauty of your cinder block vegetable garden but also promote soil health. Incorporating industrial water features can also elevate your garden’s aesthetic while contributing to a serene environment.

    Here are my top four tips to get started:

    1. Remove all existing weeds that compete with your plants for nutrients.
    2. Check the soil for nutrient levels and amend as needed.
    3. Apply a protective layer of organic mulch to retain moisture.
    4. Reassess the layout periodically to guarantee ideal growth and sun exposure.

    Your plants will thrive with these simple steps!

    Summary

    Cinder blocks have transformed my gardening experience, creating a sturdy base for my vegetable patches. From simple rectangular beds to multi-functional designs, these blocks not only support my tomatoes and cucumbers but also spark my creativity and resilience in gardening. Each harvest reflects my dedication.

    I’d love to hear your experiences with cinder block gardening! What designs have you tried?

    Feel free to share pictures of your garden and tell us how you designed it. I’m excited to see your creativity in action!

    References

  • What Are Modular Cinder Block Garden Options?

    What Are Modular Cinder Block Garden Options?

    When I stumbled upon modular cinder block gardens, I thought, “This could be a game-changer.”

    Who knew cinder blocks could be so stylish?

    Raised beds? Check! Perfect for my tomatoes and cucumbers that I somehow manage not to kill. Vertical gardens? Yes, please! Herbs galore, and don’t get me started on succulents.

    I’m slowly transforming my yard into a colorful mishmash of nature and Pinterest-worthy designs.

    Can you blame me? The idea of a sustainable oasis makes me feel like a gardening pro, even if I occasionally question my plant-parenting skills.

    My Journey to Crafting the Perfect Garden Design

    So, there I was, apple cider in hand, staring blankly at my yard, contemplating life choices. I decided to experiment with layout, diving deep into garden design.

    I began arranging my cinder blocks and realized I was channeling my inner landscape artist. Each stone became a canvas.

    But here’s the kicker: I nearly lost my confidence while trying to align them perfectly! After a couple of trial-and-error sessions, I added colorful stones and herbs that spark joy (thanks, Marie Kondo). It turns out, a splash of whimsy can elevate practicality! Now my garden is a buzzing haven for bees and a calm escape for me. What’s stopping you from creating your own little paradise?

    Quick Takeaways

    • Modular cinder block gardens offer customizable designs with various colors and arrangements for aesthetic appeal in any garden space.
    • They provide both raised and vertical garden bed options, maximizing space for plants and enhancing growth conditions.
    • The blocks interlock easily, enabling straightforward assembly for gardeners of all experience levels.
    • Cinder blocks are durable and provide stability, promoting healthy root growth and effective drainage for a thriving garden.
    • Additional planting opportunities are available through the open cavities in cinder blocks, allowing for more greenery and plant diversity.

    Raised Garden Beds

    elevated planting for gardens

    Raised Garden Beds

    Raised garden beds offer an organized and accessible way to cultivate diverse plants while guaranteeing good drainage and soil quality. Typically, they range from 4 to 6 feet in length, 2 to 4 feet wide, and 1 to 3 feet high, allowing easy reach without bending.

    Constructed from modular cinder blocks, wood, or composite materials, these beds boast a defined structure that promotes healthy root growth. They can accommodate a variety of plants, such as vegetables, herbs, and flowers, arranged in thoughtful layouts for aesthetic appeal and functional use. Additionally, the defined structure of cinder block gardens can assist in preventing soil erosion and maintaining moisture levels.

    How to Select Plants for Raised Beds

    Choosing the right plants for your raised garden bed is essential. Consider the following options:

    • Tomatoes
    • Basil
    • Lettuce
    • Carrots
    • Marigolds
    • Peppers

    Select plants based on your climate zone and the amount of sunlight the bed receives.

    Designing Your Raised Garden Bed Layout

    When planning your raised garden bed, follow these tips for ideal design:

    • Position beds in full sun, ideally 6-8 hours daily.
    • Use companion planting principles to enhance growth.
    • Space taller plants, such as tomatoes, on the north side to avoid shading smaller ones.
    • Interplant with herbs for pest control and aesthetics.

    Pro tip: Confirm you follow spacing guidelines based on mature plant sizes for healthy growth.

    Exploring Garden Fertilization Techniques

    Proper fertilization is key to achieving vibrant plants in your raised beds.

    Consider using organic options like compost, worm castings, or slow-release fertilizers to enrich the soil. Regular testing will help maintain the right nutrient balance.

    Engaging in crop rotation helps prevent nutrient depletion and soil pests, promoting long-lasting fertility in your garden.

    Herb and Vegetable Gardens

    modular cinder block gardens

    Modular cinder block garden beds offer a practical and creative way to grow your herbs and vegetables.

    Modular cinder block garden beds provide a versatile and innovative solution for cultivating your favorite herbs and vegetables.

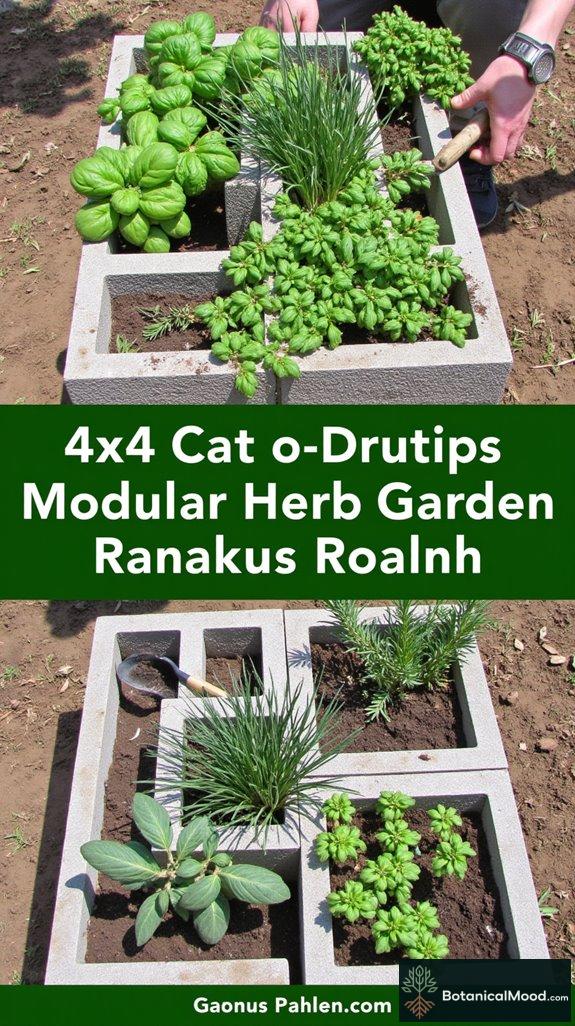
    Typically measuring 4 feet by 4 feet, these beds can be easily arranged in various layouts, providing a rustic yet modern look to your garden. Built using sturdy concrete cinder blocks, the structure incorporates openings for drainage and can even double as a planter for smaller plants.

    When constructing, stack cinder blocks to create a border, filling the interior with a quality soil mix enriched with compost. Plants thrive in these beds with ample sunlight and proper watering. Utilizing a quality soil mix is vital for ensuring optimal plant growth and health.

    How to Select Plants for This Bed

    Choosing the right plants is essential for a flourishing garden bed.

    Consider the following suggestions:

    • Basil
    • Cherry Tomatoes
    • Lettuce
    • Parsley
    • Radishes
    • Green Beans

    Tips for Designing Your Garden Bed

    Designing your cinder block garden requires thoughtful planning.

    Follow these tips for an amazing layout:

    • Start with a grid system to visualize plant placement.
    • Space tall plants like tomatoes (24-36 inches apart) away from shorter herbs to avoid shading.
    • Interplant quick-growing herbs (6-12 inches apart) with slower-paced veggies to maximize space.
    • Pro tip: Companion planting can repel pests and promote mutual growth!

    Exploring Vertical Gardening Techniques

    Vertical gardening is a fantastic alternative for limited spaces.

    Consider using trellises or hanging planters to support climbing crops such as pole beans and cucumbers.

    This method maximizes sunlight exposure and creates an eye-catching garden feature while allowing for efficient use of space.

    Using this technique can enhance your overall gardening experience!

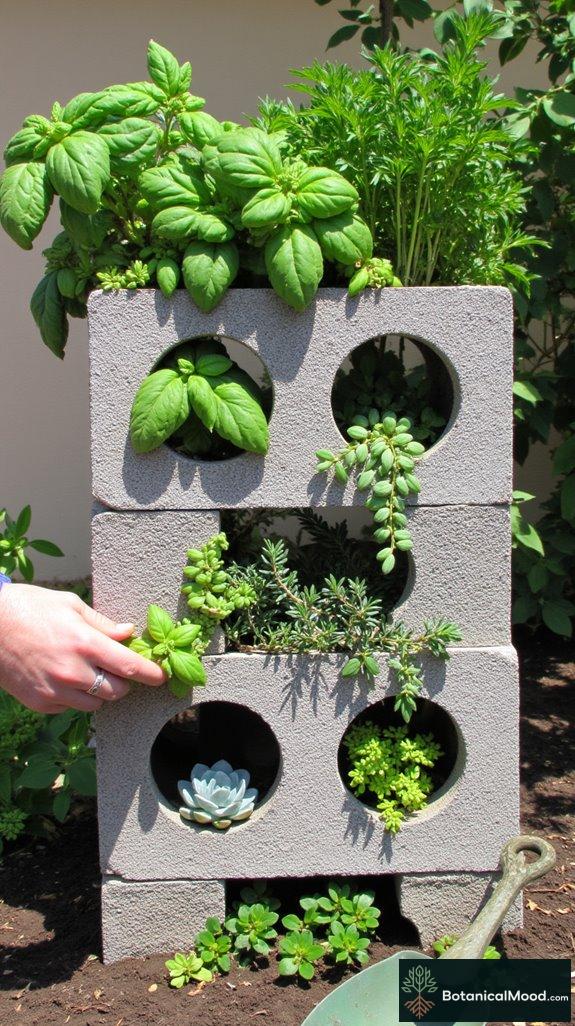
    Vertical Gardens

    lush greenery on walls

    Vertical Gardens

    Vertical gardens are a creative and space-saving option for gardeners, perfect for urban settings or small spaces. Constructed using modular cinder blocks, these structures allow for the growth of various plants while elevating them off the ground. Typically measuring 4×4 feet, the layout can be customized into a tiered or stacked system for visual appeal. Fill the cinder blocks with potting mix, and choose native or flowering plants for a vibrant display. Materials used may include cinder blocks, soil, and optional trellises or garden mesh for climbing plants. Additionally, modular cinder blocks make it easy to arrange and adjust your garden design over time.

    Plant Selection for Vertical Gardens

    When selecting plants for vertical gardens, consider light exposure, growth habits, and maintenance needs. Some recommended plants include:

    • Herbs (basil, mint, parsley)
    • Succulents (aloe, sedum)
    • Pansies or marigolds (colorful blooms)
    • Climbing plants (sweet peas, morning glories)
    • Strawberries (compact and productive)

    Designing Your Vertical Garden

    To design an effective vertical garden, follow these steps:

    • Plan for sunlight: Identify light conditions and choose accordingly.
    • Layer plants: Place taller plants at the top and shorter at the bottom for ideal sunlight and aesthetics.
    • Spacing: Verify 6-12 inches between plants to allow growth.
    • Use trellises: For climbing varieties, include sturdy support.
    • Rotate crops: Change plant varieties seasonally for biodiversity and health.

    Best Practices for Vertical Garden Care

    Caring for a vertical garden requires a few extra considerations. Watering can be more challenging; use drip irrigation or a soaker hose.

    Check nutrient levels regularly and adjust as necessary. Verify that your vertical garden gets adequate sunlight, making adjustments as needed with movable installations.

    Decorative Garden Features

    versatile modular cinder blocks

    Modular cinder block garden beds are versatile, practical, and visually appealing. Typically sized at 2-4 feet wide and 6-8 feet long, these raised beds are constructed using durable, water-resistant cinder blocks arranged in a rectangular shape. You can fill the hollow sections with soil, compost, and mulch to create a rich planting medium. Ideal for decorative features in your garden, these beds can host a variety of plants, such as herbs, flowers, and vegetables, while the cinder blocks themselves can be painted or adorned with mosaics for unique flair. Additionally, incorporating vertical garden options can enhance your garden’s aesthetic while maximizing space.

    Modular cinder block garden beds offer durability and aesthetic appeal, making them a practical choice for any garden space.

    How to Select Plants for this Bed

    When selecting plants for a cinder block garden bed, consider the following:

    • Sun Exposure: Choose sun-loving plants if the bed is in bright light.
    • Soil Compatibility: Opt for plants suited to the soil mix you’ll use.

    Suggested plants include:

    • Marigolds
    • Lavender
    • Lettuce
    • Basil
    • Zinnias

    Designing Your Cinder Block Bed

    To design a cinder block planting bed effectively, follow these tips:

    1. Sketch a Layout: Plan your bed’s shape, size, and plant arrangement.
    2. Consider Plant Heights: Place taller plants at the back and shorter ones in front for visibility.
    3. Spacing: Verify at least 12-18 inches between each plant to allow for growth.

    Pro Tips:

    • Use companion planting to enhance growth and deter pests.
    • Implement a drip irrigation system for efficient watering.

    Exploring Vertical Garden Options

    Vertical gardens create stunning focal points while optimizing space. Utilizing trellises or wall-mounted planters allows you to grow climbing plants and enhance aesthetics.

    This approach not only maximizes your yard’s area but also supports biodiversity by attracting pollinators and beneficial insects. For easy maintenance, select low-growing perennials to balance your garden’s design while providing year-round interest.

    Functional Structures

    elegant modular garden beds

    Modular cinder block garden beds offer an elegant and functional option for gardening enthusiasts. Typically measuring 4×8 feet, these beds are constructed using sturdy, durable cinder blocks, which provide excellent drainage and aeration. In addition to their structural benefits, they can also enhance your garden’s aesthetics with their clean lines and customizable configurations.

    Arrange the blocks in a rectangular format, stacking them to create a height of about 12 to 24 inches for ideal comfort while gardening. The aesthetic arrangement allows for easy access to your planting space, making maintenance simpler. Fill the interior with high-quality soil and organic compost for optimal plant growth. Suitable plants include herbs, vegetables like tomatoes or peppers, and colorful flowers.

    Selecting Plants for Cinder Block Beds

    When choosing plants for your modular cinder block garden, consider the growing conditions and your personal preferences. Here are some suggestions:

    • Herbs: Basil, rosemary, oregano
    • Vegetables: Lettuce, carrots, zucchini
    • Flowers: Marigolds, petunias, daisies

    Designing Your Modular Cinder Block Garden Bed

    To design your cinder block planting bed effectively, follow these tips:

    1. Plan your layout according to sunlight exposure.
    2. Use companion planting techniques for healthy growth.
    3. Maintain space of 12-18 inches between larger plants.
    4. Arrange taller plants at the back of the bed and shorter in front for visibility.
    5. Incorporate pathways for easy access.

    Pro tips: Use trellises for climbing plants and mix colors for visual interest.

    Planting Bed Alternatives for Unique Environments

    Exploring alternative gardening options can enhance your setting. Raised beds, vertical gardens, and container gardens provide flexibility with space and design, catering to small yards or unique outdoor areas.

    Each type offers specific benefits, such as improved drainage or ease of access.

    Materials for Construction

    modular cinder block gardens

    Modular cinder block gardens are versatile, low-maintenance planting beds constructed from durable concrete blocks. Typically arranged in a square or rectangular shape, sizes can vary based on your garden space, with common dimensions being 4×4 feet or 4×8 feet. The blocks create a sturdy border that can support soil mixtures and allows for efficient drainage. Fill them with nutrient-rich soil and compost, guaranteeing proper plant growth. You can switch the layout by adding decorative rocks or sand at the edges, enhancing visual appeal. Ideal for vegetables like tomatoes, peppers, or herbs, these beds are both functional and decorative. Incorporating rainforest inspired elements into your garden design can further enhance the tropical aesthetic.

    Customization Possibilities

    versatile modular garden beds

    Modular cinder block garden beds are versatile and ideal for plant customization.

    These beds can vary in size, typically ranging from 4×4 feet to larger configurations, arranged in a rectangular or square layout. The overall look is modern and structured, with the sturdy concrete blocks providing a durable frame.

    Modular cinder block garden beds come in various sizes and configurations, offering a modern, structured look with durable concrete frames.

    Constructed by stacking cinder blocks, these beds accommodate a variety of soil types and drainage needs. Fill them with nutrient-rich soil to support diverse plant growth. For plant options, consider herbs, vegetables, and flowering plants for a vibrant display.

    Selecting Plants for Cinder Block Beds

    Choose plants that thrive in your climate and complement each other. Here are some suggestions:

    • Basil
    • Tomatoes
    • Marigolds
    • Lettuce
    • Peppers

    Designing Your Cinder Block Garden Bed

    When designing your modular garden bed, consider the following tips:

    • Determine the sun exposure and space available.
    • Use taller plants at the back and shorter at the front for height variation.
    • Leave ample space between plants for air circulation and growth.

    Pro tips: Aim for a spacing of 12-18 inches between larger plants and about 6-12 inches for herbs. Mix textures and colors for visual interest.

    Engaging in Compost Practices

    Incorporating compost in your garden routine enriches the soil, boosts plant health, and promotes sustainability.

    Use kitchen scraps and yard waste to create nutrient-rich compost. This process reduces landfill waste and enhances biodiversity in your garden bed.

    Ease of Installation

    versatile modular garden beds

    Modular cinder block garden beds offer a versatile and durable option for gardeners of all experience levels. Typically sized 4×4 feet or larger, these beds are constructed using concrete blocks that interlock for easy assembly.

    Their arrangement allows for unique layouts, providing ideal drainage and soil retention. Cinders provide an earthy appearance, while the open cavities can be filled with soil or planted for added greenery. Ideal plants include vegetables like tomatoes and peppers, herbs such as basil and rosemary, or vibrant flowers like marigolds and petunias.

    Selecting Plants for Your Cinder Block Bed

    When choosing plants, consider sunlight, water needs, and space. Here’s a list of suitable plants:

    • Tomatoes
    • Basil
    • Lettuce
    • Marigolds
    • Peppers

    Designing Your Modular Planting Bed

    For a successful design, start with a layout plan. Tips include:

    • Arrange taller plants at the back for sunlight access.
    • Space plants according to their growth size to prevent overcrowding.
    • Incorporate color contrasts for visual appeal.

    Pro tip: Group plants with similar water requirements together to simplify irrigation.

    Explore Other Sustainable Gardening Practices

    Aside from cinder block beds, consider permaculture techniques that enhance resource efficiency.

    Methods like composting, crop rotation, and rainwater harvesting promote sustainable systems. Emphasizing companion planting can greatly boost growth and pest resistance, creating a flourishing garden ecosystem.

    Inspiring Garden Projects

    versatile cinder block gardens

    Modular cinder block planting beds are a versatile and durable gardening solution. Typically measuring 2 to 4 feet wide and 4 to 6 feet long, they can be arranged in various shapes, such as rectangular or L-shaped, allowing for creative garden layouts.

    The cinder blocks provide stability and excellent drainage due to their porous nature. You can incorporate a variety of plants, such as herbs, flowers, or vegetables. Constructing this bed involves stacking cinder blocks in a layout of your choice while leaving gaps for planting, ensuring they’re level for even growth.

    The overall look can be customized with colorful bedding plants or decorative stones atop the blocks.

    Selecting Plants for Cinder Block Beds

    When selecting plants for your modular cinder block bed, consider the following options:

    • Herbs: Basil, Thyme, Oregano
    • Vegetables: Lettuce, Radishes, Cherry Tomatoes
    • Flowers: Marigolds, Petunias, Snapdragons

    Designing a Modular Planting Bed

    To design and plan your cinder block planting bed effectively, follow these tips:

    1. Choose a sunny location for maximum growth.
    2. Calculate the number of cinder blocks needed based on your desired size.
    3. Arrange blocks to form a shape that complements your garden layout.
    4. Space plants according to their mature size for superb growth.

    Pro Tips:

    • Stack blocks in staggered rows for increased stability.
    • Leave 12-18 inches between plants for air circulation and ease of harvesting.

    Enhancing Your Garden Environment

    Incorporate companion planting techniques to maximize the benefits of your modular cinder block beds. This method not only enhances growth but also protects plants from pests naturally.

    Consider planting marigolds alongside your vegetable crops for added pest deterrence, promoting a healthier garden ecosystem overall.

    Seasonal Mulching and Weeding

    seasonal mulching and weeding

    Maintaining a thriving garden involves more than just selecting the right plants and designing an appealing layout; it also requires diligent attention to seasonal mulching and weeding, which are key practices that promote healthy growth and lessen maintenance efforts.

    By integrating seasonal planting (e.g., tomatoes (Solanum lycopersicum) in summer), and prioritizing organic maintenance, we can effectively reduce weeds and nourish our soil.

    Season Mulching Material
    Spring Straw
    Summer Grass Clippings
    Fall Wood Chips
    Winter Leaves
    Year Round Cardboard or Newspaper

    Embracing these strategies cultivates a flourishing community garden.

    Summary

    Using modular cinder blocks in my garden has been a game-changer. They’re practical and easy to personalize, whether with paint or stone. I love how they can adapt to any design, from herb patches to vertical gardens, making my outdoor space both productive and beautiful.

    What about you? I’d love to hear your experiences with cinder blocks in your garden.

    Feel free to share pictures of your garden designs. I’m excited to see how you’ve made it your own!

    References

  • Stylish Stackable Block Gardens For Every Space

    Stylish Stackable Block Gardens For Every Space

    I can’t get over how stylish stackable concrete block gardens can elevate any space!

    I mean, who knew these little blocks could look so good, right?

    Trust me, I’ve seen my garden transform from drab to fab with these modular interlocking designs.

    Plus, they’re a breeze for drainage! I’ve packed the cores with rich soil, then dropped in some basil and cherry tomatoes, and voilà!

    Oh, and remember, taller plants in the back give it that Pinterest-perfect vibe. It’s like nature’s version of a high-rise!

    Ever tried that?

    It’s a green journey full of surprises!

    Creating a Dreamy Urban Garden Oasis

    Last summer, I hit a wall with my adorably cramped balcony. One afternoon, I swapped my cluttered pots for the stackable blocks. Imagine cramming in fresh herbs, mini peppers, and lush flowers in perfect harmony.

    To say it was a game changer is an understatement. Each tier became a conversation starter—seriously, who can resist asking, “How did you do that?”

    It turned my little urban space into a lush garden escape. Plus, using sustainable practices made me feel like Mother Nature herself—minus the rain.

    Seriously, if I can whip up a gorgeous stackable garden, what’s stopping you? 🌱

    Quick Takeaways

    • Concrete blocks are durable and offer versatile designs, allowing for creative and stylish stackable garden arrangements.
    • Staggered layers in block arrangements provide visual appeal and improve stability while creating pathways for easy access.
    • Fill block beds with nutrient-rich soil to support a variety of plants, enhancing aesthetics and garden health.
    • Optimize limited spaces using vertical gardening techniques and tiered arrangements to maximize planting areas in urban settings.
    • Incorporate decorative features like garden art and stones to personalize and elevate the overall look of your garden.

    Benefits of Using Concrete Blocks for Garden Beds

    durable stackable garden beds

    Concrete blocks provide durable and versatile options for creating stylish stackable garden beds. These planting beds can be arranged in various sizes and configurations, allowing for creative layouts and improved accessibility. Constructing your garden bed with concrete blocks involves stacking blocks securely, with gaps for soil and plants, ensuring drainage and preventing weed growth. You can fill the beds with nutrient-rich soil and a variety of plants, from colorful flowers to hardy vegetables. Additionally, using concrete blocks for urban gardening can help optimize limited space while adding a modern aesthetic to your outdoor area.

    Selecting Plants for Concrete Block Beds

    When selecting plants for your concrete block garden bed, consider sun exposure, moisture requirements, and growth habits. Here are some great options:

    • Marigolds
    • Zinnias
    • Basil
    • Cherry Tomatoes
    • Lavender

    Designing Your Concrete Block Garden Bed

    To design your garden bed, follow these steps for an organized and attractive layout:

    1. Choose a full sun or partial shade location.
    2. Plan the arrangement of concrete blocks, ensuring stability and accessibility.
    3. Space plants according to their mature size, typically 12-18 inches apart.
    4. Layer plants based on height—taller in the back, shorter in the front for visibility.

    Pro tip: Incorporate a trellis for climbing plants or vines to maximize vertical space and create visual interest.

    Innovative Container Gardening Techniques

    Container gardening is an excellent alternative for limited yard space. Use recycled materials like old buckets, wooden crates, or even plastic bottles to create unique plant displays.

    Combining creative containers with various plants can enhance aesthetics and optimize space. Embrace vertical gardening, intercropping, and harmonious plant pairing for a thriving and beautiful garden.

    Choosing the Right Block Size and Style

    customizable stackable block gardens

    Stylish stackable block gardens provide a versatile and structured approach to gardening. These planting beds utilize materials like concrete, wood, or bricks, allowing for customizable sizes and configurations. The size of blocks typically ranges from 12 to 24 inches, facilitating easy stacking for stability and aesthetic appeal. Additionally, you can enhance the functionality of your garden by incorporating tire stack growing towers, which can add height and unique flair to your garden design.

    Stackable block gardens offer a chic and adaptable way to cultivate your green space.

    Arrange the blocks in a rectangular or L-shape layout to create distinct sections for different plant types. Suitable plants include herbs, vegetables, and flowers, offering a vibrant look and functional benefits. The construction involves leveling the ground, aligning the blocks securely, and filling them with soil and compost.

    Construction Techniques for Stability

    stylish modular garden beds

    Stylish stackable block gardens offer a modern twist to traditional planting beds, combining aesthetics with functionality. Typically constructed with modular, interlocking concrete or wooden blocks, they can be arranged in a variety of sizes, from small square patches to expansive rectangular beds. Each layer can be staggered for a visually appealing look while providing excellent drainage and soil stability. Ideal plants include herbs, flowers, or vegetables, selected based on sunlight and soil moisture needs. The multi-tiered design allows for easy access and maintenance. Additionally, cinder block modular beds are known for their durability and versatility in various garden setups.

    Selecting Plants for Stackable Block Beds

    When selecting plants for your stackable block garden, consider the following:

    • Sunlight Requirements: Choose plants based on light exposure.
    • Height Variation: Include tall plants like sunflowers for the back or sides.
    • Root Depth: Consider the root growth; deep-rooted plants may need additional soil.

    Suggested Plants:

    • Basil
    • Marigolds
    • Cherry Tomatoes
    • Lavender
    • Zinnias

    Designing Your Stackable Block Garden

    To design your stackable block garden effectively:

    • Plan Layout: Sketch the arrangement of each block and plant.
    • Spacing: Space plants according to their mature size, allowing airflow.
    • Accessibility: Confirm each layer is reachable without disturbance.

    Pro Tips:

    • For taller plants, place them at the back or center.
    • Mix perennials with annuals for all-season beauty.
    • Use mulch to retain moisture and reduce weeds.

    Exploring Vertical Gardening Techniques

    Vertical gardening offers a unique way to maximize space in small areas.

    Combining trellises, wall planters, and tiered containers can create lush green walls. This method not only enhances aesthetics but also increases air circulation, leading to healthier plants.

    Utilize materials like repurposed pallets or hanging pots to add a touch of creativity to your gardening space.

    Designing Your Garden Layout

    modern stackable block gardens

    Stylish stackable block gardens are a modern and versatile gardening solution, perfect for maximizing space in urban areas or small backyards. Typically, these beds are constructed from durable materials such as concrete blocks, wood, or stone, allowing for various designs and settings. Sizes can range from small square plots to larger rectangular designs, accommodating plants at different heights for visual interest. The overall layout often features tiered planting layers, promoting proper drainage and sunlight access. Ideal plants include herbs, vegetables, and flowers, which can thrive in this structured environment. Customizable cinder block vegetable gardens can enhance both aesthetic appeal and functionality in your gardening space.

    Selecting Plants for Stackable Block Gardens

    To guarantee a vibrant garden, consider the following criteria when selecting plants:

    • Sunlight Requirement: Choose sun-loving or shade-tolerant plants based on your garden’s positioning.
    • Height Variance: Select a mix of tall plants (like sunflowers) and low-growing flowers (like alyssum).
    • Growth Habit: Opt for cascading varieties (like trailing thyme) for top rows.
    • Companion Planting: Combine compatible plants to enhance growth and deter pests.

    Suggested Plants:

    • Basil
    • Cherry Tomatoes
    • Marigolds
    • Strawberries
    • Lavender

    Designing Your Stylish Block Garden

    When designing your stackable block garden, follow these practical tips:

    • Plan Layout: Sketch a design on paper before construction.
    • Block Arrangement: Use staggered stacking for an aesthetically pleasing look.
    • Adequate Spacing: Leave at least 12-18 inches between taller and shorter plants to avoid overcrowding.
    • Layering Technique: Position larger plants at the back and smaller ones at the front for visibility.

    Pro Tips:

    • Incorporate a drip irrigation system for ease of watering.
    • Use decorative rocks or mulch for added appeal and to retain moisture.

    Exploring Container Gardening Techniques

    Container gardening offers a flexible way to incorporate plants into limited spaces. With proper drainage and suitable soil, herbs and vegetables can thrive in pots of varying sizes, allowing you to customize your garden arrangement.

    Consider using vertical structures for climbing plants, making the most of vertical space while achieving a colorful display.

    Filling Hollow Cores for Enhanced Strength

    stylish stackable block gardens

    Creating stylish stackable block gardens involves constructing planting beds that not only look great but also provide strength and durability. These beds typically utilize interlocking concrete blocks or bricks, arranged to form a raised garden. The size can vary based on available space—common dimensions are 4×4 feet or 3×6 feet.

    For enhanced strength, hollow cores within the blocks can be filled with gravel or soil, adding stability and aiding in drainage. Plants like herbs, seasonal flowers, or even compact vegetables thrive in these gardens. Additionally, consider incorporating a vertical herb garden to maximize space and diversify your planting options.

    Selecting the Best Plants for Your Bed

    When selecting plants for your stackable block garden, consider the following:

    • Herbs: Basil, thyme, rosemary
    • Flowers: Marigolds, petunias, zinnias
    • Vegetables: Cherry tomatoes, lettuce, radishes

    Designing Your Stylish Stackable Garden

    To design your stackable block garden effectively, follow these tips:

    1. Plan your layout: Consider sunlight, accessibility, and aesthetic appeal.
    2. Spacing: Maintain 12-18 inches between plants for proper growth.
    3. Layering: Position taller plants at the back and shorter ones at the front for better visibility.
    4. Pro Tip: Incorporate a drip irrigation system for easy watering.

    Exploring Sustainable Gardening Practices

    Sustainable gardening practices not only enhance your garden’s health but also promote biodiversity. Incorporate composting methods, utilize native plant species, and practice crop rotation for a thriving ecosystem.

    Modular Lightweight Concrete Panels: A Stylish Option

    stylish stackable block gardens

    Modular lightweight concrete panels offer a chic and functional solution for creating stylish stackable block gardens.

    These panels, usually sized 2×2 feet, easily interlock for flexible arrangements, providing a contemporary look. You can design your planting beds in varied layouts—rectangular, square, or even curves.

    Modular lightweight concrete panels offer versatile interlocking designs, enabling chic garden layouts in various shapes like rectangles, squares, or curves.

    With a smooth surface for easy maintenance, these panels require minimal material stress, making them ideal for urban gardening. Constructed with reinforced, lightweight aggregates, they’re durable yet easy to handle, ideal for vegetable, herb, or decorative flower gardens. Additionally, incorporating pollinator-friendly plants into your design will help you create a vibrant ecosystem that supports local bee populations.

    Selecting Plants for Your Modular Bed

    When choosing plants for your modular lightweight concrete panel garden, consider the following:

    • Herbs: Basil, mint, cilantro
    • Vegetables: Cherry tomatoes, lettuce, peppers
    • Flowers: Marigolds, petunias, geraniums

    Choose plants based on sunlight, moisture, and space for growth.

    Designing Your Stackable Garden Bed

    To design your stackable block garden, follow these tips:

    1. Plan Layout: Determine the size and shape of your garden.
    2. Select a Sunlit Location: Ascertain the garden gets at least 6 hours of sunlight daily.
    3. Space Plants Properly: Consider mature size; space them 12-18 inches apart.
    4. Layer for Visual Appeal: Arrange taller plants at the back and shorter in front.
    5. Consider Growth Habits: Mix perennial and annual plants for seasonal blooms.

    Pro tip: Keep a consistent watering schedule to maintain plant health.

    Exploring Garden Design Inspirations

    Explore various garden design inspirations, such as vertical gardens, raised beds, and trellises.

    Combine elements like container gardening with stackable garden beds for a dynamic environment. Recall to incorporate pathways and seating areas to enhance accessibility and enjoyment.

    Lining Your Planter Bed to Enhance Functionality

    stylish modular planter beds

    Stylish stackable block gardens offer an eye-catching way to grow plants in limited spaces.

    Constructed from durable materials like wood or plastic, these planter beds often measure around 3 feet by 6 feet, allowing for ample planting space while maintaining a neat look.

    Their modular design enables gardeners to arrange multiple beds in various layouts, creating a visually appealing setting. To enhance functionality, lining the interior with landscaping fabric prevents soil loss and discourages weeds, while also promoting proper drainage.

    Selecting Plants for Your Planter Bed

    When choosing plants for your stackable block garden, consider factors like sunlight, soil type, and plant height.

    Opt for combinations that thrive together and create visual harmony. Here are some great plant choices:

    • Herbs: Basil, Thyme, Oregano
    • Vegetables: Lettuce, Radishes, Cherry Tomatoes
    • Flowers: Marigolds, Petunias, Pansies

    Designing Your Stackable Block Garden

    Creating an effective design for your planter bed involves thoughtful planning.

    Start by sketching your layout to visualize each plant’s spacing. Here are some tips:

    • Arrange taller plants at the back and shorter ones in the front for an organized look.
    • Allow 12-18 inches between each plant for adequate growth.
    • Pro tip: Group plants with similar watering and sunlight needs together.

    Maintaining a Thriving Garden Ecosystem

    Consider integrating beneficial insects and companion planting into your garden design.

    Attract pollinators like bees and butterflies by incorporating flowering plants.

    Regularly rotate crops to promote soil health and reduce pests. Keep your block garden vibrant and diverse!

    Integrating Raised Berms for Aesthetic Appeal

    elevated beds enhance gardens

    Raised berm planting beds are elevated areas designed to create visual interest and improve drainage in your garden. Typically ranging from 1 to 3 feet in height and 3 to 6 feet wide, these beds can be arranged in various configurations to achieve a stunning aesthetic appeal.

    Crafted using natural materials like stone, wood, or composite blocks, they offer both durability and style. Popular plants for raised berms include perennial flowers, shrubs, and ornamental grasses, which provide year-round beauty. Construction involves layering soil and compost within the raised structure, promoting healthy plant growth while maximizing drainage.

    Crafted from natural materials, raised berms combine durability and style, featuring perennial flowers and ornamental grasses for year-round beauty.

    Selecting Plants for Raised Berm Gardens

    When choosing plants for raised berms, evaluate sunlight, soil type, and moisture requirements. Here are some excellent options:

    • Lavender
    • Coneflower (Echinacea)
    • Daylily (Hemerocallis)
    • Sedum
    • Ornamental grasses (e.g., Miscanthus)

    Designing Your Raised Berm Planting Bed

    To design a stunning raised berm, begin by plotting your layout using graph paper or digital planners. Tips to evaluate:

    • Elevate the center and slope downward for effective drainage.
    • Space plants 12-24 inches apart based on their mature size.
    • Group plants by height for visual layering.
    • Use a mix of colors and textures for a dynamic look.

    Pro Tip: Evaluate incorporating taller plants as a backdrop for shorter ones to enhance depth!

    Enhancing Your Garden With Unique Features

    Incorporating garden art or unique pathways can elevate your raised berm design. Evaluate adding decorative stones or sculptures to enhance visual appeal, and create winding paths with gravel or wood chips for easy access and maintenance.

    Soil Volume Considerations for Optimal Growth

    stylish stackable block gardens

    Stylish stackable block gardens provide an innovative way to create green spaces in urban environments. These modular beds are typically constructed using concrete blocks, wood, or recycled materials, allowing for versatile sizes and arrangements. A 2×3 foot layout is popular, offering ample soil volume for root development while guaranteeing easy maintenance.

    When building, verify to fill each layer with quality potting soil, ideally mixed with compost for nutrients.

    Choosing the Right Plants for Your Bed

    Selecting plants for your stackable block garden depends on sunlight, climate, and personal preference. Consider these options:

    • Herbs: Basil, parsley, thyme.
    • Vegetables: Lettuce, radishes, cherry tomatoes.
    • Flowers: Marigolds, petunias, and zinnias.

    Designing Your Stackable Block Garden

    To design and plan your stackable block garden, follow these tips:

    1. Choose a sunny location with at least 6 hours of sunlight.
    2. Use taller plants like tomatoes in the back and shorter herbs in the front for visibility.
    3. Space plants according to their growth habits (e.g., 12 inches apart for veggies).
    4. Add pathways to access plants easily, maximizing your growing potential.

    Pro Tip: Use companion planting to enhance growth and repel pests.

    Benefits of Vertical Gardening Solutions

    Vertical gardening offers numerous benefits, including maximizing space, improving air circulation, and reducing weed growth. This sustainable practice allows for creativity and biodiversity, contributing notably to a greener environment, especially in small areas.

    Incorporate vertical elements like trellises or hanging planters for a stylish touch!

    Planting Ideas for Stackable Block Gardens

    customizable tiered plant beds

    Stackable block gardens create a modern and versatile planting bed. Typically constructed from durable materials like concrete or wood, these gardens consist of interlocking blocks, allowing for easy tiered arrangements.

    The ideal size varies based on available space, with sections ranging from 3 to 6 feet in width and height. The layout can be customized to fit any garden style, offering a chic aesthetic while maximizing plant exposure to sunlight. Popular plants include colorful annuals like petunias and marigolds, alongside perennial herbs such as basil and thyme.

    The ideal stackable block garden can be customized from 3 to 6 feet, providing a stylish way to maximize sunlight exposure for your plants.

    Selecting Plants for Stackable Block Gardens

    When choosing plants for your stackable block garden, consider the sunlight and water needs. Here are some great options:

    • Petunias
    • Marigolds
    • Basil
    • Thyme
    • Lettuce
    • Strawberries

    Designing a Stylish Stackable Block Garden

    To design a stackable block garden, start with a solid foundation and plan your layout. Consider these tips:

    • Choose plants with similar light and water requirements.
    • Arrange taller plants, like sunflowers, in the back and shorter ones, like herbs, in the front.
    • Space plants according to their mature sizes to prevent overcrowding.
    • Pro tip: Use companion planting to promote growth and deter pests.

    Maintaining Plant Health in Stackable Gardens

    Maintaining the health of your stackable block garden involves regular watering and proper fertilization.

    Focus on a balanced nutrient mixture, maintaining soil pH and employing organic pest control methods where necessary. Regularly prune plants to promote healthy growth and encourage airflow around the foliage.

    Experimentation with new plant combinations can lead to a vibrant and thriving garden oasis.

    Sustainable Practices in Block Garden Construction

    innovative urban gardening solution

    Stackable block gardens are an innovative, sustainable solution for urban gardening. Typically measuring 3-4 feet wide, these beds can be arranged in various layouts—such as tiered or linear—to maximize space. Constructed from durable materials like repurposed concrete blocks or timber, the blocks create distinct planting compartments, allowing for proper drainage and soil ventilation.

    The overall look is modern and eye-catching, making it a decorative addition to any environment. Ideal plants include herbs, flowers, and vegetables, which grow well in this type of garden bed.

    How to Select Plants for Your Block Garden

    Choosing the right plants is essential to the success of your block garden. Consider these options:

    • Basil
    • Marigolds
    • Cherry tomatoes
    • Lavender
    • Bell peppers

    Select herbs for easier maintenance and flowers for vibrant colors. Consider sun and shade preferences for best growth.

    Designing Your Stackable Block Garden

    When planning your block garden, follow these tips:

    • Plan Layout: Sketch the arrangement before starting.
    • Layering: Use taller plants at the back and shorter at the front.
    • Spacing: Make sure plants have enough room to grow (1-2 feet apart).
    • Sun Exposure: Group sun-loving plants together.

    Professional Tip: Utilize companion planting to promote pest resistance and mutual growth benefits.

    Exploring Vertical Gardening Techniques

    Vertical gardening complements stackable block gardens, maximizing space and creativity. Wall planters and trellises can enhance your garden’s aesthetics while providing additional planting areas.

    Incorporate climbing plants like peas or beans for added height, making sure they’re spaced appropriately to allow vines to flourish.

    Tips for Maintaining Your Concrete Block Garden Beds

    maintaining concrete block gardens

    Concrete block garden beds are an

    Rotational Mulching for Beds

    rotational mulching for gardens

    Maintaining healthy soil and plant life in our concrete block garden beds naturally leads us to contemplate the practice of rotational mulching.

    Summary

    I find stackable block gardens to be a perfect mix of style and function. They can breathe life into any area, whether it’s a small balcony or a larger yard. Using concrete blocks and smart plant choices makes my gardening experience both enjoyable and sustainable.

    I’d love to hear about your experiences with stackable gardens! What has worked for you?

    Please share photos of your gardens and tell me how you designed them. I can’t wait to see your creative designs!

    References

  • 7 Easy Cinder Block Garden Bed Designs

    7 Easy Cinder Block Garden Bed Designs

    Cinder block garden beds—who knew they could turn my little patch of dirt into a lush oasis?

    I’ve tried my hand at seven designs, starting with the classic 4×8 ft rectangle. Ah, the nostalgia of growing tomatoes (*Solanum lycopersicum*)—my childhood dreams of becoming a farmer were in full swing.

    Then there’s the U-shaped planter for those “tiny backyard” dilemmas. I mean, because everyone has a sprawling estate, right?

    And vertical wall beds? They turned my limited space into an epic jungle. Let’s not even start on the herb spirals—my cooking game has never been stronger!

    I love my terraced beds too; they’re perfect for those pesky slopes. The multi-zoned setups are just mysteries begging to be solved.

    But really, is there ever a perfect garden design?

    My Garden Journey: From Chaos to Organized Bliss

    I remember the first time I tried to create a garden in my sloping backyard. It was one of those “what was I thinking?” moments. Little did I know that cinder blocks would become my best friends.

    After a couple of frustrating attempts and a few too many seedlings wilting away, I embraced a terraced design. I stacked cinder blocks, creating a layered effect that not only tamed the slope but also made my garden look like an Instagram-worthy paradise.

    Who knew that soil management could involve so much sweat and tears? I learned about drainage, soil types, and the art of companion planting. Now I grow everything from radishes to zucchinis, and the satisfaction? Pure joy!

    Quick Takeaways

    • Classic rectangle garden beds provide a sturdy and spacious option for a variety of plants, ranging from vegetables to flowers.
    • Innovative vertical wall gardens maximize planting space in compact areas with staggered arrangements for herbs and small flowering plants.
    • Staggered corner beds offer a unique design that enhances drainage and aeration while still being visually appealing.
    • Cinder block herb spirals create microclimates and optimize space, promoting healthy growth for a diverse range of herbs.
    • Terraced beds are ideal for sloped gardens, preventing soil erosion while providing level surfaces for planting.

    Classic Rectangle Garden Bed

    rectangular shaped garden bed

    Classic Rectangle Garden Bed

    A classic rectangle garden bed is a timeless choice for gardeners, typically measuring 4×8 feet. Constructed from sturdy cinder blocks, it features well-defined boundaries that promote organized plant growth.

    The design allows for ideal sunlight exposure and drainage, making it perfect for vegetables, herbs, and flowers. To create this bed, simply stack cinder blocks in a rectangular formation, guaranteeing they’re level and secure. Fill the center with nutrient-rich soil to encourage healthy root development. Utilizing custom cinder block gardens can enhance both aesthetics and functionality in your gardening layout.

    Selecting Plants for Your Rectangle Bed

    Choosing the right plants is essential for a thriving garden bed. Consider the following plants for your classic rectangle garden bed:

    • Tomatoes
    • Bell peppers
    • Basil
    • Lettuce
    • Marigolds

    Designing Your Rectangle Garden Bed

    To design your classic rectangle garden bed effectively:

    • Plan your layout: Group plants by height to guarantee sunlight reach.
    • Space wisely: Leave 12-18 inches between larger plants and 6-12 inches for smaller varieties.
    • Pro tip: Utilize companion planting to deter pests and enhance growth.

    Inspiring Garden Design Ideas

    Consider incorporating vertical gardening elements for added space and aesthetics. Utilizing trellises, hanging pots, or even decorative stakes can create visual interest and maximize space for climbing plants like cucumbers or sweet peas.

    Integrating paths or stepping stones can also enhance accessibility and garden flow.

    Staggered Corner Bed Design

    staggered corner garden design

    The staggered corner garden bed design features a unique zigzag arrangement that maximizes space and adds visual interest. Typically, each corner measures 2 feet, creating a rectangular shape of about 4×8 feet.

    Constructed from durable cinder blocks, this raised bed design allows for excellent drainage and soil aeration. The open, staggered arrangement makes it easy to reach plants for maintenance while promoting a lush growth environment. Furthermore, the tiered approach of this design can also benefit container garden beds on patios by enhancing the overall aesthetic appeal and space utilization.

    Ideal plant choices include colorful annuals, herbs, and dwarf vegetables such as cherry tomatoes, peppers, and marigolds for pest control.

    Choosing Plants for Staggered Corners

    To select plants for your staggered corner bed, consider the following suggestions:

    • Cherry tomatoes
    • Basil
    • Marigolds
    • Dwarf peppers
    • Compact zinnias

    These options thrive in sunny conditions and offer vibrant color, aroma, and functionality.

    Designing Your Staggered Corner Bed

    To design your staggered corner garden bed, follow these planning tips:

    1. Choose a sunny location with at least 6 hours of sunlight.
    2. Plan for staggered plant heights to create an appealing visual effect.
    3. Space plants adequately, approx. 12-18 inches apart.

    Pro tip: Use taller plants towards the back and shorter ones at the front to guarantee all plants receive equal light and coverage.

    Exploring Vertical Garden Options

    Consider incorporating vertical garden designs into small spaces. Utilizing vertical planters, trellises, or wall-mounted containers can maximize your growing area while adding a dynamic look to your garden.

    Mix ornamental and edible plants for a stylish and functional vertical arrangement.

    U-Shaped Modular Planter

    innovative u shaped garden planters

    U-Shaped modular planters are an innovative and functional gardening option, ideal for small to medium-sized spaces. These raised beds typically measure 4-6 feet in width and can stretch up to 8 feet in length, creating an inviting central area for gardening.

    U-shaped modular planters offer a practical and stylish solution for gardening in limited spaces.

    Constructed from durable cinder blocks, this design combines efficiency and aesthetics with an open-ended layout allowing easy access from all sides. You can fill the bed with nutrient-rich soil and grow a variety of plants, including flowers, herbs, and vegetables. The elevated structure promotes drainage and reduces back strain while gardening. Additionally, this design allows for optimal sunlight exposure**** when positioned correctly, making it perfect for various plant types.

    Selecting Plants for U-Shaped Planter

    When selecting plants for your U-shaped planter, take into account factors like sunlight exposure and growth patterns.

    Here are some recommended plants:

    • Cherry Tomatoes
    • Basil
    • Marigold
    • Lettuce
    • Zucchini

    Opt for companion plants to enhance growth and deter pests.

    Designing Your U-Shaped Planter

    To design your U-shaped modular planter, begin by sketching your layout, deciding how many sections to include.

    Here are some tips to keep in mind:

    • Create sections for different plant types.
    • Position taller plants at the back for maximum sunlight.
    • Space plants generously for air circulation.

    Pro Tip: Use a triangular formation for plants to maximize exposure and create an aesthetically pleasing look.

    Garden Sustainability Tips for a Modular Bed

    Enhancing sustainability in your garden bed is essential for a successful ecosystem.

    Think about adding composting bins nearby to recycle organic waste and enrich soil fertility. Integrating companion planting not only maximizes space but also encourages beneficial insects, promoting a thriving garden environment.

    Use rain barrels for irrigation, conserving water while keeping plants hydrated.

    Vertical Wall Garden Bed

    innovative vertical gardening solution

    A vertical wall garden bed is an innovative gardening solution constructed from cinder blocks, creating a visually appealing and space-efficient planting area. Typically, these beds can vary in size, commonly ranging from 4 to 6 feet wide and up to 4 feet tall.

    The cinder blocks are stacked in a staggered arrangement, offering several pockets for soil and plants. This type of garden bed is excellent for herbs, succulents, and flowering plants that thrive in small spaces.

    Materials primarily include cinder blocks and potting soil, while optional features like garden fabric and watering systems can enhance productivity. Additionally, utilizing a modular herb garden can increase the versatility of your planting options and allow for easy rearrangement as seasons change.

    Selecting Plants for Vertical Wall Garden

    To guarantee a thriving vertical garden, choose plants that suit the light and watering conditions of your space. Excellent choices include:

    • Herbs: Basil, Thyme, Mint
    • Flowers: Pansies, Nasturtiums, Petunias
    • Succulents: Aloe Vera, Sedum, Echeveria

    Designing a Vertical Wall Garden Bed

    When planning your vertical wall garden bed, consider the overall aesthetics, sunlight exposure, and plant compatibility. Follow these tips:

    • Layering: Taller plants at the top, trailing plants at the bottom.
    • Spacing: Maintain 6-12 inches between plants for air circulation.
    • Irrigation: Integrate a drip irrigation system for easy watering.

    Pro Tip: Use lightweight soil amendments to reduce the weight of each cinder block and guarantee durability.

    As we admire vertical gardens, it’s essential to recognize how natural garden trends evolve. Incorporating natural resources, like native plants and organic materials, can greatly enhance eco-friendliness.

    Battling climate change through sustainable gardening practices promotes biodiversity and resilience in our ecosystems.

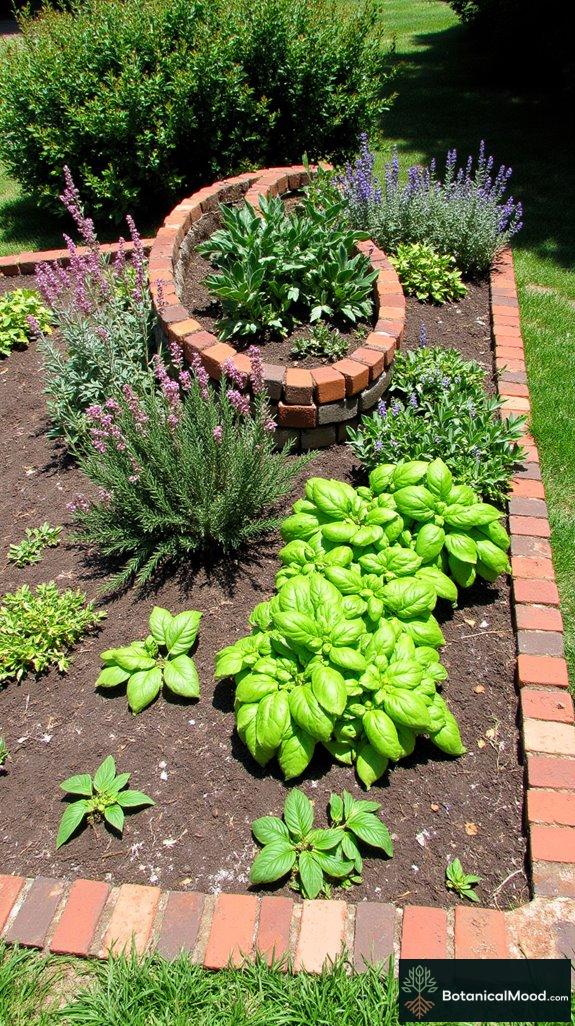
    Cinder Block Herb Spiral

    cinder block herb spiral

    A cinder block herb spiral is an innovative and space-efficient planting bed designed to create microclimates suitable for various herbs. Typically sized about 4 feet in diameter and 3 feet high, this spiral arrangement gradually rises from a central point, allowing for diverse sunlight exposure and moisture retention.

    Constructed from concrete cinder blocks, the bed features a mix of soil to support plant health. When properly built, it not only adds visual appeal to any garden but also provides ideal conditions for herbs like basil, thyme, and chives. The design of a cinder block herb spiral inherently promotes drainage and airflow, ensuring that herbs thrive in their unique microenvironments.

    How to Select Plants for Your Herb Spiral

    When choosing herbs for your cinder block herb spiral, consider plant compatibility with varying moisture and light conditions. Here are some excellent plant options:

    • Basil
    • Oregano
    • Rosemary
    • Parsley
    • Sage
    • Mint

    Designing Your Cinder Block Herb Spiral

    To design a successful herb spiral, follow these essential planning tips:

    • Start with a solid base level.
    • Arrange blocks in a circular pattern or spiral shape.
    • Verify the design allows for adequate drainage and airflow.

    When planting, place taller herbs like rosemary at the top, shifting to shorter ones like thyme and oregano as you spiral down. Aim for approximately 6-12 inches of space between plants to guarantee healthy growth.

    Exploring Cinder Blocks Beyond Gardens

    Cinder blocks are versatile beyond gardening, proving useful in outdoor furniture projects, retaining walls, and even artistic installations.

    Check local regulations when using them for structural purposes, and consider repurposing old blocks for eco-friendly initiatives. Their durability and affordability make them an excellent choice for various DIY tasks.

    Terraced Bed for Sloped Gardens

    terraced beds for sloped gardens

    Terraced garden beds are an excellent solution for sloped areas, helping to prevent soil erosion while maximizing planting space. These beds can be constructed using durable cinder blocks, arranged in a step-like formation to create flat surfaces ideal for gardening.

    Terraced garden beds effectively prevent soil erosion while enhancing planting space in sloped areas.

    A typical size might range from 4 to 8 feet in length and 2 to 3 feet in depth, depending on your garden’s slope. Fill each level with nutrient-rich soil, and plant a variety of herbs, vegetables, and flowering plants to enhance biodiversity. Additionally, incorporating sustainable sculptural elements can increase visual interest and promote a cohesive design.

    Materials like ground cover fabric can help retain moisture and reduce weeds.

    Selecting Plants for Sloped Terraced Beds

    Choose plants that thrive in well-drained soil and can handle varying sun exposure. Consider these options:

    • Lavender
    • Thyme
    • Sedum
    • Geraniums
    • Marigolds

    Designing Your Terraced Garden Bed

    For designing your terraced bed, follow these tips:

    • Assess your garden’s slope and sunlight.
    • Plan the number of terraces based on available space.
    • Space plants at least 12 to 18 inches apart for growth.
    • Use taller plants at the back and shorter ones in the front for visual appeal.
    • Maintain good water drainage to avoid plant rot.

    Pro Tip: Incorporate a drip irrigation system to keep water consistently applied.

    Explore Vertical Gardening Alternatives

    Vertical gardening can complement your terraced beds, making use of wall space. Utilizing pots, shelves, or pockets filled with soil allows you to grow a variety of plants with minimal ground space.

    Multi-Zoned Cinder Block Garden

    cinder block garden zones

    A multi-zoned cinder block garden bed is an innovative approach to gardening that maximizes space and organizes plants by their growing needs. Typically sized at 4×8 feet, this design comprises separate sections for various plant types, making it ideal for growing vegetables, herbs, and flowers.

    The cinder blocks create distinct zones while providing excellent drainage and stability. To construct, stack cinder blocks in a rectangular formation, leaving open areas for planting. Fill the zones with nutrient-rich soil, guaranteeing each section meets specific plant requirements.

    Selecting Plants for Multi-Zoned Beds

    When selecting plants for a multi-zoned cinder block garden, consider each zone’s sunlight, moisture, and nutrient needs. Recommended plants include:

    • Tomatoes
    • Basil
    • Lettuce
    • Peppers
    • Marigolds

    Choose a combination of compatible species to create a visually pleasing and productive garden.

    Designing Your Multi-Zoned Garden Bed

    To design a successful multi-zoned cinder block garden bed, follow these tips:

    • Plan zones based on plant height and spread.
    • Space taller plants like tomatoes toward the back.
    • Use companion plants such as basil with tomatoes for pest control.
    • Rotate crops annually to maintain soil health.

    When arranging plants, allow at least 12-18 inches between larger plants, while smaller ones can be spaced closer together for a fuller look.

    Exploring Vertical Gardening Techniques

    Vertical gardening is a fantastic way to maximize limited space. By using trellises, wall-mounted planters, or hanging pots, you can create beautiful green walls and guarantee your plants receive adequate sunlight.

    Vertical gardens also enhance aesthetics and provide a serene atmosphere, making them perfect for small yards or urban settings.

    Yearly Soil Amendment Routine

    yearly soil amendment routine

    To maintain a thriving garden ecosystem, I’ve found that establishing a yearly soil amendment routine is essential for optimizing the health and productivity of my multi-zoned cinder block garden bed.

    In early spring, I focus on enhancing soil health by applying rich compost from various composting methods, such as vermicomposting (using Eisenia fetida worms) and hot composting.

    These techniques not only nurture beneficial microorganisms but also improve nutrient availability. Furthermore, I often incorporate organic matter like aged manure or leaf mold, ensuring my soil remains fertile and ready to support the diverse plants I love, including tomatoes (Solanum lycopersicum) and basil (Ocimum basilicum).

    Summary

    I’m excited about these seven cinder block garden bed designs! Each one lets me explore my creativity while growing my plants. My garden feels like a unique canvas, where I create a thriving space that showcases nature’s beauty and resilience.

    I’d love to hear about your gardening experiences. What designs have you tried?

    Feel free to share photos of your own garden and tell us about your design choices!

    References

  • 10 Best Modular Herb Gardens Using Cinder Blocks

    10 Best Modular Herb Gardens Using Cinder Blocks

    Cinder blocks for herb gardens? Oh, where have you been all my gardening life?

    I’ve dabbled in this trendy approach and honestly, it’s a game changer. My 4×4 feet beds, crafted from these stylish 8-inch blocks, perfectly cradle herbs like basil, thyme, and mint.

    Stacking them vertically? Genius. Who knew I could maximize my tiny backyard while creating a sweet spot for my morning coffee?

    The blend of colors and textures—from bold rosemary to adorable sedums—has

    Quick Takeaways

    • Cinder blocks create affordable and versatile modular herb gardens with excellent drainage and insulation for optimal herb growth.
    • A 4×4 feet square layout is ideal for building raised beds using 8-inch high cinder blocks to ensure stability and durability.
    • Staggered or stacked configurations maximize vertical space, making them ideal for small gardens or urban settings.
    • Plant various compatible herbs like basil, cilantro, and thyme in designated sections to enhance visual appeal and ensure similar care requirements.
    • Engaging local communities in modular gardening can promote sustainable practices and foster a sense of collaboration in green spaces.

    Creating Square Modular Herb Gardens With Cinder Blocks

    cinder block herb gardens

    Creating Square Modular Herb Gardens With Cinder Blocks

    Modular herb gardens using cinder blocks offer an affordable and versatile planting solution, perfect for both novice and seasoned gardeners. Typically, a square layout can measure 4×4 feet, accommodating various herbs in each block’s cavity.

    Construction is simple: stack cinder blocks in a square formation, leaving the hollow sections open for planting. Opt for well-draining soil and consider incorporating a weed barrier at the base to maintain soil quality. Popular herbs include basil, mint, cilantro, and parsley. The rustic appearance of cinder blocks complements any garden, creating an urban, eco-friendly aesthetic. Additionally, using well-draining soil is essential for optimal herb growth and root health.

    Selecting Plants for Cinder Block Beds

    Choose herbs that thrive in your climate and prefer similar light and water conditions. Suggested plants include:

    • Basil
    • Thyme
    • Chives
    • Oregano
    • Rosemary

    Designing Your Cinder Block Garden

    Plan your modular garden by sketching a layout that allows easy access to each herb. Arrange taller plants like rosemary in the back and shorter ones like chives in the front.

    Tips for ideal design include:

    • Space plants 12-18 inches apart
    • Confirm each block receives sunlight
    • Group herbs with similar growth habits

    Considerations for Vertical Gardening

    Explore vertical gardening techniques to maximize space in small yards, using trellises for climbing herbs or installing shelving for pots.

    This method not only enhances aesthetics but also improves air circulation and plant health.

    Designing L-Shaped Cinder Block Herb Beds

    cinder block herb garden

    L-shaped cinder block herb beds are an attractive and functional choice for gardeners looking to maximize space while creating a unique garden design. Each bed typically measures 3-4 feet on one side and 6 feet on the other, constructed using sturdy cinder blocks arranged in an L shape. The blocks provide excellent drainage and insulation for herbs. Popular materials for this setup include well-draining soil mixed with compost to enrich plant growth. With customizable cinder block gardens, you can easily design your garden to fit your specific needs and style.

    To construct, stack cinder blocks to form the L shape, fill with soil, and plant your favorite herbs, leaving enough space for each to thrive.

    How to Select Plants for Your Bed

    When selecting plants for your cinder block herb bed, consider the climate, sunlight, and herbs favorable for your cooking needs. Here are some great options:

    • Basil
    • Rosemary
    • Thyme
    • Parsley
    • Chives
    • Mint

    Tips for Designing Your L-Shaped Herb Bed

    Designing your L-shaped herb bed involves planning the layout and spacing carefully. Consider the following tips:

    • Sunlight Exposure: Position taller herbs on the northern side to avoid shading shorter ones.
    • Water Requirements: Group plants sharing similar water needs together.
    • Plant Size: Space plants according to their mature size—allow 12-18 inches between larger herbs.
    • Companion Planting: Mix herbs like basil and tomatoes for mutually beneficial growth.
    • Pro Tip: Use decorative mulch around plants for added aesthetics and moisture retention.

    Vertical Gardening and Herb Integration

    Exploring vertical gardening can enhance your herb garden’s appeal and productivity.

    Utilize trellises or hanging planters to increase growing space, especially in limited areas. This method not only beautifies your garden but also allows for better air circulation and light exposure.

    Building Vertical Gardens With Stacked Cinder Blocks

    vertical cinder block gardens

    Stacked cinder block gardens are functional and visually appealing planting beds, perfect for urban and small spaces. These gardens are typically arranged in a rectangular shape, composed of varying heights of cinder blocks providing both structure and an innovative way to grow plants vertically. Each cinder block can be filled with soil, allowing for creative plant placement, ideal for herbs and small vegetables.

    To construct your garden, stack the blocks in a stable manner, guaranteeing they’re level. Use quality potting soil and consider lining the holes for drainage. The cinder blocks’ rustic characteristics also add a unique aesthetic to your garden. Additionally, stacked cinder blocks can help maximize your gardening space by utilizing vertical height effectively.

    Selecting Plants for Cinder Block Gardens

    When choosing plants for your cinder block garden, focus on herbs and compact crops that thrive in smaller spaces.

    Suggested plants:

    • Basil
    • Mint
    • Thyme
    • Chives
    • Strawberries

    Designing Your Cinder Block Garden Layout

    To design your planting bed, start by sketching the layout according to available space. Keep in mind the sun’s direction to position plants that require partial or full sunlight.

    Tips for designing:

    • Plan for easy access when watering and harvesting
    • Group plants with similar light and water needs
    • Space plants adequately to allow for growth and airflow

    Pro Tips:

    • Use taller herbs like mint at the back if placed against a wall
    • Guarantee each cinder block has adequate drainage to prevent root rot

    Creative Uses for Cinder Blocks in Gardening

    Cinder blocks aren’t just for gardens; they can create unique outdoor decor elements. Use them to form pathways, borders, or seating areas in your gardening design.

    The versatility of cinder blocks allows for numerous applications while enhancing the overall aesthetic of your outdoor space.

    Integrating Seating Into Cinder Block Garden Designs

    cinder block herb garden seating

    Cinder block planting beds offer a versatile and durable option for modular herb gardens. Typically designed with blocks measuring 16” x 8” x 8”, these beds can be arranged in various shapes—like rectangles or circles—to suit your garden space.

    Using cinder blocks (often reused for eco-friendliness), you can create a raised bed that not only provides excellent drainage but also retains moisture and warmth for plants. The open cavities make perfect homes for herbs such as rosemary, thyme, basil, and mint, while also serving as additional seating or decorative elements in your garden. Additionally, vertical garden designs can further enhance the available planting space in small areas.

    Create a raised bed with cinder blocks for excellent drainage, moisture retention, and beautiful herb displays.

    Selecting Plants for Cinder Block Gardens

    Choose plants that thrive in your climate and have varying heights for visual interest. Recommended options include:

    • Basil
    • Oregano
    • Parsley
    • Chives
    • Sage

    These herbs are generally low-maintenance and complement each other well, both in flavor and space.

    Designing Your Cinder Block Planting Bed

    To design an effective cinder block planting bed, consider the following tips:

    • Layout: Start with a simple rectangular or square shape to accommodate a range of herbs.
    • Spacing: Allow at least 12 inches between each plant for ideal growth; for larger herbs, increase spacing.
    • Layering: Use taller plants like basil at the back and shorter ones like chives in the front for a pleasing aesthetic.

    Pro Tip: Opt for companion planting to enhance growth and deter pests, which can maximize your harvest and keep the garden healthy.

    Exploring Cinder Block Garden Accessories

    Consider adding decorative elements like fairy lights or colorful planters to enhance your cinder block garden. Incorporating garden statues or unique rocks can also provide personalized touches that make your space inviting and reflective of your personality.

    Utilizing Cinder Block Planters for Succulents and Herbs

    cinder block modular planters

    Cinder block planters are an innovative and visually appealing option for creating modular herb gardens. These versatile structures typically consist of standard-sized cinder blocks arranged in a rectangular or square formation. The holes of the blocks create natural planting spaces, making them suitable for small herbs and succulents.

    When constructing your bed, stack the blocks, guaranteeing stability and an even layout. Fill the openings with quality potting soil and select plants that thrive in similar conditions. Ideal materials include concrete cinder blocks, organic soil, and an optional ground cover fabric to enhance drainage.

    How to Select Plants for Cinder Block Gardens

    Choosing the right plants is key. Opt for herbs and succulents that thrive in well-draining soil. Here’s a selection:

    • Basil
    • Thyme
    • Mint
    • Rosemary
    • Sedum
    • Aloe Vera
    • Echeveria

    Designing Your Cinder Block Planter Layout

    To design your planting bed, consider the following tips:

    • Plan Spacing: Leave space between plants to guarantee air circulation and growth.
    • Layering: Use taller herbs like rosemary toward the back and shorter varieties like thyme in front.
    • Mix Textures: Combine different leaf shapes and colors for visual appeal.
    • Sun Exposure: Position sun-loving plants in the sunniest spots—generally the top of cinder blocks.

    Pro Tips:

    • Use companion planting to deter pests and enhance growth.
    • Regularly trim herbs to encourage bushier plants.

    Benefits of Modular Herb Gardens

    Modular herb gardens provide gardeners with the ability to create personalized spaces that fit their aesthetic tastes while promoting biodiversity. They also allow easy access for harvesting and maintenance, accommodating various gardening styles. Cinder blocks also retain heat, perfect for extending the growing season for herbs, making them an ideal choice for vegetable gardening.

    Tips for Constructing Raised Cinder Block Beds

    cinder block garden construction tips

    Cinder block raised beds are an innovative and durable option for home gardening. Typically, these beds are constructed using 8-inch high cinder blocks arranged in a rectangular or square layout, allowing for easy access to soil and plants.

    The anchored blocks create a sturdy frame, which can be filled with quality soil and compost to promote healthy plant growth. Easy to customize, these beds can hold a variety of plants such as herbs, vegetables, or flowers, depending on your gardening goals. Additionally, modular ideas for concrete block gardens can further enhance the layout and versatility of your planting space.

    Selecting Plants for Cinder Block Beds

    When selecting plants for your cinder block bed, consider the following options:

    • Basil
    • Oregano
    • Thyme
    • Chives
    • Lettuce
    • Cherry tomatoes

    These plants thrive in raised beds and are ideal for modular herb gardens.

    Designing Your Cinder Block Planting Bed

    Designing a cinder block planting bed involves simple steps:

    • Choose Location: Survey sun exposure and drainage.
    • Plan Layout: Sketch the design on paper, considering dimensions (3-4 feet wide) for easy reach.
    • Space Plants: Follow spacing guidelines—typically, 12-18 inches apart for herbs; 24 inches for larger vegetables.
    • Utilize Block Holes: Plant herbs in the holes of the blocks.

    Pro Tip: Rotate your crops annually to improve soil health and prevent pests.

    Exploring Sustainable Gardening Techniques

    Embrace sustainable gardening practices by incorporating composting, crop rotation, and water conservation methods into your gardening routine.

    These techniques not only improve plant health but contribute to a thriving ecosystem.

    Enhancing Aesthetic Appeal With Cinder Block Features

    cinder block herb gardens

    Cinder block planting beds offer a versatile and visually appealing method for herb gardening. These beds typically measure 4×4 feet, constructed using durable cinder blocks arranged in a square or rectangular layout.

    The open spaces in the blocks provide practical planting pockets, ideal for herbs like basil, rosemary, and thyme. Enhanced by soil, compost, and mulch within the blocks, these gardens beautifully blend function with aesthetics, creating a modern garden look.

    Choosing the Right Plants for Cinder Blocks

    When selecting plants for your cinder block garden, consider herbs that thrive in well-drained soil. Suggested plants include:

    • Basil
    • Mint
    • Oregano
    • Thyme
    • Chives
    • Rosemary

    Designing and Planning Your Cinder Block Garden

    To craft an inviting cinder block garden, keep these design tips in mind:

    • Choose a sunny spot with at least 6 hours of sunlight.
    • Plan for drainage by ensuring the bottom blocks are slightly raised.
    • Space plants 12-18 inches apart for proper air circulation.
    • Use varying heights of herbs for visual interest.

    Pro Tip: Group plants with similar watering needs in adjacent blocks to maintain consistent moisture levels.

    Exploring Vertical Gardening Options

    Cinder block beds integrate well with vertical gardening strategies, such as trellises or wall planters.

    These approaches enhance limited space utilization while allowing for creative plant arrangements. Incorporating vertical elements can create a unique garden silhouette and improve yield from your gardening efforts.

    Maximizing Space With Vertical Cinder Block Gardens

    vertical cinder block gardens

    Vertical cinder block gardens are innovative planting beds that maximize limited space while adding a unique aesthetic to your garden. Typically, each cinder block measures 8×16 inches and can be arranged in various layouts, like staggered or stacked configurations.

    These gardens are built using standard concrete cinder blocks, easily accessible at hardware stores. To assemble, stack the blocks with open ends facing upwards to hold plants and soil. Fill the plant holes with quality potting soil and choose herbs that thrive in these beds, creating a lush wall of greenery.

    Selecting Plants for Vertical Cinder Block Gardens

    When selecting plants for your vertical cinder block garden, consider herbs that flourish in confined spaces. Here are some suggestions:

    • Basil
    • Thyme
    • Oregano
    • Chives
    • Mint
    • Cilantro

    Designing Your Cinder Block Planting Bed

    To design an effective cinder block garden, follow these tips:

    1. Choose a sunny location, ideally 6-8 hours of sunlight daily.
    2. Create a sturdy base by leveling the ground.
    3. Vary plant heights (taller herbs in the back, shorter in front).
    4. Space plants about 6-12 inches apart for airflow.
    5. Consider companion planting for healthier growth.

    Pro Tip: Use a mix of annual and perennial herbs for continuous yields.

    Urban gardening trends, like vertical gardening and container gardening, have surged in popularity, allowing city dwellers to cultivate fresh produce and lush greenery.

    Community gardens and rooftop gardens are perfect examples of how limited space can be effectively utilized. Consider integrating composting solutions to enhance soil fertility and encourage sustainable practices in your gardening routine.

    Safety Considerations for Using Cinder Blocks in Gardens

    cinder block herb garden design

    Cinder block planting beds are an innovative and durable choice for herb gardens, offering a unique aesthetic and functional design. Typically, these beds are constructed using standard cinder blocks, arranged in a rectangular or square layout measuring about 3 feet by 6 feet for manageable access. The open spaces of the blocks can be filled with soil and planted with herbs or flowers, providing an attractive look.

    For ideal drainage, consider using good-quality potting soil blended with compost. Enhancing the garden with colorful flowering herbs such as lavender, chives, or oregano can create a visually pleasing atmosphere.

    Selecting Plants for Your Cinder Block Bed

    Choosing the right plants is essential for a thriving cinder block garden. Consider herbs that thrive in similar conditions. Here are some great options:

    Selecting compatible herbs is crucial for a successful cinder block garden, ensuring that your plants thrive together and enhance your garden’s beauty.

    • Basil
    • Thyme
    • Sage
    • Mint
    • Parsley

    Designing Your Cinder Block Garden Bed

    Designing your cinder block bed requires careful planning. Here are tips to get started:

    • Location: Choose a sunny spot that receives at least 6 hours of sunlight daily.
    • Spacing: Space plants 6-12 inches apart, depending on their growth habits.
    • Layering: Incorporate taller herbs, like basil, at the back and shorter ones, like chives, at the front.
    • Accessibility: Guarantee easy access for harvesting and maintenance.

    Enhancing Your Garden Experience

    Engaging with your garden can be incredibly rewarding. Experiment with different plant combinations and consider companion planting. Using diverse herbs can help deter pests and promote healthy growth.

    Regular care, including watering and pruning, will keep your cinder block garden lush and productive.

    Exploring DIY Cinder Block Garden Projects and Ideas

    cinder block planting beds

    Cinder block planting beds make a versatile and modern garden feature. Typically, each bed measures around 2 feet wide and 4-8 feet long, allowing plenty of space for various plants. The arrangement commonly showcases blocks stacked in a single layer or double for added height.

    The unique attribute of cinder blocks lies in their hollow centers, perfect for planting herbs, vegetables, or flowers like basil, thyme, and marigolds. Constructing a cinder block garden involves placing the blocks in a rectangular layout, leveling the ground, and filling the holes with quality soil and compost for ideal growth.

    Selecting Plants for Cinder Block Beds

    Choosing the right plants is vital for a successful cinder block garden. Consider herbs and compact vegetables as they thrive in limited spaces. Some excellent plant options are:

    • Basil
    • Cilantro
    • Chives
    • Cherry tomatoes
    • Lettuce

    Designing and Planning Your Cinder Block Bed

    When designing a cinder block planting bed, layout and plant selection play an essential role. Follow these tips:

    1. Plan Dimensions: Guarantee a comfortable reach for maintenance.
    2. Choose Companion Plants: Pair plants that benefit each other.
    3. Spacing: Plant in blocks every few inches to allow for growth.
    4. Visual Appeal: Consider color and height for an attractive display.

    Pro Tip: Plant taller herbs, like basil, behind shorter ones, like chives, for a visually pleasing arrangement.

    Benefits of Vertical Gardening Techniques

    Vertical gardening not only maximizes space but also provides greater yield in small areas. Suitable for urban environments, growers can utilize walls and fences for climbing plants.

    It improves air circulation and sun exposure, contributing to healthier plants.

    Plant Bed Upkeep Timetable

    regular garden maintenance schedule

    Plant care doesn’t stop once the cinder block beds are planted; in fact, regular upkeep is key to maintaining a flourishing garden throughout the growing season.

    I establish a seasonal maintenance timetable to guarantee my herbs thrive. Each week, I check soil moisture, ensuring it’s neither too dry nor waterlogged.

    Every month, I trim the plants, promoting bushy growth, and I harvest herbs regularly to encourage new shoots.

    In late spring, I apply organic compost (e.g., compost from a trusted local supplier) to nourish the plants.

    Summary

    Incorporating cinder blocks into my herb garden has transformed its look and improved my gardening practices. I love how I can experiment with designs like L-shaped beds or vertical gardens to create a vibrant space that thrives all year round.

    I’d love to hear about your own experiences with modular herb gardens. What designs have you tried and what worked best for you?

    Feel free to share pictures of your garden and the unique ways you’ve set it up. I can’t wait to see your creativity!

    References

  • 9 Best L-Shaped Cinder Block Garden Designs

    9 Best L-Shaped Cinder Block Garden Designs

    Looking to boost your garden game with some L-shaped cinder block designs? Trust me, I’ve been there, staring at my sad little patch of dirt, wishing for a miracle.

    Picture this: My first attempt at an L-Shaped Raised Bed, about 4×8 feet, ended up more like a “raised disaster.” But hey, it forced me to get creative!

    The Stepped Garden Terrace I later built? Let’s just say my neighbors were so impressed they almost forgot about that time I accidentally painted my fence neon green.

    I’ve also dabbled in Modular Planter Walls—super adaptable! And if you need a place to chill, concrete benches and a fire pit make a cozy hangout spot. They’re like the icing on the garden cake!

    Each design has its vibe, and I love finding inspiration everywhere. Have you ever dived into a project that turned into a hilarious adventure?

    The Day I Embraced Chaos in My Garden Design

    One summer, I decided to tackle a garden redesign using cinder blocks. Armed with ambition and questionable skills, I created a quirky L-shaped raised bed. Took a few days—okay, a week—to get it right, but the growth was unbelievable!

    I added herbs, veggies, even pretty flowers. Gotta love that combo! As I watched my greens thrive, I felt like some kind of garden wizard. It’s interesting how design can wield such power over our moods. Who knew cinder blocks could bring such joy?

    I’ve learned that garden design ties in with eco-friendliness, creativity, and functionality. Can’t wait to dig into my next epic project!

    Quick Takeaways

    • L-Shaped raised beds provide ample growing space while utilizing durable cinder blocks for good drainage and warmth, ideal for a variety of plants.
    • Using L-shaped borders enhances garden design by maximizing space and supporting plant roots, perfect for ornamental plants like lavender and daylilies.
    • Stepped garden terraces created with L-shaped cinder blocks offer improved drainage and visual interest, suitable for incorporating a mix of flowers and herbs.
    • Modular planter walls made from L-shaped cinder blocks are versatile and can be adapted to different outdoor spaces while ensuring excellent drainage and aeration.
    • Companion planting strategies can be applied in L-shaped gardens to optimize growth, enhance pest resistance, and achieve healthier ecosystems through strategic plant placement.

    L-Shaped Raised Bed

    stylish spacious durable garden

    The L-shaped raised bed offers ample growing space while adding a stylish touch to your garden. Typically measuring 4×8 feet or larger, this bed can accommodate a wide variety of plants, such as vegetables, herbs, and flowers.

    Constructed from durable cinder blocks, it’s easy to assemble on any level area, providing good drainage and warmth for plants. The unique design encourages creative layouts, allowing for staggered planting arrangements tailored to your preferences. Additionally, incorporating no-dig methods in your garden can enhance soil health and reduce maintenance efforts.

    How to Choose Plants for Your L-Shaped Bed

    Selecting plants for an L-shaped raised bed can enhance your garden’s appeal. Consider these options:

    • Tomatoes
    • Basil
    • Zucchini
    • Marigolds
    • Lettuce

    Designing Your L-Shaped Raised Bed

    To effectively design your L-shaped raised bed, follow these tips:

    • Plan your layout: Use companion planting strategies to maximize growth.
    • Space plants adequately: Guarantee tall plants don’t shade short ones, e.g., place tomatoes at the back.
    • Layer your plants: Arrange them from tall to short or mix height for visual interest.

    Pro Tips: Use a garden planner to visualize plant placement beforehand!

    Seasonal Care and Maintenance

    Regularly water, fertilize, prune, and check for pests during each growing season to maintain health and productivity.

    Exploring Cinder Block Gardening Benefits

    Cinder block gardening not only provides unique aesthetics but also promotes effective soil temperature management, pest control, and ease of access, especially for those with mobility issues.

    L-Shaped Garden Border/Edge

    durable l shaped garden border

    An L-shaped garden border is a versatile planting bed that enhances garden design while maximizing space. Typically, this bed sizes up to 4 feet long on each leg and can accommodate various plants, including perennials, annuals, or shrubs.

    Constructed using durable cinder blocks, it creates a sturdy edge that delineates your garden while providing insulation and support for plant roots. The layout can be arranged along walkways or next to fences, giving gardens an organized look while allowing easy access for maintenance. The cinder block material provides not only durability but also an attractive aesthetic that blends well with natural landscapes.

    Selecting Plants for Your L-Shaped Bed

    When choosing plants, consider the sun exposure and soil quality of your garden bed. Here are some excellent plant choices:

    • Lavender
    • Hostas
    • Sedum
    • Marigolds
    • Daylilies

    Designing Your L-Shaped Planting Bed

    To plan your L-shaped border, start with the following steps:

    • Assess sunlight and drainage.
    • Select a variety of heights for visual interest.
    • Space taller plants at the back or center and shorter ones at the front.

    Pro Tip: Use a staggered pattern to create a lush, layered effect when planting.

    Seasonal Care and Maintenance

    Regularly water, fertilize, prune, and monitor for pests to keep your L-shaped bed healthy throughout the year.

    Exploring Garden Edging Materials

    Beyond cinder blocks, consider other edging materials such as wood, metal, or stone to add character and contrast to your garden layout, enhancing its overall aesthetic appeal.

    Stepped Garden Terrace

    tiered outdoor planting area

    Stepped Garden Terrace

    A Stepped Garden Terrace is an eye-catching design featuring a series of raised planting beds, often made from sturdy L-shaped cinder blocks. Typically arranged in ascending levels, these terraces maximize planting space, create visual interest, and improve drainage. Incorporating materials like straw bale gardening can further enhance this setup by providing additional growing mediums.

    Constructing this garden involves stacking cinder blocks, filling them with quality soil, and planting according to light and space requirements. Ideal plant choices may include herbs, succulents, or vibrant perennials, arranged for aesthetic appeal and functionality.

    How to Select Plants for this Bed

    Choosing plants for your stepped terrace should take into account sunlight, texture, and color. Consider integrating these plants:

    • Lavender
    • Marigolds
    • Succulents
    • Basil
    • Shasta daisies

    How to Design a Stepped Garden Terrace

    To design your stepped garden:

    • Sketch a layout to visualize levels and plant placement.
    • Use the tallest plants on the upper tiers, descending to shorter plants below.
    • Space plants according to their mature width to allow for air circulation.
    • Pro Tip: Group plants with similar watering needs for easier maintenance.

    Seasonal Care and Maintenance for this Bed

    Regularly water, fertilize, prune, and control pests as needed to keep your terrace thriving throughout the seasons.

    Benefits of Vertical Gardening

    Vertical gardening is an excellent technique for maximizing space, especially in urban environments, allowing more plants in smaller areas while also improving air circulation and reducing pest problems.

    Modular Planter Walls

    versatile l shaped planter walls

    Modular planter walls made from L-shaped cinder blocks create striking, functional garden beds. Typically measuring 2-3 feet high, these structures can adapt to any outdoor space’s size and shape.

    Modular planter walls crafted from L-shaped cinder blocks offer versatile and eye-catching garden beds for any outdoor space.

    The cinder blocks can be arranged in various configurations to form raised beds that offer excellent drainage and aeration for plants. They’re durable, affordable, and can be painted or adorned for aesthetic appeal.

    Constructed by stacking cinder blocks, the beds can be filled with nutrient-rich soil and topped with mulch to retain moisture. Ideal plants for these beds include herbs, succulents, or vibrant perennials.

    Choosing the Right Plants for Modular Planters

    Selecting plants for your modular planter wall involves evaluating sun exposure, maintenance level, and growth habits.

    Recommended options are:

    • Basil
    • Lavender
    • Sedum
    • Marigolds
    • Snapdragons

    Designing Your Modular Planter Walls

    Designing your planting bed involves thoughtful spacing and arrangement.

    Here are some tips to keep in mind:

    • Plan your layout on paper before construction.
    • Use taller plants at the back and shorter in front for visibility.
    • Space plants according to their mature size for best growth.
    • Examine complementary colors and textures for a visually appealing display.

    Seasonal Care and Maintenance of Your Garden Bed

    Maintain your planter walls year-round by implementing regular watering, fertilizing in the growing season, prudent pruning, and effective pest control measures.

    Exploring Alternative Gardening Techniques

    Think about companion planting in your modular planter beds, where specific plants are grown together for mutual benefits, enhancing growth while minimizing pests and diseases.

    This method can maximize space and create a healthier ecosystem in your garden.

    Spiral Herb Garden

    spiral design herb garden

    A spiral herb garden is a unique and visually appealing planting bed designed to optimize space while providing easy access to a range of herbs.

    Typically, this garden can be constructed using cinder blocks for structure, creating a height variation of around 3-4 feet. The spiral design allows for different microclimates, making it suitable for diverse herbs like basil, thyme, and mint.

    Selecting Plants for a Spiral Herb Garden

    When choosing plants, consider their growth habits, sunlight requirements, and companion planting.

    Here are some suggestions:

    • Basil
    • Cilantro
    • Oregano
    • Chives
    • Sage
    • Parsley

    Designing Your Spiral Herb Garden

    To plan your spiral garden, sketch your layout to visualize the arrangement.

    Tips include:

    • Start with larger herbs at the bottom and herbs that require less sun towards the top.
    • Space plants 6-12 inches apart for growth and airflow.
    • Map out watering paths for efficiency.

    Seasonal Care and Maintenance

    Ensure consistent watering, apply organic fertilizers as needed, prune for healthy growth, and monitor for pests throughout the year.

    Exploring Additional Garden Designs

    Consider creating a companion planting bed, which uses the principles of mutual support among plants to enhance growth and repel pests.

    This technique can complement your spiral herb garden beautifully, allowing for a diverse ecosystem right in your backyard.

    Fire Pit Seating Arrangement

    l shaped cinder block garden

    The L-shaped cinder block garden design serves as an innovative and durable planting bed solution, typically measuring 6-8 feet on each side. Constructed using sturdy cinder blocks, this layout provides an appealing structured look while maximizing space and promoting efficient drainage.

    Ideal for both small and larger gardens, it can feature an assortment of flowers, herbs, or vegetables, depending on your preference. To construct, clear the area, lay cinder blocks in an L-shape, and fill the interior with quality soil, leaving space for the selected plants.

    How to Select Plants for Your Bed

    When choosing plants for your L-shaped bed, consider height, color, and growing conditions. Suggested plants include:

    • Marigolds (for color and pest deterrence)
    • Basil (for culinary use)
    • Petunias (for flowering aesthetics)
    • Cherry tomatoes (space-efficient vegetable)

    Designing Your L-Shaped Planting Bed

    Planning your planting bed involves mapping out dimensions and determining sun exposure. Here are some design tips:

    • Arrange taller plants like tomatoes at the back for maximum sunlight.
    • Space plants 6-12 inches apart based on their mature size.
    • Utilize mixed heights for visual interest; group same species for cohesion.

    Seasonal Care and Maintenance Tips

    Consistent care involves watering, fertilizing, pruning, and monitoring for pests throughout the year to guarantee plant health and productivity.

    Unique Uses for Cinder Blocks in Gardening

    Cinder blocks can also be creatively utilized for vertical gardening. Stack blocks to create elevated plant shelves, allowing you to grow herbs or succulents in an eye-catching, space-efficient manner while enhancing your garden’s aesthetics.

    Concrete L-Shaped Benches

    modern functional garden seating

    Concrete L-shaped benches add a modern touch to garden spaces while providing functional seating. Typically constructed from sturdy cinder blocks, these benches can range in size—often measuring 6-8 feet in length and 2-3 feet in height.

    Arrange the benches to form an inviting corner, seamlessly blending with planting beds. Fill the surrounding area with a mix of perennial flowers, herbs, and shrubs, creating a lively atmosphere. For construction, stack blocks securely with a strong adhesive, ensuring stability and comfort.

    Selecting Plants for L-Shaped Benches

    When selecting plants for an L-shaped bench bed, consider low-maintenance varieties that thrive in your climate. Here are some recommendations:

    • Lavender
    • Sedum
    • Ornamental grasses
    • Marigolds
    • Pansies

    Designing Your L-Shaped Planting Bed

    To design a harmonious planting bed around your bench, follow these tips:

    • Choose a focal point: Use taller plants, like ornamental grasses, in the back.
    • Create layers: Arrange mid-height and low-lying plants in succession.
    • Spacing: Space each plant according to its size; generally, 12-18 inches apart is ideal.
    • Pro tip: Plant in odd numbers (3, 5) for a more natural look.

    Seasonal Care and Maintenance

    Ensure your planting bed is well-watered, fertilized, pruned, and periodically checked for pests throughout the year.

    Outdoor Seating Areas: A Garden’s Best Friend

    In addition to using concrete benches, consider enhancing your garden with lightweight furniture. Pieces made from wicker or metal can create cozy sitting areas, perfect for enjoying your vibrant garden blooms and providing diverse seating arrangements for family and friends.

    Painted or Natural Finish

    cinder block garden beds

    L-shaped cinder block garden beds provide a striking and functional planting space. Typically, they measure 4-6 feet on each side, ideal for small to medium gardens. The layout often includes a corner that creates a cozy nook for various plants.

    You can paint the blocks for a pop of color, or leave them with a natural finish for a rustic look. To construct, stack the cinder blocks in an L formation, filling them with nutrient-rich soil. Choose sun-loving plants like tomatoes, herbs, and colorful flowers to bring the bed to life.

    Selecting Plants for L-Shaped Beds

    • Herbs: Basil, parsley, and mint
    • Vegetables: Peppers, scallions, and carrots
    • Flowers: Marigolds, petunias, and sunflowers

    Designing Your L-Shaped Planting Bed

    1. Plan Ahead: Draft a sketch of your garden bed layout.
    2. Choosing Heights: Place taller plants at the back or center and shorter ones at the edges.
    3. Spacing: Verify adequate space between plants (12-18 inches apart) for airflow.
    4. Pro Tip: Consider companion planting to maximize growth and deter pests.

    Seasonal Care and Maintenance

    Regularly water, fertilize with organic compost, prune as needed, and monitor for pests throughout the year.

    Unconventional Uses for Cinder Block Gardens

    In addition to traditional plantings, cinder blocks can serve as creative seating, storage, or even a unique outdoor fire pit.

    Consider using the hollow sections to house decorative stones or small succulents, enhancing both aesthetics and functionality!

    Use of Hollow Cores

    hollow core cinder block gardens

    L-shaped cinder block garden beds are an innovative and practical way to create a versatile planting space. They typically measure 4×8 feet, can be adjusted according to your available space, and provide excellent stability.

    Using hollow cores, these blocks can house soil and plants while offering unique design aesthetics. Constructed by stacking cinder blocks to form an L-shape, this bed is ideal for growing a variety of plants, from vibrant flowers to hearty vegetables. Common materials include soil amendments, such as compost, for healthy growth.

    Selecting Ideal Plants for Your Bed

    When selecting plants for your L-shaped cinder block garden bed, consider the following:

    • Sunlight Requirements: Verify chosen plants thrive in the light conditions available.
    • Water Needs: Select plants with similar irrigation needs to simplify care.

    Suggested plants include:

    • Marigolds
    • Basil
    • Tomatoes
    • Lavender
    • Lettuce

    Designing Your L-Shaped Garden Bed

    To design a stunning L-shaped garden bed, follow these tips:

    1. Plan Your Layout: Sketch your design to visualize plant placements.
    2. Consider Plant Heights: Arrange taller plants at the back and shorter ones in front for visibility.
    3. Proper Spacing: Allow 12-18 inches between plants for airflow.
    4. Design Themes: Consider color schemes or plant types for unified aesthetics.

    Pro Tip: Utilize companion planting to improve growth and pest resistance.

    Seasonal Care and Maintenance

    Regularly water, fertilize, prune, and monitor for pests throughout the growing season for ideal plant health.

    Understanding Soil Quality in Raised Beds

    Good soil quality is essential for successfully growing plants in raised beds. Aim for a balanced mix of topsoil, compost, and organic matter to enhance drainage and nutrient availability, fostering a thriving garden environment.

    FAQ

    What Plants Grow Best in L-Shaped Cinder Block Gardens?

    I’ve found that herb combinations like basil, parsley, and chives flourish beautifully in L-shaped cinder block gardens. Plus, vertical gardening techniques make it easy to maximize space while creating a vibrant, liberating green oasis.

    How Do I Maintain Cinder Block Garden Structures?

    I maintain my cinder block garden structures by regularly checking for cracks and weeds, sealing any damages, and ensuring proper drainage. This cinder block maintenance greatly enhances my garden’s longevity, helping me enjoy my space longer.

    Are Cinder Blocks Environmentally Friendly for Gardening?

    Cinder blocks are like sturdy allies in my garden. They’re durable and can be recycled, which aligns with sustainability practices. Choosing them as gardening materials enhances my eco-friendly efforts while fostering a thriving green space.

    Can I Build an L-Shaped Garden on Uneven Ground?

    I’ve built L-shaped constructions on uneven terrain before. Just guarantee you level the base where the blocks sit. It creates a solid foundation, allowing your garden to flourish despite the challenges of the ground.

    What Are the Costs Associated With Cinder Block Garden Designs?

    Cinder block garden designs can vary widely in cost. I find doing a cost comparison of DIY materials helps; blocks, soil, and plants can add up but are manageable with some planning and creativity.

    Summary

    Creating an L-shaped garden has been a game-changer for my outdoor space. Using cinder blocks gives it a unique charm, while the colorful plants and structured beds come together beautifully. It truly feels like a peaceful retreat where I can unwind and get inspired.

    I’d love to hear about your experiences with L-shaped gardens! What design ideas have worked for you?

    Share your own garden photos and tell me about your design process. I’m excited to see your creative spaces!

    References

  • Sunken Brick Border Cottage Gardens

    Sunken Brick Border Cottage Gardens

    Ever dreamed of a garden that screams “I have my life together” without the actual maintenance? Sunken brick borders might be your jam.

    I’ve become obsessed with these 2-6 foot planting beds that sit 12-18 inches deep. The brick edges aren’t just pretty—they’re functional lifesavers for drainage. Trust me, I learned this after drowning half my plants last year.

    My Echinacea and Delphiniums are finally thriving after I switched to this setup.

    The best part? Playing with multicolored bricks like some kind of adult LEGO session. Who knew garden design could be therapeutic AND slightly addictive?

    Not perfect yet, but honestly, when is gardening ever?

    My Embarrassing Brick Border Disaster That Actually Worked Out

    Last summer, I hosted a garden party that almost became a catastrophe. I’d installed my sunken brick border just days before, using salvaged Victorian bricks from my grandmother’s old property. As guests arrived, my neighbor’s dog crashed through, sending bricks tumbling and exposing my hasty installation work.

    Instead of ruining the evening, it became a group project. Friends grabbed trowels, wine glasses still in hand, rearranging the border into something far more artistic than my original design.

    The “accidental layout” created natural planting zones I’d never considered—shade-loving ferns nestled against sun-worshipping lavender with perfect transition areas. Sometimes your worst gardening moments become your most inspired designs. That border’s still standing, dog-proof now, and full of happy memories alongside the blooms.

    Quick Takeaways

    • Sunken brick border gardens feature structured raised beds made from sunken bricks, promoting both visual appeal and excellent drainage.
    • Ideal plant selections include perennials, annuals, herbs, and foliage plants that thrive in your local climate for a vibrant garden.
    • Effective design involves planning, grouping plants in odd numbers, and creating layers with taller plants at the back.
    • Regular maintenance such as watering, fertilizing, and pest management is essential for the health of sunken brick gardens.
    • Enhance the garden with pathways, decorative elements, and whimsical touches to create a charming and functional outdoor space.

    The Charm of Sunken Brick Borders in Cottage Gardens

    charming sunken brick gardens

    Sunken brick border cottage gardens embody an enchanting aesthetic, offering a plentiful planting bed that can vary in size and arrangement. Typically constructed by digging a shallow trench and laying down aged bricks, the result is a charming, rustic appearance. This design allows for easy access to nurturing plants, while the bricks maintain the soil’s structure. Ideal plants include perennial flowers, herbs, and vibrant seasonal blooms, while materials like rich compost and mulch enhance soil quality and moisture retention. The use of rustic reclaimed bricks adds a unique character to your garden, creating an inviting atmosphere.

    Sunken brick border cottage gardens create a rustic charm, providing ample space for diverse and vibrant plantings.

    Selecting Plants for Sunken Brick Beds

    When selecting plants, consider color, height, and blooming periods. Here are some suggestions:

    • Lavender
    • Echinacea (Coneflower)
    • Rudbeckia (Black-eyed Susan)
    • Salvia
    • Snapdragons

    Designing and Planning Your Planting Bed

    To create a beautiful planting bed, follow these tips:

    1. Plan for Height Variation: Place taller plants, like sunflowers, at the back.
    2. Use Focal Points: Incorporate unique plants, such as ornamental grasses.
    3. Space Plants Properly: Allow 12-24 inches between mature plants for proper airflow.
    4. Layer Your Plants: Combine groundcovers with taller perennials for depth.

    Pro tip: Sketch a design before planting to visualize spacing and plant combinations.

    Seasonal Care and Maintenance

    Throughout the year, guarantee proper watering, fertilizing, pruning, and pest control to keep your sunken brick border flourishing.

    Exploring Other Garden Styles

    Cottage gardens can also blend beautifully with tropical and Mediterranean designs. Incorporating palms, succulents, or vibrant tiles can create stunning contrasts while enriching the overall setting’s diversity.

    Essential Materials for Creating Brick Edges

    charming sunken brick borders

    Sunken brick border cottage gardens are characterized by their low-profile beds framed with bricks, creating a charming yet functional area for plants. Typically ranging from 4 to 6 feet wide, these beds can be arranged in a rectangular or oval layout, lending an inviting look to your garden.

    Constructed by digging out the soil to create a sunken effect, bricks are laid flat or at an angle, enhancing drainage and aesthetics. Ideal plants include perennials like lavender, daisies, and daisies, which thrive in these defined spaces while allowing for excellent airflow. Incorporating natural stone edges can also enhance the beauty and structure of your garden beds.

    Selecting Plants for Sunken Brick Beds

    When selecting plants for your sunken brick garden, consider these options:

    • Delphiniums
    • Hellebores
    • Speedwell
    • Salvias

    Designing Your Sunken Brick Planting Bed

    To design your planting bed effectively:

    1. Start with a clear plan: sketch the layout.
    2. Arrange taller plants at the back and shorter upfront.
    3. Space plants adequately for growth; generally, 12-18 inches apart is ideal.
    4. Utilize varying bloom times for continuous color.

    Pro Tip: Group plants in odd numbers for a more natural look.

    Seasonal Care and Maintenance

    Year-round maintenance of your sunken brick bed includes consistent watering, regular fertilizing, timely pruning, and vigilant pest control.

    Additional Garden Features for Cottage Gardens

    Incorporating pathways of gravel or stepping stones can lead visitors through your sunken brick borders, enhancing both accessibility and the serene atmosphere of your cottage garden.

    Add whimsical touches like birdhouses or rustic fences to enrich the overall aesthetic.

    Installation Process for Sunken Brick Borders

    sunken brick border installation

    Sunken Brick Border Cottage Gardens

    Sunken brick border cottage gardens elegantly combine rustic charm with structured design, creating vibrant and visually appealing planting beds.

    Sunken brick border cottage gardens are enchanting planting beds that blend rustic charm with structured elegance. Typically ranging from 2 to 4 feet wide and surrounded by a modest brick wall, these beds create a distinct framework for diverse plants. Constructed with durable bricks or pavers, they can accommodate various arrangements of colorful flowers, herbs, or vegetables, enhancing visual appeal and ensuring good drainage.

    Selecting the Right Plants for Your Garden

    When choosing plants for your sunken brick border, consider the following:

    • Perennials: Echinacea, Lavender, and Daylilies.
    • Annuals: Petunias, Zinnias, and Marigolds.
    • Herbs: Basil, Thyme, and Chives.
    • Foliage plants: Hostas and Ferns.

    Designing Your Planting Bed Effectively

    To design your sunken brick border, consider these tips:

    • Choose a focal point plant.
    • Layer plants by height: taller plants in the back, shorter in the front.
    • Space plants according to their mature size.
    • Use organic shapes for a natural look.

    Pro tip: Group plants in odd numbers for a more dynamic impact!

    Seasonal Care and Maintenance Tips

    Regularly water, fertilize, prune, and manage pests to keep your cottage garden thriving throughout the year.

    Exploring Other Garden Features

    Incorporate decorative elements such as trellises, birdbaths, or garden sculptures to enhance your sunken brick border, creating a serene outdoor retreat. Additionally, utilizing minimalist water-wise design techniques can further optimize your garden’s sustainability and resilience.

    Designing Curved Borders for a Flowing Aesthetic

    sunken brick border design

    Creating a sunken brick border planting bed enhances your garden’s aesthetics by creating a flowing, harmonious design.

    Typically 3 to 5 feet wide and extending in gentle curves, this garden feature combines practicality with beauty.

    Use durable materials like reclaimed bricks or capstones to form this inviting edge, ensuring to level the ground beneath. Fill with a mixture of quality topsoil and organic compost to promote healthy plant growth.

    Selecting the Right Plants

    When selecting plants for your sunken brick border, opt for varieties that complement each other in height, color, and texture.

    Consider:

    • Lavender
    • Sedum varieties
    • Daylilies
    • Coreopsis
    • Ornamental grasses
    • Foxglove

    Designing Your Curved Planting Bed

    To design the perfect curved bed, follow these tips:

    • Mark your desired shape with a garden hose.
    • Choose plants with varying heights for visual interest, placing taller plants toward the back or center.
    • Aim for a balanced color palette.

    Pro tip: Space perennials about 12-18 inches apart for air circulation and growth.

    Seasonal Care and Maintenance

    Regularly water, fertilize in early spring, prune dead foliage, and monitor for pests throughout the year to keep your bed thriving.

    Exploring Other Garden Layouts

    Consider adding vertical elements to your garden like trellises or arbors. These features not only maximize space but also add dimension and focus points, creating a more dynamic garden experience.

    Choosing the Right Brick Types for Your Garden

    rustic sunken brick borders

    Sunken brick border cottage gardens feature a charming layout with a raised planting bed surrounded by sunken bricks, creating an inviting border. Typically, these beds are 12-18 inches high and can vary in size based on your garden area. The bricks add a rustic look and help retain moisture. Common materials include clay or crushed bricks for added drainage, while plants like roses, lavender, and geraniums fill the space, arranged in layers for visual interest.

    Sunken brick border cottage gardens create charming raised beds, combining rustic appeal with moisture retention for vibrant plant arrangements.

    Selecting Plants for Sunken Beds

    When selecting plants for your sunken brick borders, consider these factors:

    • Sun and shade tolerance
    • Soil type and drainage
    • Color harmonies

    Suggestions:

    • Marigolds
    • Foxglove
    • Salvia
    • Echinacea
    • Hostas

    Designing Your Sunken Brick Garden Bed

    To design your sunken brick border, follow these tips:

    • Choose a focal point plant as a centerpiece.
    • Use odd numbers for groupings for appealing aesthetics.
    • Space larger plants (24-36 inches apart) at the back and smaller ones (12-18 inches apart) in the front.
    • Incorporate pathways for easy access.

    Pro Tip: Use companion planting to maximize growth and pest resistance.

    Seasonal Maintenance of Your Brick Border Garden

    Throughout the year, regularly water, fertilize, prune, and manage pests to maintain a vibrant sunken brick garden.

    Consider incorporating trellises or arbors in your garden design. They offer vertical interest and are perfect for climbing plants like clematis or sweet peas, enhancing the overall beauty of your cottage garden.

    Enhancing Planting Areas With Spiral Herb Gardens

    spiral herb garden design

    Spiral herb gardens are a vertical planting design that maximizes space while providing an attractive focal point. Typically constructed in a circular or spiral shape, these beds can range from 3 to 6 feet in height and 4 to 5 feet in diameter.

    Using materials such as brick, stone, or timber, you create walls that retain soil while allowing for various planting zones. The layout promotes excellent drainage and sun exposure, ideal for herbs. Popular plants include basil, rosemary, thyme, and mint, chosen for their adaptability and culinary usefulness.

    How to Select Plants for a Spiral Herb Garden

    When choosing plants, consider size, growth habits, and culinary uses. Great options include:

    • Basil
    • Chives
    • Oregano
    • Lemon Balm
    • Sage

    Designing a Spiral Herb Garden

    To create an appealing spiral herb garden, follow these tips:

    • Plan the spiral design in a sunny location.
    • Space plants based on growth habits: smaller herbs at the top, larger ones at the base.
    • Use a mix of perennial and annual herbs for continuous growth.
    • Pro Tip: Place taller plants on the outer edges to maintain visibility.

    Seasonal Care and Maintenance

    Regularly water, fertilize with a balanced organic mix, prune to encourage growth, and implement integrated pest management for a flourishing spiral garden throughout the year.

    Exploring Companion Planting Benefits

    Companion planting enhances growth and pest resistance, making it a worthwhile strategy for your herb garden. Pair herbs with compatible vegetables, like planting basil with tomatoes to improve flavor and deter pests naturally.

    Visual Depth: How Sunken Borders Transform Your Space

    sunken brick border gardens

    Sunken brick border cottage gardens are a charming and visually appealing planting bed type. This design features a recessed area surrounded by brick borders, providing visual depth and a defined structure.

    Typically measuring 4-6 feet wide, these beds can be arranged in various shapes: circular, oval, or irregular. The overall look is lush and inviting, often filled with diverse flower species, herbs, and perennials, alongside rich, organic materials such as compost and mulch.

    Construction involves digging a shallow bed, laying a brick border (ensuring proper drainage), and filling it with a nutrient-rich soil mix.

    Selecting Plants for Sunken Cottage Gardens

    Choose plants that thrive in your climate and complement the cottage aesthetic. Consider the following options:

    • Lavender
    • Coneflower
    • Black-eyed Susan
    • Delphinium
    • Foxglove
    • Hostas
    • Thyme

    Designing a Sunken Brick Border Bed

    Plan your sunken garden by following these tips:

    • Select a sunny spot that gets 6-8 hours of light.
    • Layer plants by height to create depth (tall in back, short in front).
    • Space plants according to their mature size to avoid overcrowding.
    • Pro Tip: Incorporate annuals for seasonal bursts of color and change.

    Seasonal Care for Sunken Gardens

    Maintain your sunken garden by ensuring consistent watering, applying fertilizer every season, pruning established plants, and monitoring for pests year-round.

    The Benefits of Companion Planting

    Companion planting is an excellent way to improve your sunken garden’s health. By pairing compatible plants, you can enhance growth, deter pests, and attract beneficial insects, resulting in a thriving ecosystem that supports your cottage garden’s beauty and productivity.

    Long-Term Benefits of Brick Edging in Cottage Gardens

    charming sunken brick borders

    Sunken brick border cottage gardens create a charming and defined planting bed, typically measuring 3-4 feet wide.

    Arranged in a circular or rectangular layout, these borders give gardens a quaint, vintage appeal. Constructed using weather-resistant bricks, the edges are sunk into the ground for stability and a clean look, allowing plants to spill over the sides naturally. The soil within is enriched for ideal growth, perfect for a variety of plants including colorful perennials, fragrant herbs, and lush annuals.

    Selecting Plants for Your Cottage Garden

    When selecting plants for your sunken brick border, take into account varieties that thrive in your climate and complement each other visually.

    Recommended plants include:

    • Lavender
    • Peonies
    • Foxglove
    • Salvia
    • Daylilies
    • Creeping Thyme

    Designing Your Cottage Garden Bed

    To design your planting bed, start by sketching a layout that highlights plant combinations.

    Follow these tips:

    • Group plants by height; taller plants like foxglove in the back, shorter like creeping thyme in the front.
    • Space plants according to their mature size to prevent overcrowding.
    • Use pathways for accessibility between plants.

    Pro Tips: Use repetition of certain plants to create continuity and balance.

    Seasonal Care and Maintenance

    Regularly water, fertilize, prune, and manage pests throughout the seasons to maintain a healthy, vibrant garden.

    Alternative Garden Borders to Explore

    For a unique twist, explore alternative border materials like natural stone or wood, adding differing textures and colors to your garden design while maintaining a rustic charm.

    Integrating Multicolored Bricks for Personalized Touches

    sunken multicolored brick gardens

    Sunken brick border cottage gardens feature a charming aesthetic that integrates multicolored bricks with lush plants. Typically, these beds range from 4 to 8 feet in diameter, arranged in a circular or oval layout to create a cozy focal point. Constructed using natural clay bricks, the planting area is sunken about 6 inches below the surrounding ground, allowing for better drainage and plant visibility.

    Sunken brick border cottage gardens blend vibrant bricks with lush plants, creating charming, cozy focal points.

    You can include perennials, annuals, and even ornamental grasses to create a vibrant tapestry of colors and textures.

    Selecting Plants for Sunken Brick Beds

    Opt for plants that complement the cottage style and thrive in your local climate. Consider these options:

    • Lavender (Lavandula)
    • Echinacea (Coneflower)
    • Gaillardia (Blanket Flower)
    • Salvia (Sage)
    • Coreopsis (Tickseed)

    Designing a Stunning Planting Bed

    For effective design and planning:

    • Choose a central focal plant, surrounded by smaller companions.
    • Aim for a color scheme: consider pastel hues for a softer look or vibrant tones for a lively display.
    • Space taller plants towards the back (or center), and shorter ones in front.

    Pro Tips:

    • Use odd numbers of plants for more visual interest.
    • Group plants with similar care needs together.

    Seasonal Care and Maintenance

    Regularly water, fertilize, prune, and monitor for pests throughout the year for prime plant health and aesthetics.

    Exploring Cottage Garden History

    Cottage gardens emerged in the 16th century, reflecting personal style and practicality.

    They often include edibles, emphasizing sustainable gardening practices alongside beautiful blooms.

    Embrace this tradition while creating your own sunken brick garden!

    Exploring Influences From English and Mediterranean Traditions

    cottage garden brick borders

    Sunken brick border cottage gardens feature a charming, rustic layout with a defined planting bed, typically 3-5 feet wide, surrounded by low, sunken brick borders. These flower beds showcase a mix of English and Mediterranean plant species, arranged in an informal, layered style for visual appeal.

    Using reclaimed bricks, you can easily construct the border by digging a shallow trench, laying the bricks, and backfilling with soil. This design encourages drainage while providing a well-defined space for seasonal blooms and perennial favorites.

    Selecting Plants for Your Cottage Garden

    When selecting plants for your sunken brick border, consider these options:

    • Lavender
    • Hollyhocks
    • Delphiniums
    • Salvia
    • Pansies
    • Echinacea (Coneflower)
    • Thyme

    Designing Your Sunken Brick Border Bed

    To design your planting bed, follow these steps:

    1. Choose a sunny location.
    2. Sketch your layout, incorporating an informal arrangement.
    3. Group plants by height—taller species at the back.
    4. Space plants adequately (12-24 inches apart) for airflow.

    Pro Tips:

    • Use a mix of perennial and annual plants for continuous blooms.
    • Incorporate herbs and companion planting for added benefits.

    Seasonal Care and Maintenance Tips

    Throughout the year, maintain your garden with regular watering, bi-annual fertilizing, seasonal pruning, and vigilant pest control.

    Exploring Mediterranean Garden Features

    Mediterranean gardens often emphasize drought-resistant plants and terracotta pots, reflecting a harmonious relationship between nature and architecture.

    FAQ

    How Do Sunken Brick Borders Prevent Erosion?

    Sunken brick borders effectively prevent erosion by employing soil stabilization techniques and drainage management methods. I’ve seen how they create barriers that absorb water, redirecting it away and keeping the soil firmly in place.

    Can I Use Recycled Bricks for My Garden?

    Absolutely, I love using recycled bricks in my garden! They breathe life into my space, weaving a tapestry of sustainability and beauty. Embracing recycled materials elevates my garden aesthetics and liberates my creative spirit.

    What Maintenance Is Required for Brick-Edged Gardens?

    Maintaining brick-edged gardens involves regular seasonal upkeep, like removing debris and weeds. I focus on brick preservation, ensuring they stay intact and vibrant. Trust me, it’s liberating to see your garden thrive year after year!

    Are Sunken Borders Suitable for All Soil Types?

    While working on my garden, I found that sunken borders thrive in well-drained soil. However, heavy clay presents drainage challenges, making soil suitability essential for successful growth. Always consider drainage to open up your garden’s true potential!

    How Do I Remove Weeds From Brick Borders Effectively?

    I tackle weed removal in my brick borders by regularly pulling them out, using a hoe, or applying mulch for that extra barrier. Effective brick maintenance means keeping those pesky weeds at bay, allowing my garden to thrive!

    Summary

    I’ve integrated sunken brick borders into my cottage garden, loving how they accentuate my hostas and lavender while keeping soil in place and weeds at bay. The warm brick tones against lush greens create a captivating natural tapestry in my outdoor space.

    Have you used brick borders in your own garden? I’d love to hear about your experiences with installation challenges or how they’ve enhanced your garden’s appearance over time.

    Share your garden journey with our community! Send pictures of your brick borders or other garden design elements you’re proud of, and tell us about your inspiration and process. What creative solutions have you discovered?

    References

  • What Makes Rustic Brick Garden Rooms Timeless?

    What Makes Rustic Brick Garden Rooms Timeless?

    What Makes Rustic Brick Garden Rooms Timeless?

    Ever fallen in love with a wall? I have, and it wasn’t even good-looking.

    I’m obsessed with rustic brick garden rooms. The way those reclaimed materials practically wink at you with centuries of stories? Priceless.

    Nothing beats the warm, weathered textures that somehow look better with age—unlike my attempts at gardening.

    I’ve found that pairing these sturdy structures with fragrant lavender creates this ridiculous contrast that just works. My juniper bushes add year-round structure when everything else looks dead and depressing.

    Trust me, you haven’t lived until you’ve sipped coffee in a space where nature and architecture are having their own little love affair.

    How My Disastrous Garden Party Revolutionized My Outdoor Design Philosophy

    The rain started precisely three minutes after I proudly unveiled my new brick garden room to twenty overdressed friends. Classic. Water streamed through my hastily constructed pergola, creating what I now affectionately call “The Great Indoor Waterfall of 2019.”

    This catastrophe taught me that authentic garden design requires proper structural planning. I rebuilt with reclaimed Victorian bricks featuring those gorgeous irregularities that modern materials lack. I integrated copper guttering that’s developed this stunning verdigris patina.

    My landscape architect suggested incorporating varying heights—tall Miscanthus grasses against low-growing Thymus serpyllum. The textural contrast is stunning against weathered brick.

    The space now transitions seamlessly between seasons—something I never considered before my soggy canapé disaster.

    Quick Takeaways

    • Rustic brick garden rooms exude charm with their authentic, reclaimed materials that age beautifully and naturally blend with the environment.
    • Their durability ensures longevity, providing a sturdy structure that holds soil and enhances drainage while withstanding weather elements.
    • The warm, rustic vibe creates a cozy atmosphere, inviting relaxation and enjoyment of the surrounding garden landscape.
    • Versatile design options, such as tiered layouts and integrated pathways, enable personalization, maintaining relevance in evolving garden styles.
    • Incorporating sustainable practices, such as rainwater harvesting and organic gardening, aligns with modern eco-friendly values, making them appealing and timeless.

    Material Authenticity and Reclaimed Bricks

    reclaimed brick garden beds

    Rustic brick garden beds combine charm and sustainability, offering a beautiful backdrop for a variety of plants. Typically, these beds vary in size, but a common dimension is 4 feet by 8 feet for small to medium gardens.

    Constructed using reclaimed bricks for authenticity, the arrangement features a rectangular layout with a low-height wall that visually enhances the scenery. This permits good drainage while maintaining soil warmth, essential for plant health. Ideal plants include a mix of perennials and annuals like lavender, black-eyed Susans, and geraniums. Additionally, incorporating water-wise gardening techniques can significantly enhance the efficiency of your garden’s water use.

    Selecting Plants for Rustic Beds

    When choosing plants for your rustic brick garden bed, consider the following:

    • Low-maintenance perennials: Lavender, Hellebores
    • Bright annuals: Marigolds, Petunias
    • Evergreens for year-round interest: Thriving Boxwood, Juniper

    Designing a Rustic Brick Garden Bed

    To design your rustic garden bed, follow these steps:

    • Plan your layout for sun and shade exposure.
    • Select varied heights for visual interest; taller plants in the back and shorter in the front.
    • Space plants appropriately based on their mature size (typically 12-24 inches apart).
    • Pro Tip: Use groupings of 3-5 plants for a natural look.

    Seasonal Care and Maintenance Tips

    Regularly water, fertilize in spring, prune dead foliage in fall, and monitor for pests throughout the year.

    Exploring Sustainable Gardening Techniques

    Consider implementing composting in your garden maintenance strategy to enrich soil quality and support healthy plant growth. This not only benefits your rustic brick beds but also enriches your entire garden ecosystem!

    Aesthetic Harmony With Nature

    charming rustic garden beds

    Rustic brick garden rooms are charming planting beds that seamlessly blend aesthetic harmony with nature. Typically, these beds measure about 4×6 feet and are constructed with reclaimed or new bricks to create a sturdy, inviting border.

    The arrangement often features a mix of perennial flowers, herbs, and low-maintenance shrubs, providing year-round color and texture. Commonly, materials used include organic soil and decorative pebbles to enhance drainage and visual appeal. These beds can also be seamlessly integrated with raised stone borders to further elevate their natural beauty.

    To construct, first lay out the bricks in your desired shape, ensuring proper leveling. Fill the interior with premium soil, and start planting.

    Selecting Plants for Rustic Beds

    Choose plants that complement the rustic aesthetic and thrive in your climate. Consider these favorites:

    • Lavender
    • Echinacea
    • Sedum
    • Salvia
    • Heuchera

    Designing Rustic Garden Beds

    To design your rustic brick garden bed, keep these tips in mind:

    • Choose a focal point: Position taller plants at the back or center.
    • Vary heights: Mix tall, medium, and low-growing plants.
    • Space wisely: Provide adequate space (12-18 inches) between plants to allow for growth.

    Pro tip: Use complementary colors and textured foliage to create visual interest.

    Seasonal Care and Maintenance Tips

    Regularly water your plants, apply organic fertilizer during the growing season, prune dead or overgrown branches, and monitor for pests, ensuring a thriving garden year-round.

    Expanding Your Garden Aesthetic

    Consider incorporating rustic paths made from gravel or recycled wood to enhance the charm of your garden room.

    These pathways not only add character but also offer functional access to different sections of your garden, providing an inviting and cohesive outdoor experience.

    Versatile Design Integrations

    rustic brick garden beds

    Rustic brick garden rooms are cozy planting beds crafted from reclaimed or new bricks, typically ranging from 3 to 6 feet in height and 4 to 10 feet in length.

    Their natural, weathered finish blends beautifully with outdoor settings. A circular or rectangular layout enhances their aesthetic, providing an inviting focal point within your garden.

    Materials include bricks, mortar, soil, and a variety of plants like herbs, flowers, and small shrubs. Constructing these beds involves stacking bricks in desired shapes, ensuring a level base for proper drainage. Incorporating modern landscape lighting techniques can further enhance the nighttime ambiance of your rustic garden space.

    How to Choose Plants for Your Garden Bed

    Selecting the right plants for a rustic brick planting bed involves color harmony and growth compatibility.

    Consider including:

    • Lavender
    • Geraniums
    • Ornamental grasses
    • Thyme
    • Begonias

    Tips for Designing Your Rustic Planting Bed

    To design an engaging planting bed, follow these tips for arrangement and spacing:

    1. Choose a focal plant for height.
    2. Mix textures by combining foliage types.
    3. Space plants based on mature size (12-24 inches apart).
    4. Consider seasonal blooms for ongoing color.

    Pro tip: Use varying heights to create depth and interest, stacking shorter plants at the front and taller ones towards the back.

    Seasonal Care for Your Planting Bed

    Maintain your rustic brick bed year-round by ensuring consistent watering, applying organic fertilizers, pruning to encourage growth, and using natural pest control methods.

    Exploring Sustainable Gardening Techniques

    Incorporating sustainable gardening techniques, like composting and rainwater harvesting, can enhance the health of your rustic brick garden bed while promoting eco-friendly practices.

    Classic Cottage Garden Features

    rustic brick planting beds

    Rustic brick garden planting beds offer a charming, classic cottage aesthetic. Typically sized 4×8 feet, these beds have a rectangular arrangement and are composed of weathered bricks, lending a natural look to garden spaces.

    When constructed, the bricks are laid in a staggered pattern, providing excellent drainage and structure. Ideal for vibrant perennials, fragrant herbs, and colorful annuals, these beds can include sunflowers, lavender, and marigolds, which thrive in rich, well-draining soil.

    Selecting Plants for Your Brick Garden Bed

    Choosing plants for your rustic brick garden bed is essential for aesthetics and growth. Consider the following plants for a delightful display:

    • Echinacea (Coneflower)
    • Digitalis (Foxglove)
    • Salvia (Sage)
    • Helleborus (Lenten Rose)
    • Acanthus (Bear’s Breeches)

    Designing Your Rustic Garden Planting Bed

    To design a charming rustic brick bed, start by sketching the layout, prioritizing structure and sunshine exposure.

    Tips for planning the bed include:

    1. Utilize varying heights: taller plants at the back, shorter ones at the front.
    2. Group plants with similar water needs together.
    3. Leave ample space for air circulation.
    4. Use pathways for easy access.

    Pro Tip: Space plants according to their mature size to avoid overcrowding.

    Seasonal Care and Maintenance Tips

    Regularly water, fertilize in spring, prune as necessary, and monitor for pests throughout the growing season.

    Exploring Other Cottage Garden Elements

    Enhance your rustic garden with elements like whimsical paths created from natural stones or recycled wood chips, and consider charming garden accents such as trellises or birdhouses to complement your planting beds.

    Durability and Longevity of Brick Structures

    durable rustic brick planting beds

    Rustic brick planting beds offer both durability and aesthetic charm for your garden. Typically rectangular and ranging in size from 4×4 feet to larger 6×12 feet, these beds are constructed using locally-sourced bricks and can be arranged in various patterns to enhance the overall scenery.

    Rustic brick planting beds combine durability with timeless beauty, making them a charming addition to any garden.

    The sturdy brick walls retain soil and create a warm, rustic vibe. Commonly planted with a variety of perennials and annuals, ideal choices include herbs, colorful flowers, and small shrubs. Proper construction involves a leveled base, mortar to secure bricks, and an interior filled with high-quality soil.

    Selecting Plants for Brick Garden Beds

    When selecting plants for your rustic brick bed, consider the sunlight and drainage levels. Some great options include:

    • Lavender
    • Marigolds
    • Succulents
    • Daylilies
    • Basil

    Designing a Rustic Brick Planting Bed

    To design your rustic brick planting bed, follow these tips:

    • Plan the layout: Start with a sketch of your desired size and shape.
    • Arrangement: Place taller plants at the back and shorter ones in the front for visual balance.
    • Space wisely: Allow enough room between plants for growth—about 12 to 18 inches is recommended.
    • Pro Tip: Use a mix of foliage colors and textures to create interest.

    Seasonal Care for Rustic Garden Beds

    Maintain your brick planting bed by regularly watering, fertilizing every spring, pruning dead stems, and monitoring for pests throughout the year.

    Expanding Your Rustic Garden Theme

    Consider adding rustic elements like wooden trellises or classic birdhouses to enhance the charm of your garden and provide habitat for beneficial wildlife.

    Cultural Resonance in Rustic Architecture

    rustic garden room essentials

    Rustic brick garden rooms blend natural elements with cozy architecture, creating inviting outdoor spaces. Typically, these planting beds are constructed using reclaimed or new bricks, offering durability and a vintage charm. Ideal sizes range from 4×6 to 8×10 feet, depending on available space. The arrangement consists of raised beds to improve drainage and soil health.

    Common materials include organic soil, gravel pathways, and natural stone decor. Popular plants for these beds include herbs, perennials, and shrubs that complement the rustic aesthetic.

    Selecting Plants for Rustic Beds

    Choose plants based on their growth habits and color palettes. Favor native and drought-tolerant species that thrive in local conditions. Suggested plants:

    • Lavender
    • Echinacea
    • Rosemary
    • Rudbeckia
    • Salvia

    Designing Rustic Planting Beds

    When designing a rustic planting bed, consider the following tips:

    • Use a tiered layout for visual interest.
    • Include a mixture of heights and textures.
    • Plant in groups of 3-5 for a natural look.

    Pro tips: Space plants according to their mature size, ensuring good air circulation and growth.

    Seasonal Care for Rustic Beds

    Regular watering, seasonal fertilization, intermittent pruning, and vigilant pest control are essential for maintaining vibrant rustic planting beds throughout the year.

    Benefits of Native Plants in Gardens

    Incorporating native plants into your garden supports local ecosystems, requires less water, and attracts beneficial pollinators, enhancing the overall health and beauty of your rustic spaces.

    Indoor-Outdoor Flow and Natural Light

    charming rustic brick gardens

    Rustic brick garden rooms offer a charming touch to outdoor spaces with their timeless appeal and practicality.

    These planting beds typically measure 3 to 5 feet wide and can be arranged in various layouts, such as rectangular or circular. Constructed from durable, weather-resistant bricks, they create a distinct border, enhancing the overall look of your garden while also providing a functional growing area.

    Fill these beds with a mix of vibrant perennials, herbs, and seasonal flowers to create a lively tapestry of color and scents.

    How to Select Plants for Brick Garden Beds

    Choosing the right plants is essential for a thriving rustic garden bed. Consider sun exposure and soil type.

    Here are some plant suggestions:

    • Lavender (Lavandula)
    • Coneflower (Echinacea)
    • Heuchera (Coral Bells)
    • Marigolds (Tagetes)
    • Rosemary (Rosmarinus officinalis)

    Designing Your Rustic Planting Bed

    Designing your planting bed involves thoughtful planning.

    Consider these tips:

    • Choose a sunlit area for flowering plants.
    • Group plants by height: tall in the back, shorter in front.
    • Space plants 12-18 inches apart for air circulation.

    Pro Tip: Create depth by layering with trailing plants on edges.

    Seasonal Care and Maintenance

    Maintain your rustic brick garden bed with regular watering, fertilizing in spring, seasonal pruning, and vigilant pest control.

    Enhancing Your Garden Aesthetics

    Integrate features like a rustic wooden bench or decorative stones to augment the serenity of your garden.

    These additions provide inviting resting spots and enhance visual appeal, creating a harmonious indoor-outdoor flow.

    Creating Cozy Nooks in Garden Rooms

    rustic brick planting beds

    Rustic brick planting beds bring warmth and charm to garden rooms, often ranging from 4 by 8 feet to larger expanses.

    Constructed using weathered or reclaimed bricks, these beds create a sturdy and aesthetically pleasing frame for plants. The overall layout allows for layered planting, which can include a variety of flowers, herbs, and lower-growing plants.

    To enhance the rustic look, consider using natural soil amendments like compost and mulch.

    Selecting Plants for Rustic Beds

    When choosing plants for your rustic brick planting bed, consider the environment in which they’ll thrive. Here are some excellent options:

    • Marigolds
    • Lavender
    • Rosemary
    • Salvia
    • Hostas

    Designing Your Rustic Planting Bed

    To design a stunning rustic planting bed, follow these tips:

    • Choose a central focal point, such as a decorative statue or large pot.
    • Utilize a mix of heights; place taller plants towards the back and shorter ones up front.
    • Keep a spacing of 12-18 inches between plants for airflow and growth.
    • Pro Tip: Group plants with similar watering needs together to simplify maintenance.

    Seasonal Care and Maintenance Tips

    Regularly water, fertilize, prune, and monitor for pests throughout each season to maintain your rustic brick planting bed’s vibrant health.

    Exploring Garden Room Accessories

    Consider adding cozy decorative elements to your garden room, such as vintage furniture, lanterns, or a small water feature, to complement the rustic ambience of your brick planting beds and enhance their charm.

    FAQ

    How Do I Maintain the Appearance of Rustic Brick Over Time?

    I maintain my rustic brick’s appearance by using brick sealing techniques and regular cleaning methods. I love the freedom I feel knowing my garden room’s charm will shine through for years to come!

    Can Rustic Brick Garden Rooms Be Eco-Friendly?

    I love that rustic brick garden rooms can be eco-friendly. By choosing sustainable materials and optimizing energy efficiency, I can create a space that’s not just beautiful but also contributes to a healthier planet.

    What Are the Best Plants to Complement Rustic Brick?

    As nature entwines with brick, I love adding herb selections like basil and mint, alongside flowering vines like clematis and honeysuckle. They dance together, creating a lush, vibrant escape that’s both rejuvenating and liberating.

    How Much Does It Typically Cost to Build a Rustic Brick Garden Room?

    Building a rustic brick garden room typically costs between $15,000 to $30,000. I always recommend careful cost estimation and budget considerations, so you can create a space that truly reflects your freedom and personality.

    Are There Any Zoning Restrictions for Building Garden Rooms?

    Yes, I’ve found that zoning requirements often vary by location. You’ll need to check local guidelines and may require residential permits. It’s essential to guarantee you’re compliant before diving into your garden room project!

    Summary

    I adore my rustic brick garden room for its timeless appeal and durability. It creates a perfect harmony with my outdoor space, providing a cozy retreat where nature and architecture blend. I’ve found these structures offer versatility year-round while maintaining their charming character.

    Have you incorporated brick elements in your garden? I’d love to hear about your experiences with rustic materials and how they’ve enhanced your outdoor living space over time.

    Share your garden journey with us! Send photos of your brick features or garden rooms and tell us about your design process. What inspired your choices, and how has your space evolved through the seasons?

    References

  • 5 Tips For Charming Weathered Brick Garden Borders

    5 Tips For Charming Weathered Brick Garden Borders

    5 Tips For Charming Weathered Brick Garden Borders

    Nothing screams “I’ve been gardening since before it was cool” like weathered brick borders.

    I swear by reclaimed bricks – they’ve already got that perfect worn look that would take years to develop (and who has time for that?).

    My go-to layouts? Staggered or curved patterns. They break up the monotony of straight lines and soften my garden’s edges beautifully.

    Got drainage issues like I once did? Throw some gravel in there! Works like a charm and looks intentional.

    For that pop of color against terracotta, I plant lavender or coneflower. The contrast makes my heart skip a beat every spring.

    Clay bricks are my non-negotiable. Yes, they’re pricier, but after the Great Concrete Border Disaster of 2019, I learned my lesson.

    How My Brick Border Saved My Marriage (And My Hostas)

    The summer my spouse decided our garden looked “too wild,” I knew I needed a diplomatic solution. Our constant bickering over my beloved cottage-style planting versus their preference for manicured precision was reaching critical mass.

    My weathered brick border became the perfect compromise. The structured edges satisfied their need for order, while the rustic, imperfect texture appeased my organic sensibilities. I sourced antique street pavers from a downtown renovation project, each one telling its own story.

    The transformation was remarkable – not just for our garden, but our relationship. Now the border contains my aggressive hostas while defining planting zones for both our styles. Sometimes I catch them admiring the moss-covered bricks at sunset, proof that good garden design is sometimes marriage counseling in disguise.

    Quick Takeaways

    • Choose reclaimed bricks from local sources for a unique, rustic charm that complements your garden’s aesthetics.
    • Arrange bricks in a staggered pattern to enhance both stability and visual appeal while keeping drainage needs in mind.
    • Mix brick sizes and incorporate varied colors to create dynamic borders that enrich your landscaping.
    • Utilize gravel within brick borders to improve drainage and support plant health, making maintenance easier.
    • Enhance the beauty of bricks with decorative elements like garden statues or trellises that align with your overall design theme.

    Use Reclaimed or Old Bricks for Natural Weathering

    reclaimed brick garden borders

    Creating charming weathered brick garden borders with reclaimed bricks offers a rustic appeal to any garden. Typically sized between 3 to 5 feet deep, these beds can be arranged in a rectangular or curved layout to complement your surroundings.

    Creating weathered brick garden borders with reclaimed bricks adds rustic charm and flexibility to your garden design.

    Use old bricks, which can be sourced from local reclamation yards, to construct the border. Lay the bricks in a staggered pattern for stability and aesthetics. Opt for a mix of perennial and annual plants, such as lavender, daisies, and boxwood, for a vibrant look.

    Incorporating sunken brick borders can also enhance the visual depth of your garden design.

    Selecting Plants for Your Brick Bed

    When choosing plants for your weathered brick planting bed, consider their growth habits and colors. Here are some recommended plants:

    • Lavender (Lavandula)
    • Coneflower (Echinacea)
    • Daylily (Hemerocallis)
    • Boxwood (Buxus)
    • Astilbe

    Designing and Planning the Planting Bed

    To design an engaging planting bed, consider these key tips:

    1. Theme & Color Scheme: Select a cohesive theme that complements your brick color.
    2. Layering & Heights: Place taller plants at the back, medium-sized in the middle, and shorter in the front.
    3. Spacing: Provide enough space (1-3 feet) for mature growth to promote good air circulation.
    4. Pro Tip: Use a garden hose to outline your design before setting the bricks; this helps visualize the layout.

    Seasonal Care and Maintenance

    Routine care includes consistent watering, seasonal fertilization, periodic pruning of overgrown plants, and vigilant pest control to maintain a thriving, picturesque bed throughout the year.

    Exploring Other Garden Border Options

    In addition to brick borders, consider incorporating wood, stone, or decorative fencing for varied aesthetics in your garden. Each material brings its unique charm and maintenance requirements, enhancing your outdoor space’s overall appeal and functionality.

    Choose Brick Layout Patterns That Add Visual Interest

    weathered brick garden borders

    Creating charming weathered brick garden borders involves arranging bricks to create defined planting beds, which can enhance the visual appeal of your garden. Use reclaimed or new bricks, typically set 4-6 inches deep and 1-2 rows high. These borders can frame perennial flowers, shrubs, or ornamental grasses, providing a clean, rustic look. Consider a circular or rectangular layout for a well-organized appearance. Properly constructed borders consist of a solid base, level alignment, and sufficient drainage to prevent water accumulation. Additionally, incorporating segmented rock perimeters can further enhance the structure and charm of your garden borders.

    Incorporate Curves and Organic Shapes for Soft Appeal

    charming curved brick borders

    Creating a planting bed with charming weathered brick borders adds a timeless appeal to any garden. This design typically features curved shapes and organic lines that soften the surroundings.

    It can range from small, intimate beds to expansive borders, using weathered bricks—either reclaimed or new—for a rustic look. Arrange the bricks in a gentle curve to define the space, and fill it with vibrant plants that complement the natural aesthetic. Incorporating elements like rustic reclaimed wood pathways can enhance the overall charm and functionality of the garden.

    Selecting Plants for Weathered Brick Beds

    When choosing plants for your charming brick garden, consider colors, textures, and growth habits. Here’s a list to inspire:

    • Lavender (Lavandula)
    • Sedum (Sedum spp.)
    • Ornamental grasses (e.g., Blue Fescue)
    • Heuchera (Coral Bells)
    • Echinacea (Coneflower)

    Designing a Weathered Brick Planting Bed

    To design your planting bed:

    1. Sketch your layout, incorporating gentle curves.
    2. Select a mix of perennials and annuals for continuous bloom.
    3. Space plants according to their mature size, keeping taller plants in the back.
    4. Use mulch to suppress weeds and retain moisture.
    5. Pro tip: Group plants with similar light and water requirements.

    Seasonal Care and Maintenance Tips

    Regularly water, fertilize, prune, and control pests to maintain thriving plants in your charming bed throughout the year.

    Expanding Your Garden’s Aesthetic

    Consider adding features such as trellises or arched gateways to enhance the outdoor space further.

    These elements can provide vertical interest, support climbing plants, and add depth to the overall design.

    Combine Brick Borders With Gravel or Plantings

    charming brick bordered planting bed

    When designing a charming planting bed with weathered brick borders and gravel, start by defining the size—typically 3 to 4 feet wide and long enough to suit your garden space.

    Arrange the bricks in a low, curved design, allowing for easy access and a visually appealing layout. Fill the interior with compacted gravel or mulch to promote drainage. Choose a mix of vibrant plants that thrive in your climate, which can include perennials, annuals, and grasses.

    Selecting Plants for Your Garden Bed

    To achieve a cohesive look, select plants that complement the rustic charm of weathered bricks. Some great options include:

    • Lavender
    • Sedum
    • Ornamental grasses
    • Hostas
    • Daylilies

    Designing Your Planting Bed Layout

    When planning your planting bed, consider the following tips:

    • Use varying heights for visual interest.
    • Place taller plants at the back and shorter ones in front.
    • Space plants according to their mature size—generally 12 to 24 inches apart.

    Pro tip: Group plants in odd numbers for a more natural appearance.

    Seasonal Care for Your Garden Bed

    Maintain your planting bed by watering deeply, fertilizing every spring, pruning in late winter, and monitoring for pests throughout the growing season.

    Exploring Outdoor Materials for Garden Projects

    In addition to bricks and gravel, consider using stone, wood, and metal for unique garden features, paths, or structures to beautifully enhance your outdoor space.

    Select Clay Bricks for Durability and Color Warmth

    durable warm clay bricks

    A charming weathered brick garden border enhances any planting bed, creating a cozy, inviting atmosphere. Typically about 6-12 inches high and several feet long, these beds can be arranged in rectangular or curved layouts around the garden.

    Use clay bricks for warmth and durability, constructing the border with a dry-stack method for a rustic look. Fill the bed with soil rich in organic matter, and plant colorful perennials, annuals, or native plants that thrive in your climate.

    Choosing Plants for Your Garden Bed

    Selecting plants for your charming garden border can enhance its beauty. Consider these options:

    • Aster
    • Purple Coneflower (Echinacea)
    • Daylily
    • Salvia
    • Coreopsis
    • Lavender
    • Sedum

    Designing Your Charming Garden Bed

    To design a stunning planting bed:

    • Plan your layout in advance.
    • Space plants 12-18 inches apart for airflow.
    • Group plants with similar needs together.
    • Use vertical layering—tall at the back and shorter in front.

    Pro tip: Incorporate a mix of textures and colors for visual appeal.

    Seasonal Care and Maintenance

    Maintain your weathered brick garden borders by monitoring water, fertilizing in spring, pruning spent blooms, and checking for pests throughout the year.

    Enhancing Your Outdoor Space with Accessories

    Consider adding decorative elements like garden statues, bird baths, or trellises to further enhance your brick borders.

    These accessories can provide additional charm while attracting wildlife and adding height to your design.

    FAQ

    How Do I Clean Weathered Bricks Before Installation?

    I clean weathered bricks using gentle scrubbing with a wire brush or sponge and a solution of water and mild detergent. Different brick types may need specific cleaning techniques, but this method usually works wonders!

    What Tools Are Needed for Laying Brick Borders?

    You’ll need a trowel for mortar application, a brick cutter for precise edges, and a level to avoid that charmingly lopsided look. It’s freedom, right? Just me, my tools, and some oddly shaped bricks.

    Can I Use New Bricks in a Weathered Design?

    Absolutely, you can use new bricks for a weathered design! I love mixing different brick colors to create contrast. It adds charming character and captures the essence of those beautiful weathered aesthetics we crave in our gardens.

    How Do I Properly Maintain Brick Garden Borders?

    I regularly inspect my brick garden borders for weeds and cracks, clean them with a gentle brush, and occasionally apply sealant. This keeps my brick maintenance simple, enhancing my garden’s aesthetics while promoting a freeing, beautiful space.

    What Is the Cost Estimate for Installing Brick Borders?

    When I built my garden’s brick borders, it felt like planting a castle’s foundation. Installation pricing usually falls between $10-$30 per square foot, depending on design complexity and local cost factors. You’ll love the transformation!

    Summary

    I’ve discovered weathered brick creates timeless garden borders. I love using reclaimed bricks in delightful patterns with gentle curves, pairing them with gravel or plants. Clay varieties offer lasting beauty, telling a story while connecting my style with nature’s warmth.

    Have you tried brick borders in your garden? Tell us about your experience with weathered materials and how they’ve enhanced your outdoor space.

    We’d love to see your garden designs! Share photos of your brick borders or other creative garden elements you’ve incorporated into your landscape.

    References

  • 7 Best Brick-Bordered Herb Garden Design Ideas

    7 Best Brick-Bordered Herb Garden Design Ideas

    Transform Your Yard with These Brick-Bordered Herb Gardens

    Ever looked at your sad patch of dirt and thought, “I should grow something other than weeds”?

    I finally tackled my outdoor chaos last spring with a brick-bordered herb garden. The Classic Raised Bed became my basil and rosemary haven, though I nearly killed everything that first month.

    For tight spaces, I’m obsessed with the Vertical Herb Garden with brick support. Compact yet impressive when guests visit.

    The Curved Brick design adds that natural touch I desperately needed after my “straight-line obsession” phase.

    Want practicality with style? Try the Tiered approach for optimal sunlight. My oregano finally stopped looking so… depressed.

    How My Disaster-Turned-Dream Garden Taught Me Patience

    My first brick-bordered herb garden was an absolute nightmare. I’d watched exactly two YouTube videos and suddenly thought I was a master landscaper. The bricks I selected were mismatched yard sale finds, and my initial layout resembled something created by a toddler with building blocks.

    Three weekends of frustration later, I finally consulted my neighbor Martha (a retired landscape architect—talk about lucky). She taught me about proper drainage, north-facing considerations, and how certain herbs actually hate each other when planted too close (who knew plants had social preferences?).

    Now my little herbal sanctuary features proper capstones, deliberate spacing, and a charming rustic pathway that actually serves a purpose beyond Instagram photos. The rosemary and sage finally coexist peacefully.

    Quick Takeaways

    • Create a charming classic raised brick bed (3×6 feet) for sturdy herb gardening, ideal for basil, rosemary, and thyme.
    • Utilize curved brick borders for a natural look, providing visual appeal and suitable for herbs like cilantro and sage.
    • Design a brick circle herb garden (3-6 feet diameter) for easy access and companion planting benefits.
    • Employ vertical herb gardens with brick support to maximize small spaces while growing herbs like mint and chives.
    • Integrate a tiered brick herb garden for enhanced drainage and sunlight, perfect for a variety of herbs including parsley and thyme.

    Classic Raised Brick Bed Design

    elegant sturdy brick bed

    A classic raised brick bed offers an elegant and sturdy structure for your herb garden. Typically measuring 3×6 feet, these beds provide ample space for a variety of herbs.

    Elevate your herb garden with a timeless raised brick bed, providing elegance and durability in a 3×6 foot space.

    Constructed from durable bricks, they create a timeless aesthetic while guaranteeing proper drainage. The raised design promotes excellent air circulation, making it ideal for gardening enthusiasts. Commonly, you’ll find plants like basil, rosemary, thyme, and mint thriving within this stylish enclosure. Additionally, creating a sturdy border around your herb garden can help delineate the space and enhance its visual appeal.

    Selecting Plants for Your Brick Herb Garden

    When selecting plants for your brick bed, consider both culinary and aesthetic qualities:

    • Basil: Great for cooking, especially in Italian dishes.
    • Thyme: Low-growing and drought-resistant.
    • Chives: Adds a mild onion flavor to dishes.
    • Oregano: Hardy and perfect for Mediterranean meals.
    • Mint: Fragrant and versatile, but can spread quickly.

    Designing Your Raised Brick Herb Bed

    To design a classic raised brick herb bed, follow these steps:

    1. Choose a Sunny Location: Guarantee a minimum of 6 hours of sunlight daily.
    2. Plan a Square or Rectangular Shape: Fit your available space and access needs.
    3. Lay Bricks Carefully: Level them to create a uniform height.
    4. Select Companion Plants: Pair herbs that enjoy similar growing conditions.

    Pro Tips:

    • Space plants 12-18 inches apart for ideal growth.
    • Arrange taller plants like basil in the back and shorter herbs in front for visual appeal.

    Seasonal Care & Maintenance for Your Brick Herb Bed

    Regularly water, fertilize, prune, and monitor for pests throughout the year to keep your raised brick bed thriving.

    Curved Brick Borders for a Natural Look

    curved brick herb garden

    Curved brick borders create a visually appealing and organic structure for herb gardens, blending seamlessly with natural environments. An ideal size for a curved bed is around 4 feet in diameter, allowing ample space for a variety of herbs. In addition to bricks, consider incorporating woodland plants that thrive in shaded areas, which can enhance the overall beauty of the garden.

    Using red or beige bricks, the border gives a charming rustic feel, while curved layouts soften the garden’s geometry. Select herbs like basil, rosemary, thyme, or mint to fill this vibrant, aromatic space, complementing each other’s growth habits. Choose quality soil with good drainage to promote healthy plant growth.

    Choosing the Right Herbs for Your Curved Brick Garden Bed

    When selecting plants for your herb garden, consider their compatibility, sunlight needs, and growth habits. Suggested plants include:

    • Basil
    • Cilantro
    • Oregano
    • Chives
    • Sage

    Designing Your Curved Brick Herb Garden Bed for Best Growth

    To design your curved herb garden, consider the following tips:

    • Assess sunlight exposure; most herbs thrive in 6-8 hours of sun daily.
    • Plan the curvature with a gentle sweep to enhance movement and accessibility.
    • Space plants 12-18 inches apart to guarantee proper air circulation and growth.

    Pro Tip: Use taller herbs like rosemary at the back or center of the curve, gradually making way for shorter herbs toward the front edges.

    Seasonal Care and Maintenance for Your Herb Garden Bed

    Regularly water, fertilize with organic options, prune plants for shape, and monitor for pests throughout the seasons to maintain a thriving herb garden.

    Tiered Brick Herb Garden

    Tiered Brick Herb Garden

    A tiered brick herb garden adds both style and functionality to your outdoor space. Typically running 4-6 feet in length and 2-3 feet in height, this design consists of layered sections, each filled with rich soil and bordered with durable bricks. The layout showcases a visually appealing sloped effect, enhancing drainage while providing ample sunlight access to every plant. Ideal herbs for this design include basil, thyme, rosemary, and parsley. Materials like reclaimed bricks give a rustic charm, while the soil mix should preferably contain compost and organic matter for maximum growth. Additionally, divided trough herb gardens serve as a trendy option for organizing various herbs in a compact space.

    A tiered brick herb garden beautifully blends aesthetics and functionality, maximizing space while providing an ideal environment for your favorite herbs.

    How to Select Herbs for a Tiered Brick Herb Garden

    When selecting plants, consider your culinary preferences, climate, and sunlight availability. Here’s a list of ideal herbs:

    • Basil
    • Oregano
    • Chives
    • Mint
    • Sage

    Designing Your Tiered Brick Herb Garden

    To design your garden, follow these steps:

    1. Choose the Location: Confirm a sunny spot with good drainage.
    2. Plan Your Levels: Create at least three tiers for varied plant heights.
    3. Space Wisely: Place taller herbs like basil at the back and shorter ones like chives in front.
    4. Pro Tip: Use vertical gardening solutions by adding trellises for climbing herbs like mint.
    5. Arrange for Aesthetics: Mix leafy herbs with flowering varieties for a vibrant look.

    Seasonal Care and Maintenance for Your Herb Garden

    Maintain your tiered herb garden with regular watering, monthly fertilizing, seasonal pruning, and proactive pest control throughout the year.

    Brick Circle Herb Garden

    A brick circle herb garden is an inviting and functional planting bed designed as a circular shape bordered by bricks. Typically, the diameter can range between 3 to 6 feet, allowing for ample growing space while remaining compact. The arrangement fosters easy access from all sides, ideal for harvesting fresh herbs.

    Materials like durable bricks or pavers create a defined border, while soil within the circle provides an excellent growing medium for various herbs. Commonly used plants include basil, thyme, rosemary, and parsley, which thrive in full sun and well-drained soil.

    Selecting Plants for Your Brick Circle Herb Garden

    To choose plants for your brick circle herb garden, consider sun exposure, fragrance, and growth habits. Here are some suitable options:

    • Basil
    • Oregano
    • Cilantro
    • Mint
    • Chives

    Select herbs that complement each other in both flavor and light requirements.

    Designing and Arranging Your Brick Circle Herb Garden

    When designing your brick circle herb garden, keep in mind these planning tips:

    1. Prepare the soil by tilling and enriching it with compost.
    2. Lay bricks to form a secure, circular border.
    3. Arrange taller herbs like rosemary towards the center and shorter ones like chives along the edge.
    4. Space plants about 12 inches apart for optimum growth.

    Pro Tip: Use companion planting techniques to enhance growth and deter pests.

    Seasonal Care and Maintenance for Your Brick Circle Herb Garden

    Regularly verify proper watering, fertilizing with organic options, pruning for healthy growth, and keeping an eye on pests throughout the seasons.

    Vertical Herb Garden With Brick Support

    A vertical herb garden supported by bricks offers a unique and space-saving solution for garden enthusiasts. Typically designed as a rectangular or square bed, this planting structure ranges from 2 to 4 feet in height and can spread 3 to 5 feet wide.

    A brick-supported vertical herb garden is a stylish, space-efficient solution for gardening lovers, reaching heights of 2 to 4 feet.

    Crafted from durable bricks or pavers, this garden not only provides stability but also contributes to an attractive aesthetic. Ideal herbs to include are basil, rosemary, thyme, and mint, which flourish in well-draining soil. Use a mix of potting soil and compost to enrich the bed and promote healthy growth.

    How to Select Plants for a Vertical Herb Garden

    When selecting plants for your vertical bed, consider the following criteria:

    • Sunlight: Most herbs thrive in full sun, so choose sun-loving varieties.
    • Growth Height: Select compact plants to avoid crowding; consider vining options for higher spaces.

    Suggested Plants:

    • Basil
    • Chives
    • Oregano
    • Parsley
    • Thyme

    Designing a Brick-Supported Vertical Herb Garden

    To design your vertical herb garden effectively, follow these tips:

    1. Layout Planning: Position taller plants, like basil, at the back and shorter ones, like chives and thyme, in front.
    2. Spacing: Space plants about 12 inches apart for ample air circulation.
    3. Accessibility: Guarantee easy access to each plant for harvesting.

    Pro Tips: Use vertical gardening pockets or containers within the bricks for additional growing space and to pair visual interest with easy maintenance.

    Seasonal Care and Maintenance of Your Vertical Herb Garden

    Guarantee consistent care by watering regularly, fertilizing every 4-6 weeks, pruning as needed to promote growth, and monitoring for pests throughout the seasons.

    Rustic Brick Pathways Between Herb Beds

    rustic herb garden pathways

    Creating a rustic herb garden defined by charming brick pathways brings both beauty and functionality to your outdoor space. Each planting bed typically measures 4 feet by 8 feet, arranged in a staggered layout to create walking space between rows. The rustic look comes alive through the use of red bricks, which can form winding paths, enhancing accessibility and aesthetic appeal.

    Ideal plants for this environment include fragrant herbs like basil, oregano, rosemary, thyme, and chives, all thriving in sunny conditions.

    How to Select Plants for Your Rustic Herb Garden

    Choosing the right plants involves understanding their compatibility and growth habits.

    Consider opting for:

    • Basil
    • Oregano
    • Rosemary
    • Thyme
    • Chives
    • Mint (in a contained space)

    Designing and Planning Your Rustic Herb Garden Beds

    To design a stunning herb garden with pathways, follow these tips:

    1. Plan the layout ensuring that pathways are at least 2 feet wide for easy access.
    2. Space plants 12 to 18 inches apart to allow for growth.
    3. Use taller herbs like rosemary at the back and shorter varieties like thyme in front.
    4. Incorporate companion planting for healthier growth.

    Seasonal Care and Maintenance for Your Herb Garden

    Provide consistent watering, apply organic fertilizers in early spring, prune regularly, and implement natural pest control methods throughout the growing season.

    Edible Landscape With Brick Borders

    brick bordered edible garden

    Creating a brick-bordered edible garden elevates both aesthetics and functionality in your garden. A typical planting bed is approximately 4 feet wide by 10-12 feet long, allowing for easy access and efficient use of space.

    The arrangement features raised beds bordered by brick, providing excellent drainage and warmth for your plants. Recommended plants include vegetables like tomatoes, basil, and peppers, along with edible flowers like nasturtiums. Materials such as clay bricks add a rustic, durable touch while allowing water to permeate through well.

    How to Select Plants for Brick-Bordered Edible Garden Beds

    When choosing plants for your brick-bordered edible garden, consider the following list for a successful mix:

    • Tomatoes
    • Bell Peppers
    • Basil
    • Rosemary
    • Lettuces
    • Strawberries
    • Nasturtiums

    Aim for a combination of herbs, vegetables, and edible flowers for a diverse and visually appealing bed.

    Designing Your Edible Garden Bed with Brick Borders

    Planning your brick-bordered bed begins with a sunny location that receives at least 6 hours of sunlight daily.

    Here are essential tips:

    • Spacing: Allow 18-24 inches between larger plants (like tomatoes) and 8-12 inches for smaller herbs.
    • Layering: Place taller plants like tomatoes at the back and shorter herbs like basil at the front for visibility.
    • Pro Tip: Utilize companion planting for pest control and enhanced growth!

    Seasonal Care and Maintenance for Your Edible Garden Bed

    FAQ

    How Do I Choose the Right Herbs for My Garden?

    I choose herb varieties based on my cooking needs and their growth habits. I love companion planting, too; pairing complementary herbs not only maximizes space but also enhances flavor and keeps pests at bay.

    Can I Use Recycled Bricks for My Herb Garden?

    Of course you can use recycled bricks! They’re eco-friendly, boosting your herb garden’s aesthetics while saving the planet. Who needs new bricks when repurposed ones offer character and charm? Go green and grow culinary delights!

    What Maintenance Do Brick Borders Require?

    Brick upkeep’s pretty minimal! I regularly check for loose bricks and weeds. To guarantee border longevity, I clean debris and occasionally refill gaps with soil. It keeps my garden looking neat and vibrant without too much hassle!

    How Can I Prevent Weeds in My Brick-Bordered Garden?

    I prevent weeds in my brick-bordered garden by applying mulch around my herbs and ensuring proper spacing between plants. This creates a healthier environment, allowing my herbs to thrive while minimizing unwanted growth. It’s liberating!

    Are There Specific Soil Requirements for Herbs in Brick Gardens?

    I use well-draining herb soil with a mix of compost and sand. It meets my herbs’ drainage needs perfectly, ensuring they thrive while I enjoy my garden’s bounty without worrying about soggy roots.

    Summary

    When designing my herb garden, I’ve found magic beyond plants. Brick borders—raised, tiered, or curved—enhance both beauty and function in my garden space. I mix design elements to create a personal sanctuary that feeds both body and soul.

    Have you experimented with brick borders in your herb garden? Share your successes and challenges with incorporating these features into your green space.

    We’d love to see your garden designs! Drop a photo of your herb garden in the comments with details about your design choices. What brick patterns or layouts have worked best for your space?